7007 SW Cardinal Lane, Ste 105 Tigard, OR 97224 USA 800.329.2225 (+1.503.597.5350) FaxBack.com | info@faxback.com NET SatisFAXtion 9.0 Fax Server Manual Carrier Edition Enterprise Edition Small Business Edition Last Edited December 8, 2014 Author Duane Appelman Proprietary FaxBack, Inc.
Table of Contents Section 1 Introduction 1.1 About This Guide 1.2 Additional Documentation 1.3 Hardware and Software Requirements 1.3.1 Static IP Address 1.3.2 Virtualization 1.4 Product Overview 1.5 What is a Network Fax Server? 1.5.1 NET SatisFAXtion Features 1.5.2 NET SatisFAXtion Components 1.5.2.1 The NET SatisFAXtion Server 1.5.2.2 The Administration Utility 1.5.2.3 The LaunchPad Website 1.5.2.4 The Report Utility 1.5.3 Supported Clients 1.6 Training and Professional Services 1.6.1 Training 1.6.
2.2.3.1 Configuring NET SatisFAXtion to use a Class 1 or Class 2 device 2.2.4 Dialogic Brooktrout TR114 2.2.5 Dialogic Brooktrout TR1034 2.2.6 Dialogic Eicon Diva Server 2.3 Services and Monitoring 2.3.1 Service Account Permissions 2.3.1.1 Service Account Printers 2.3.2 NET SatisFAXtion Service 2.3.2.1 Starting and Stopping NET SatisFAXtion 2.3.3 SMTP Gateway 2.3.4 POP3 Gateway Service 2.3.4.1 Starting and Stopping the POP3 Gateway 2.3.5 NET SatisFAXtion Service Monitor 2.3.
2.5.2.2 Routing to Groups 2.5.3 Delivering Faxes to Clients 2.5.3.1 Email 2.5.3.2 Microsoft Fax 2.5.3.3 Fax Machine Integration Server 2.5.3.4 Delivering to Both Email and Microsoft Fax 2.5.3.5 Delivering to Both Email and Fax Machine Integration Server 2.5.4 Fax Export 2.5.4.1 Configuring Export 2.5.4.2 Global vs PerUser Export 2.5.4.3 Exporting to a Network Share (UNC Path) 2.5.4.4 File Name Format 2.5.4.5 Information TXT/XML File 2.5.5 Autoprint 2.5.5.1 Global Autoprint 2.5.5.2 Group Autoprint 2.5.5.
Fax Traffic Graph Fax Page Traffic Report Fax Connection Time Report 2.7.4 SQL Database Structure 2.7.4.1 Table Columns 2.8 Billing Codes 2.8.1 User Billing Codes 2.8.2 Custom Billing Codes 2.8.2.1 Using the Custom Billing Code 2.9 Email Integration 2.9.1 Email Integration using POP3 2.9.1.1 How the Gateway Operates Using POP3 2.9.1.2 Mail Server Requirements 2.9.1.3 Mailbox Requirements Create a POP3 Mailbox 2.9.2 Email Integration using SMTP 2.9.2.
2.12.1.3 Class2 2.12.1.4 Brooktrout TR1034 (BOS_MAN) 2.12.1.5 Brooktrout TR114 (BT_MAN) Section 3 Clients 3.1 Client Protocols 3.1.1 CAS 3.1.1.1 Network Challenges for CAS Clients 3.1.2 HTTP 3.1.2.1 Requirements 3.1.2.2 Using HTTP Clients over the Internet 3.1.3 SMTP 3.1.3.1 Using SMTP Clients over the Internet 3.2 FaxOut Client Suite 3.2.1 Installing 3.2.1.1 Software Requirements 3.2.2 Sending Faxes 3.2.3 Receiving Faxes 3.2.4 Components 3.2.4.1 FaxOut Printer 3.2.4.2 Outlook Addin 3.2.4.
4.2 Registry Configuration Reference 4.2.1 [HKEY_LOCAL_MACHINE\Software\FaxBack] 4.2.1.1 ICANFax Global 4.2.1.2 Class1 Global 4.2.1.3 Class2 Global 4.2.1.4 Convert 4.2.1.5 IP_FAX Global 4.2.1.6 DotFax Plugin 4.2.1.7 Administration 4.2.1.8 Archive 4.2.1.9 ASCIIPacketServer 4.2.1.10 AutoPrint 4.2.1.11 CAS20 4.2.1.12 CASDrive 4.2.1.13 CASPost 4.2.1.14 EMEnroll 4.2.1.15 FaxBackX 4.2.1.16 Install 4.2.1.17 Logger 4.2.1.18 LoggingServer 4.2.1.19 LogonDialog 4.2.1.20 NF_Setup 4.2.1.21 Nrouter 4.2.1.22 POP3Post 4.2.
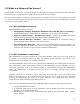
Section 1 Introduction Congratulations on your purchase of NET SatisFAXtion from FaxBack, Inc! Many years of effort have gone into developing a system that will give you the functionality you desire today and a platform that can accommodate your growing needs in the years to come. 1.1 About This Guide This manual is written for the person whose responsibility it is to install and maintain the fax server and network software.
operating systems for the NET SatisFAXtion server. Domain Controller Do not attempt to install NET SatisFAXtion on a domain controller.
1.5 What is a Network Fax Server? Simply defined, a fax server is a selfcontained unit attached to an internal network that has the capability to allow any user on that network to send and receive faxes at their desktop. Fax server functionality is provided by software services running on the server. Fax machines, fax clients or email clients submit jobs and request services from the server and the server handles these requests in an orderly and sequential manner. 1.5.
1.5.2.1 The NET SatisFAXtion Server The NET SatisFAXtion Fax Server is a dedicated server platform configured running Windows 2008 or Windows 2012 and NET SatisFAXtion server software. Typically, this server will also contain one or more fax boards or use existing Voice Over IP (VoIP) equipment on the network such as AudioCodes hardware. The fax server manages the following activities: ● Outbound fax delivery – Manages the delivery of faxes from two or more fax ports per server.
NET SatisFAXtion delivers powerful realtime fax delivery status for every user, giving you the ultimate confidence in fax delivery. Microsoft Fax – Built in to most Microsoft Windows platforms, Microsoft Fax is an easytouse, fullfeatured faxing application. Email Clients – NET SatisFAXtion can easily fax from any mail client, including: ● ● Microsoft Outlook: Users can send, receive, manage and track the status of faxes through their Outlook mail client.
quote by Professional Services Engineer. Please contact your sales rep for details. 1.7 Technical Support 1.7.1 Support Plans 1.7.1.1 30day Trialware Support Plan Complimentary email, fax and telephone software support is included with for every trialware evaluation. This complimentary support plan starts when the trialware is requested, not on software installation, and is only available during standard FaxBack Support hours 6:30am–5:00pm PST Monday through Friday, excluding US holidays. 1.7.1.
● CustomerID: Your customer number in FaxBack’s customer database. ● ServerID: The number identifying this NET SatisFAXtion server install. If you have multiple fax servers, each will have its own unique ServerID. ● Expiration: Date when your FaxBack technical support agreement expires or in the case of trialware, the date the NET SatisFAXtion software will stop working. ○ ● ● ExpirationType: ■ Subscription: Retail product key; NET SatisFAXtion will continue to operate past the expiration date.
when you run the downloaded NS90Download.exe. Look for these two files: ● ● README FIRST Installation Guide.pdf NET SatisFAXTion Upgrade Guide.pdf Up to date guides can be found on our website: http://www.faxback.com/docs Also on our website there are guides to installing and configuring NET SatisFAXtion with AudioCodes MediaPack hardware and other VoIP fax hardware brands. 1.11 Compatibility List NOTE: Not all fax hardware is supported on 64bit platforms. 1.11.
http://kb.faxback.com/Supported+VoIP+Providers 1.11.3 Dialogic Inc. Formerly Cantata Technology, Brooktrout Technology, Eicon Networks. NOTE: These devices are supported on 32bit operating systems only. 1.11.3.1 Brooktrout TruFax Series Analog Fax Boards TruFax 100: uPCI 1port loop start fax board, uPCI card TruFax 200: uPCI 2port loop start fax board, uPCI card 1.11.3.
1.11.4.1 Rockforce Series Analog Fax Boards Rockforce DUO+ Analog PCI Card Rockforce QUATRO+ Analog PCI Card Rockforce OCTO+ Analog PCI Card 1.11.4.2 IQ Express Analog Fax Boards IQ Express: 2 Port Analog PCIe Card IQ Express: 4 Port Analog PCIe Card IQ Express: 8 Port Analog PCIe Card 1.11.5 Other Class 1 / Class 2 Fax Modems Note: These devices are supported on 32bit operating systems only. Most Class 1 and Class 2 modems should work provided they are fully Class 1 or Class 2 compliant.
Section 2 Server Administrator 2.1 How Faxes Flow Through the System 2.1.1 Queues There are four important queues in NET SatisFAXtion. Any fax that is processed by the server is stored in one or more queues. The fax server’s queues should stay relatively empty. If the queues grow in size over time, it can be an an indication that something is misconfigured. Scheduled Queue: This queue stores outbound faxes waiting to be sent.
Settings’ button on the General tab for devicespecific options. The fax service will be stopped by the ‘Change Server Settings’ utility after the OK button is clicked. The service will then be restarted with the changes. 2.2.1 Additional Port Configuration 2.2.1.1 Send/Receive Only Ports Sometimes it is useful to reserve certain fax ports for sending only or receiving only.
NET SatisFAXtion records the other fax device’s CSID in its transaction log. CSID is up to 20 characters long and can include letters, numbers, spaces and symbols. It is a good idea to set CSID to either your main fax line, a contact phone number, or your company name so that recipients can identify the sender. CSID cannot be blank. CSID is initially configured during installation or ‘ReDetect Fax Devices’.
Voice over IP (VoIP) is a general term for placing telephone calls over data networks. The NET SatisFAXtion fax server uses Session Initiation Protocol (SIP) and T.38 (International Telecommunication Union publication T.38) protocol to set up calls, and to transmit fax data respectively. 2.2.2.1 A Note on Fax Server Ports versus Media Gateway Ports The ports you see in NET SatisFAXtion are ‘virtual’ ports. They do not correspond with the physical ports on the media gateway.
AudioCodes MediaPack MP114 or MP118 Gateway Run ReDetect Fax Devices from the Start menu. Select the AudioCodes VoIP Gateways option to automatically configure the MediaPack gateway. Please refer to NET SatisFAXtion MediaPack Install online at faxback.com/docs. AudioCodes or Cisco Media Gateway On Local Subnet Run ReDetect Fax Devices from the Start menu. Select the AudioCodes VoIP Gateways option if you will be connecting to an AudioCodes media gateway or under Alternate Fax Devices select IP Fax (T.
2.2.3 Class 1/ Class 2 Most internal and external serial modems use the Class 1 or Class 2 command set. 2.2.3.1 Configuring NET SatisFAXtion to use a Class 1 or Class 2 device NET SatisFAXtion can use most Class 1 or Class 2 fax modems to send and receive faxes. Class 1 or Class 2 devices are initially configured in ReDetect Fax Devices. Ensure that the modem’s drivers are already installed and Windows has detected them. Configured modems will be listed in Window’s Phone and Modem Options control panel.
2.3 Services and Monitoring 2.3.1 Service Account Permissions Some services need to run as an Administrator user. A local or domain account may be used so long as it has local Administrator rights. If the user account has insufficient rights, the service will fail to load with the error “Bad open ring 0 / kernel mode driver.” Should the service account’s password change, the account is disabled, or the account is otherwise unusable, the service will fail to load with the error: “System.
You can also start or stop the service from the Start menu under Programs ⇨ NET SatisFAXtion ⇨ Fax Service (Start & Stop). Finally you can start or stop the service from the Services control panel though this method is not as userfriendly as the others. In particular you will not receive any feedback to know when NET SatisFAXtion has finished loading all modules and is ready to send and receive faxes. 2.3.2.
2.4 Managing User and Groups The primary means of managing users is through the Administration program. It allows you to interactively create, modify and delete users and groups. Administration can also import users from Active Directory or Lightweight Directory Access Protocol (LDAP). The Userlist Import/Export program allows you to export the entire user list and groups to an XML file, and import users and groups from XML as well. 2.4.
● Additional User Aliases: Additional email addresses that can send faxes using this account. 2.4.3 Group Properties ● ● ● ● General ○ Group Name: Name assigned to this group. ○ Description: A freetext field where you can describe this group. Routing ○ Line: Route all faxes received on these lines to this group. ○ Identifier: Route all faxes received with this DID to this group.
Administration section. To access the User Administration section, run the Administration program and log in as a Supervisor level user. Click on the View ⇨ User Administration menu. You will see a list of all groups on the left, and a list of all users on the right. 2.4.5.1 Creating a User From the User Administration section, click on the User ⇨ Add User menu. A blank Add User window will appear. See above for a description of each property. Click Add when you have the necessary information entered.
2.4.6.5 Removing a User from a Group You can remove a user to a group by rightclicking the group name and clicking Add/Remove Members or by selecting the group and clicking on the User ⇨ Add/Remove Members menu. Select a user to remove from the group on the lefthand column of the window under Has users, and click the Remove button. You will see the user move from the left column to the right one. You can remove more users by repeating these steps. When done, click OK.
Select Active Directory Import and click Next. Synchronize: This option will enable you to refresh the user list with Active Directory without using the User List Import Wizard. A new option will be available under the menu Tools ⇨ Synchronize. Note that enabling this option will disable manual editing of most user settings since the settings come from Active Directory. To enable manual user modification, synchronization must be disabled from Tools ⇨ Synchronize ⇨ Disable Synchronization.
Click Next. The import wizard will default to the CN=Users OU. To select a different OU, click the Browse button. Otherwise, click Import. Selecting a different OU will open the Active Directory Browser, seen below: Use this to navigate to the correct OU. When you have found the OU needed, simply close the window by clicking the X close button at the top right of the window. You will be taken back to the import wizard, and the path will be updated. Click Import on that screen.
Click Next. The import wizard is now ready to import your users. Click Finish. The import wizard will now begin importing users. If there are any errors, they will be displayed on this Proprietary FaxBack, Inc.
screen. When the process is complete, the Finish button will become Close. 2.4.8.2 Excel Spreadsheet Using the User List Import/Export utility it is possible to import users (but not groups) from an Excel 2003 XML Spreadsheet format file. To import groups also, use XML import, below.
● PB_MIDDLE_NAME ● PB_LAST_NAME Each row after the first will define a user. The column names in bold above are required fields. The columns are defined as follows: ● USER_NAME : Required. The name this user uses to log in to the fax server. ● UG_UNIQUE_ID : Export only; this column will be discarded on import. The internal unique identifier used for this user. ● USER_FULLNAME : The name of this user. ● USER_PASSWORD : Export only; this column will be discarded on import.
First, the program must connect to the fax server. Click the Logon button in the tool bar. Only Supervisor or Routers level users are allowed to use the User List Import & Export program. Click the Open button, find and open the spreadsheet. The main window will display the users found in the spreadsheet. Finally, click the Upload button to send the users to the server. When the upload is complete, the entire user list will be downloaded and displayed in the main window. 2.4.8.
Finally, click the Upload button to send the users to the server. When the upload is complete, the entire user list will be downloaded and displayed in the main window. User List Import/Export XML File Format Below is an example XML file suitable for importing using the Userlist Import/Export program. The and elements may be repeated as needed.
● ● ● USER_LINE_ROUTING: Route all faxes received on this port to this group. Multiple instances of this tag are allowed, to route multiple ports to this group. USER_DESCRIPTION: A freetext field where you can describe this group. GROUP_PRIVILEGES: The privilege level granted to the users in this group. The values are: ○ ○ ○ ○ ○ ○ ○ ○ ○ 1: User 17: Router 4294967295: Supervisor GROUP_TYPE: Reserved for builtin groups. Do not specify GROUP_TYPE for usercreated groups.
Click on Save > Save Selected Proprietary FaxBack, Inc.
Proprietary FaxBack, Inc.
Proprietary FaxBack, Inc.
2.4.9 Exporting Users Exporting users is accomplished using the User List Import & Export program. Run User List Import Export from the Start menu under Programs ⇨ NET SatisFAXtion ⇨User List Import & Export. Proprietary FaxBack, Inc.
Only Supervisor or Routers level users are allowed to use the User List Import & Export program. Click the Download button to retrieve the user list from the server. Once the user list is downloaded, it can be saved from the Save menu. Two output formats are supported: Excel 2003 XML Spreadsheet and native XML. Both formats can be saved and later reimported. 2.4.9.1 Excel Spreadsheet Saving for Excel will create an Excel 2003 XML Spreadsheet file with an .xml file extension.
"validation_dll"="c:\program files\net satisfaxtion\casdrive.dll" [HKEY_LOCAL_MACHINE\SOFTWARE\FaxBack\CASDrive] "PerUserTSID"="1" 2.4.10.2 ANI ANI (Caller ID) can be set per user using these settings. If not set, faxes sent by the user will use the global ANI setting. The variable provided is: ;ani For example, to set a user’s caller ID to 5550123, add ;ani=5550123 at the end of that user’s description field.
Note that group Autoprint, user Export and cover sheets are not contained in these files. 2.5 Inbound Faxes When the fax server receives a fax, it stores it in the Inbox (Receive Queue). From there it will be routed to clients based on information received with the fax such as which physical fax port it was received on (line routing) or the dialed phone number (DID routing).
To line route, run the Administration program and log in. Go to the User Administration section using the View ⇨ User Administration menu. Select the user or group you wish to route to, rightclick on it and select Modify User or Modify Group. Change to the Routing tab. In the Line box, select the line(s) you wish to route to this user or group. Click OK. Note that if the line is already assigned to a different user or group it will not show up in the list. 2.5.1.
To strip digits from the end (right) of a number, configure the number of DTMF digits collected to be less than the full digit string being sent from the PBX. 2.5.1.4 CSID Routing Prone to failure. Disabled by default. To enable: [HKLM\Software\FaxBack\CasDrive] "RouteOnCsid" = "1" 2.5.1.5 Caller ID / ANI Routing Prone to failure. Disabled by default. To enable: [HKLM\Software\FaxBack\CasDrive] "RouteOnAniCallerId" = "1" 2.5.1.6 T.30 Subaddress Routing The T.
Brooktrout Fax Cards Any Brooktrout analog (loopstart) fax card is capable of routing on Line or DTMF. These cards must use DTMF Setup to enable DTMF digit capture on these cards. Any Brooktrout DID fax card is capable of routing on DNIS. No additional configuration is necessary. Brooktrout T1/PRI cards are capable of routing on DNIS. No additional configuration is necessary. Eicon Diva Server Eicon Diva Servers are capable of routing on DNIS from the T1 or PRI.
Set the number of DTMF Tones your phone switch is passing. Commonly this is the last 4 digits of the DID numbers assigned to your inbound fax users. Also included is a setting for no dial tone for outbound calls, should your PBX not provide dial tone on the line. 2.5.1.9 Refusing Unrouted Faxes If you only route to individual users and not to groups, it is possible to have the fax server reject calls to unassigned DIDs.
Round Robin Routing Round robin routing enables inbound faxes to be distributed amongst the group’s members instead of every fax going to every user. The users will be cycled through from top to bottom. You can optionally select a user to always get all messages for this group. This user need not be a group member, and the user will always get its own copy of the fax. By default only logged on users are routed to.
The following documentation covers the new Export system introduced in version 8.6. If the fax server is upgraded from an earlier version, the old export system will continue to be used. Archiving: Inbound and outbound faxes can be written to a local directory or to a network share. Separate folders can be created for individual users, and files can be flexibly named based on fax parameters. Integration: Faxes are written to a “shared” directory that the other application monitors.
Export Received Faxes: To export received faxes, check the Export Received Faxes checkbox and enter a path to the folder. You can click the […] box on the right side to browse for a folder. File Name Fields: The filename used for the exported faxes can be customized by entering variable names here. The variable names must be within $( and ) characters. The line directly below gives a sample of what the file name will look like.
Delete after export: This will cause the fax to be deleted from queue after it is exported. Use this option if the user used will not forward on to a client (email, Microsoft Fax, etc). This will prevent the exported faxes from accumulating in the queue. Essentially, this makes the user an “exportonly” user. Override all other users: Only an option for the “Everyone” entry, this will disable all peruser settings. 2.5.4.
Output Format: Use this to choose the contents and format of the exported text/xml file. Setting this to blank dumps the raw XML which you can use to create and test your own XSLT transform. Output File Extension: The file extension to use for these text/xml files. Typically set to txt or xml. Moving from the Legacy Export System to Workflow Export When a fax server is upgraded from an older version to 9.0, the legacy export system will remain in place.
Note that the user added to the group still gets its own copy of the fax, and should be routed off of the fax server to either an email address or to a Microsoft Fax client. 2.6 Outbound Faxes 2.6.1 Error and Retries When NET SatisFAXtion tries to send a fax and gets an error, one of two things happen. Either the error is retryable and the fax moves to the Scheduled Queue to wait to retry, or the error is nonretryable and gets sent back to the sender.
same time, run the Change Server Settings utility, Start ⇨ Programs ⇨ NET SatisFAXtion ⇨ Change Server Settings. Click on the Fax Hardware Settings button, and change to the General tab. Check Allow same fax number to be dialed simultaneously. Click OK. Note that this is a global setting, and will affect all faxes submitted to the fax server. If a fax number is sent two or more faxes at the same time but can only handle a single fax, all but one of the faxes will typically get a “busy” error, and retry.
● ● ● ● ● A Block rule always overrides a Dial rule. Any modifications made to a number by a Preprocess rule apply as the number is validated by a Block or Dial Rule. If a number is blocked, it does not get postprocessed. If any Dial rule(s) exist, a number being validated must pass at least one of these rules in order to be postprocessed and dialed. If no Dial rules exist, any number will pass, provided it is not blocked.
To create a rule, simply give the rule a name, then read through the dialog as a sentence, filling in applicable criteria and instructions as indicated. The left column of the Rule Definition area lists rule criteria, along with buttons with which to add and remove criteria that help define a particular rule. The right column of the Rule Definition area lists the remaining criteria and the instructions on how to handle the number up for validation. To cancel the Add process, click Close.
To delete a rule: 1. Select the rule in the Validation Editor dialog. 2. Click the Delete button. 3. In the confirmation dialog, click Yes to confirm or No to cancel To modify a rule: 1. 2. 3. 4. Select the rule in the Validation Editor dialog. Click the Modify button. Make the desired changes. Click the Modify Rule button. 2.6.3.3 Testing Validation Rules 1. In the Validation Editor dialog, click the Validate button. The dialog shown below appears. 2. Enter a number in the field provided.
2.6.3.4 Scenario: Seven Digit Local Dialing In this scenario, the following transformations will occur: ● User supplies 7 digits: Dials as supplied. ● User supplies local area code + 7 digits: Area code is stripped, and the seven digits are dialed. To implement this, open the Validation Editor and locate the rule (in the top pane) named “Example trim area code from local numbers.” Select that rule, then click the ‘Modify’ button to the right.
● ● User supplies local area code + 7 digits: Dials as supplied. User supplies long distance area code + 7 digits: Adds a “1” to the front (if not present). To implement this, open the Validation Editor and click the ‘Add’ button to the right. Select PostProcess as the rule type to be created. Name the rule “10 digit local dialing” or something similar. In the left column, under “IF a number starts with...”, add your local area code to the "Number" field and click "Add".
Select the new 10 digit local dialing rule from the left side, and click “Add >>”. Then click OK. The window will close. You can test the rule that was created by clicking the Validate button on the main Validation Editor interface. Enter some example input numbers, and verify the OUTPUT: listed in the results window is correct. 2.6.3.5 Scenario: Dial AsIs (No Validation) 2.6.3.
cover sheet. ● For Email clients, the default cover sheet template for the gateway user (POP3Post or SMTPPost) will make all email gateway users use that cover sheet template. ● Create a cover sheet template for each individual user which will allow only that user to use that cover sheet template. Note that each step, Supervisor to individual user, supersedes the previous. In other words, if you have set a cover sheet template for the Supervisor, this cover sheet template is the default for all users.
Since there is text appearing in the message body, this message will automatically send a cover sheet. If there was only an attachment without body text, just the attachment would be sent as a fax. FaxOut Client Suite: When sending a fax using the FaxOut Client Suite, the user can choose to send a cover sheet or not, or choose which cover sheet to use on the Fax Options tab. See 3.2 FaxOut Client Suite for more information. 2.6.5.
email destinations that are not marked as CC or BCC $(CC) $(95) Will be replaced with comma separated list of all email destinations that are marked as CC. Lines will wrap on word boundary. If current destination is marked as BCC its email address will be appended to this list in a form (bcc: …). Note that the recipient’s name will be lost when used as a BCC and only the email address will be displayed in the list.
PDF Adobe Acrobat Reader DOC Microsoft Word XLS Microsoft Excel JPEG Internet Explorer* GIF Internet Explorer* HTML Internet Explorer * These file types need manual configuration to function properly. Other applications will work, provided they support the “printto” action. See below for more information about the “printto” action. 2.6.6.4 Troubleshooting Conversion Errors The following graphic gives a conceptual overview of the document conversion process.
application does not automatically print, conversion will fail. Resolution: This could be caused by several things including: ● Printto action was incorrect. Reinstall the application or contact the application's publisher. ● Application is in an error state and needs user intervention to proceed. Consult the application's documentation to determine how to resolve this. It is recommended to disable any automatic updating of the application, since this typically needs user intervention.
2.7.1 Using Reports To run a report, click the Report Type dropdown and select a report. To rerun an already selected report click Run Query. To change the date and time range for the report click the Date Range dropdown. Specific dates and times can be selected by choosing Custom Calendar. Proprietary FaxBack, Inc.
2.7.1.1 Saving Reports Once a report has been generated, the results can be saved from the File ⇨ Save menu or by pressing CtrlS. The results are saved to either an XML or CSV file. XML: This is a raw XML file suitable for processing by a custom program or XSLT. CSV Comma Separated Value: This is a spreadsheet format suitable for opening with Excel or other spreadsheet program. Proprietary FaxBack, Inc.
2.7.1.2 Printing Reports Once a report has been generated, the results can be printed from the File ⇨ Print menu or by pressing CtrlP. When printing a basic report, the Print Report dialog appears, which allows control of the data printed: When printing a usage graph, a normal Windows print dialog appears since there are no additional configurable parameters, the graph will be printed as displayed in the Report window. 2.7.
Simple Report Everything Report Proprietary FaxBack, Inc.
Sent Faxes Report Proprietary FaxBack, Inc.
Received Faxes Report Errors Report Proprietary FaxBack, Inc.
2.7.3 Usage Graphs There are four builtin usage graphs that will display usage levels during the specified time period. Click the Date Range dropdown to change the time period reported. Each bar in the graph will represent the next smaller unit of time. There will be two bars per unit of time: one for sent faxes, the other for received. ● ● ● ● Fax Traffic: Graphs number of faxes sent and received. Fax Page Traffic: Graphs number of pages sent and received.
Fax Traffic Graph Fax Page Traffic Report Proprietary FaxBack, Inc.
Fax Connection Time Report 2.7.4 SQL Database Structure For advanced reporting, it is possible to use a thirdparty report generation tool to query the SQL database directly. Note that by default, Microsoft SQL Server 2005 Express does not allow network connections. Please consult the Microsoft SQL Server 2005 Express documentation and your thirdparty report generation tool documentation for more details.
The dial string on an outbound fax, or the receiver’s email address on an inbound fax. [Receiver_Name] [varchar](100) The receiver’s name, if any. Set by the sender. [Sender_Name] [varchar](100) The sender’s Caller ID (ANI). Note that not all fax devices collect Caller ID from the phone call. [Submit_Time] [datetime] When the fax was submitted to the fax server. [Schedule] [datetime] When the fax was scheduled for.
Number of pages received or total number of pages submitted. [Pages_Transferred] [int] Number of pages actually sent or received. For received faxes this will always equal [Total_Fax_Pages]. For sent faxes, this can be less than [Total_Fax_Pages] if the fax failed before all pages were sent. [Attachment_Count] [int] Number of documents attached to sent fax. [Sender_CSID] [varchar](50) The TSID of the sender. [Receiver_CSID] [varchar](50) The CSID of the receiver.
moved the file after the Export process has completed. 2.8 Billing Codes Billing codes provide additional information about faxes that gets logged in the Reports database. There are two kinds of billing codes: User Billing Codes: This is a code that is assigned to an account from the Administration program. It is logged with every fax that user sends or receives. Custom Billing Code: This is a code that a user can optionally assign to an outbound fax.
Licensing: This feature requires the EmailGateway feature (either POP3 or SMTP). To deliver inbound faxes as PDFs rather than TIFFs requires the PDFConverter feature. Email integration allows users to send and receive faxes using email. Received faxes may be received as emails with the fax image attached as either a TIFF (default) or PDF (requires license). Faxes may be sent by sending an email with the fax image attached to a special email address that is routed to the fax server. New in version 9.
feature. 2.9.2.2 How the SMTP Gateway Operates Outbound: The mail server receives the email from the user and relays it to the gateway using SMTP. The gateway sends it to the fax server to be faxed, and when it is complete, the gateway sends a notification back to the sender using SMTP. Inbound: When a fax is received and routed to email, the gateway emails it to the recipient using SMTP. 2.9.2.3 Mail Server Requirements The mail server must support SMTP. SSL is supported (using STARTTLS). 2.9.2.
Click Next to start the installation. Next, choose a destination folder. The default folder is recommended. Click Next. After the Email Gateway files are installed, the NET SatisFAXtion Email Gateway Setup program will run. This allows you to configure the gateway with mail server and mailbox information. See below for details on configuring the gateway.
address it similar to '5550123' . Replace the “5550123” with a real fax number, and “fax@yourcompany.com” with the POP3 mailbox you assigned in the previous steps. You should receive an email back from the fax server stating that the fax was sent successfully.
Options Service Administration Port: This is the HTTP port for administering the Email Gateway using the Workflow Monitor application. Select Mode Proprietary FaxBack, Inc.
POP3 Settings Here you configure your POP3 mail settings. These settings you should receive from your ISP. SMTP Settings This screen displays information retrieved from the Microsoft SMTP Server configuration. It is for information only. Click Next to continue. Drop Directory: The directory the SMTP Server will place inbound emails. Default Domain Name: The domain name the SMTP Server uses as it's primary domain. Proprietary FaxBack, Inc.
Options Cover Pages: How to render a cover page for an outbound fax. Delivery Notifications Send notification on success: Send the user an email when a fax they have sent succeeds. Send notification on failure: Send the user an email when a fax they have sent fails after all retries. Attach fax image to delivery notifications Use confirmation page format Convert to PDF: Attach the fax as a PDF rather than a TIFF.
Email Address: ‘From’ address for outbound email. Don’t use the fax server’s POP3 address. Email Display Name: The sender’s “friendly name” for outbound email. SMTP Mail Server Server Name: The domain name or IP address of the mail server. Port: The port to connect to on the mail server. Typically 25 for regular SMTP or 587 for TLS. Connection Security: Check this box if your mail server requires TLS.
File Name: This determines the file name of the fax attachment. File Type: Whether to deliver inbound faxes as a TIFF or as a PDF. Loader Monitor Send email alerts when there are problems with the email gateway. 2.9.4 SMTP Routing In order to deliver email from your users to the Email Gateway, configuration is often needed in DNS or in your mail server. 2.9.4.1 Generic SMTP Routing Users must be able to send email to the fax server using the format 5550123@fax.company.
following notes provide an outline of the required configuration, but the specific steps on how to implement this will depend on the DNS and email software being used. It is strongly recommended that mail for the SMTP Gateway's Email domain be routed first through the mail server, rather than directly from the client to the SMTP Gateway.
Click Next. Now add the Address Space that this connector will handle. This will be the Fax Server's SMTP Domain Name that you entered when installing the SMTP Gateway. Click the Add button and enter the address space, then click OK. The address space will show up in the list in the Domain column. Proprietary FaxBack, Inc.
Click Next. Now add the smart host that will handle this domain. Click Add and enter the IP address of the fax server, then click OK. Do not enter your Exchange server's IP address as that will create a mail loop. Proprietary FaxBack, Inc.
Click Next. Do not enable any authentication. Proprietary FaxBack, Inc.
Click Next. Now the wizard will associate this connector with a Hub Transport server. Enter the server you would like to use; this will depend on your Exchange infrastructure. If you only have one Exchange server, then this should be automatically filled in. Proprietary FaxBack, Inc.
Click Next. Finally, the wizard will present a summary of this connector's settings. Proprietary FaxBack, Inc.
You are finished. Click New. Advanced Configuration You can also create the Send Connector with the following Exchange Management Shell command: newSendConnector Name 'fax.company.com' Usage 'Custom' AddressSpaces 'smtp:fax.company.com;1' DNSRoutingEnabled $false SmartHosts '[192.168.10.10]' SmartHostAuthMechanism 'None' UseExternalDNSServersEnabled $false SourceTransportServers 'EXCHANGE2007' 2.9.4.2.
Enter the name of this Remote Domain entry. It is recommended to name the connector the same as the address space this connector will handle. Enter the Domain Name. This will be the same as the SMTP Domain Name of the SMTP Gateway, and the Address Space of the SMTP Send Connector. Click New. Proprietary FaxBack, Inc.
The remote domain will be created. Click Finish. Once it is created, rightclick on it and select Properties. On the general tab for Outofoffice message types delivered to this remote domain, select Allow none. Change to the Message Format tab. Disable Allow automatic replies. Proprietary FaxBack, Inc.
Click OK. Allow TNEF In order for the Client Suite’s Fax Options tab to reach the fax server, TNEF must be enabled. Run the powershell command: setremotedomain identity fax.company.com tnefenabled 1 Enable Message Relaying Proprietary FaxBack, Inc.
This will allow your fax server to relay mail to nondomain email addresses. You will only need to perform this step if your fax server is on a different domain. Expand Server Configuration. Select Hub Transport, then select your server. In the lower Receive Connectors area, rightclick and select New Receive Connector. This will launch the New SMTP Receive Connector wizard. Enter the name of this connector. It is recommended to name the connector the same as the address space this connector will handle.
Click Next. Change the Local Network settings if needed for your environment. Otherwise, continue. Proprietary FaxBack, Inc.
Click Next. Remove the default 0.0.0.0–255.255.255.255 remote IP addresses. Instead, add the IP address of your fax server. Proprietary FaxBack, Inc.
Click Next. Proprietary FaxBack, Inc.
Click Finish. Find the Receive Connector you just created. Rightclick on it and select Properties. Select the Authentication tab, then check Externally Secured, and uncheck every other item. Proprietary FaxBack, Inc.
Finally, go to the Permission Groups tab and check "Exchange Servers" and "Anonymous Users." Proprietary FaxBack, Inc.
Click OK. Advanced Configuration You may also create the Receive Connector with the following Exchange Management Shell command: newReceiveConnector Name 'fax.company.com' AuthMechanism 'ExternalAuthoritative' Usage 'Custom' Bindings '0.0.0.0:25' RemoteIPRanges '192.168.10.10' Server 'EXCHANGE2007' PermissionGroups ExchangeServers,AnonymousUsers Configuring DNS to Allow OffSite Access If it offsite users need to send faxes, typically all that is required is the fax domain be published in DNS.
2.9.5.2 POP3 Address Format The general address format for use with the POP3 email gateway is 'faxnumber' . For example, to send to (503) 5550123 if the POP3 gateway’s mailbox is fax@company.com, the email address would be '5035550123' . It is also possible to add a “display name” to put on the cover sheet. The display name is included before the fax number, separated from the number by a space. For example 'Anne Anderson 5035550123' . 2.9.5.
2.9.7 Email Notifications 2.9.7.1 Inbound Email Notifications The emails that the server sends to notify the user for delivery notifications can be customized. They are email messages with the extension of .eml, and can be found in C:\Program Files\NET SatisFAXtion Email Gateway\ PublishedWorkflows\NS_Fax2Email. These files are plain text files in MIME format. It is recommended to edit these files using Microsoft Notepad. ● ● Fax.recv.eml: Inbound fax notification message. Fax.recv.err.
matches any single character. For example, “*.ht*” will match .htm and .html files, while “*.x?l” will match .xml and .xsl files but not .xslt files. Examples: *.p7?,*.jp*g,*.gif or *.tif,*.tiff,*.pdf,*.doc,*.rtf 2.9.9 Troubleshooting Email Issues Troubleshooting email issues can be complex since email must travel though systems not under the control of the NET SatisFAXtion fax server. The best strategy is to trace the email stepbystep through the various systems in a methodical fashion.
but is still in the Inbox, then the email gateway isn’t running. If the fax has a CSID of “SMTPPOST”, then the mail server bounced it. Doubleclick on the fax in Administration and read the MESSAGE.TXT file, it will contain the bounce message from the mail server. Run a report on the fax server and verify it received and routed to SMTPPost correctly. SMTP Logs In Administration, go to View ⇨ Activity Logs. Change the Source to SMTPPost and click Start Output.
Load Connector API module: Enables or disables loading the API module with the fax server. Order Packet Folder: This directory will be scanned for new “T” order packets. This can either be a local directory or a UNC path to a remote directory. Mapped network drives are not supported (except when the server is running as an application). Ensure that the service account has full control of) the target directory (see 2.3.1 Service Account Permissions ).
FaxServer [string]: Same as in ASCIIPacketServer. PacketPath [string]: Set to the Order Packet Folder to use with this instance of the Connector API module. RegisteredName [string]: Set to the account name you created on the fax server in the previous step. RegisteredPassword [string]: Set if a password was set on the account otherwise create the string value but leave blank. ScanRate [dword]: Milliseconds to wait between checking for new packets. Suppress_Header [dword]: 1 – suppress header.
2.11.1 Xerox Supported Xerox Devices: Xerox WorkCenter Pro and Document Center models that include the Xerox Server Fax Kit. Before configuring NET SatisFAXtion, install and configure the Xerox software. In the Xerox software, you will configure a Fax Repository that points to a folder on the NET SatisFAXtion server. Once the Xerox software is configured, go to Change Server Settings and add a new Xerox scanner. The Job Folder will be the same folder that the Xerox software is configured to drop faxes into.
Fax Server User Name: The name of a NET SatisFAXtion user that will be used for this scanner. If the user does not exist it will be created. If this is changed, the changed user will be created but the old user will not be deleted (and should be deleted manually if nothing else is using it). Job Folder: The directory to look for jobs coming from the scanner. Default “From” Name: The text to use for the “from” name.
With user name from the fax job: NET SatisFAXtion will attempt to find the user’s email address by matching the user name received from the scanner with the fax server’s user list. If the server can find the user, and the user has an email address, then the server will send an email notification back to the user. If the user’s email address cannot be found, the notification is instead emailed to the “fallback” address.
Default “From” Name: The text to use for the “from” name. Select the source for the “From” Name: The “from” name can either be always set to the default, or collect the “from” name from the job information. 2.11.2.2 Delivery and NonDelivery Notifications The fax server can send notifications by printing them to a system printer, or emailing them to an email address. License: Email notification requires the Email Gateway feature (either POP3 or SMTP), and an email gateway must be installed and configured.
With user name from the fax job: NET SatisFAXtion will attempt to find the user’s email address by matching the user name received from the scanner with the fax server’s user list. If the server can find the user, and the user has an email address, then the server will send an email notification back to the user. If the user’s email address cannot be found, the notification is instead emailed to the “fallback” address.
Select the Host Enter the Username and Password Select the log you want to view. Proprietary FaxBack, Inc.
Main Log View Screen Setup Proprietary FaxBack, Inc.
Save Log Proprietary FaxBack, Inc.
Search Log This is found by going to Log > Find or Ctrl+F Finds and selects log entries Enable/Disable AutoScroll This is found by going to Log>AutoScroll or Alt+A Filter This is found by going to Log > Filter or Ctr+ I By using the pulldown menus, you can filter by Source, Class, Category, Message, Log level, or Date. Proprietary FaxBack, Inc.
Start a New Log This is found by going to Log > Open New Log or Ctrl+X Open a Log File This is found by going to File>Open or Ctrl+O Proprietary FaxBack, Inc.
Send to Log This is found by going to Log> Send to Log ● ● ● ● Options to send logs: TCP Send via TCP IPC Send via IPC SysLog Send via SysLog Event Log Send via Event Log Proprietary FaxBack, Inc.
● ● Trace Send via Trace Web Service Send via Web Service API Test This is found by going to File >API Test or Alt A 2.12.1.1 IPFax IPFax debug can help diagnose SIP or fax connection issues. Alternatively, the Wireshark (http://wireshark.org) network protocol analyzer is also very helpful in diagnosing VoIP problems.
2.12.1.3 Class2 Class2 debug can help diagnose fax connection issues. The specified debug folder will not be automatically created, be sure to create it before enabling debug. [HKEY_LOCAL_MACHINE\Software\FaxBack\Class1] “debug_show_file_path” = “C:\Program Files\NET SatisFAXtion\Debug” “debug_show_output” = “FILE” Restart NET SatisFAXtion after making changes to the registry. 2.12.1.4 Brooktrout TR1034 (BOS_MAN) BOS_MAN debug can help diagnose fax connection issues.
Proprietary FaxBack, Inc.
Section 3 Clients 3.1 Client Protocols 3.1.1 CAS Normally, a CAS client will use UDP broadcast to locate the fax server. For actual communication, clients will use a random UDP port. This typically makes CAS clients only work on the same subnet/broadcast domain as the fax server. CAS clients include the Administration program. 3.1.1.1 Network Challenges for CAS Clients Multiple NICs CAS clients and the server will only listen on the first adapter in the binding order.
Loaded successfully The IP/Port line will specify which port the HTTP service is using. You should be able to put the Server Url into a web browser and see a simple web page. 3.1.2.2 Using HTTP Clients over the Internet Before any clients can be used over the Internet, the fax server’s HTTP service must be made accessible from the internet. Using a domain name is recommended, to allow changing the IP address used without needing to reconfigure all clients. Verify it works by going entering http://faxserver.
3.2 FaxOut Client Suite The FaxOut Client Suite is a collection of tools that are the most useful to users of NET SatisFAXtion. Included in this installation are the following tools: • • • • Microsoft Outlook faxing addin FaxOut print to fax, with Print Automation technology PopUp Notifier for fax preview and realtime monitoring Microsoft Office addin to easily print to fax from any Microsoft Office application 3.2.1 Installing 3.2.1.
If Windows displays a security warning, click Run. The FaxOut Client Suite installation wizard will run. Click Next. Setup will ask which directory to install the FaxOut Client Suite. It is recommended you accept the default. Proprietary FaxBack, Inc.
Setup is ready to install the FaxOut Client Suite. Click Next. On Vista and newer, you may see a User Account Control (UAC) prompt. Enter an Administrator password (if required) and click OK or Allow. Proprietary FaxBack, Inc.
Setup will now install the FaxOut Client Suite files. Once the files are installed, the Popup Notifier Configuration will run to configure your NET SatisFAXtion fax user account for the first time. On Vista and newer, you may see a User Account Control (UAC) prompt. Enter an Administrator password (if required) and click OK or Allow. Proprietary FaxBack, Inc.
The Popup Notifier Configuration needs to know if you already have a NET SatisFAXtion fax user account already, or if it needs to create one for you. If you do not have a NET SatisFAXtion fax user account already, select the Create a new fax user account... option, and click Next. Continue to the Creating a New Fax User Account section below. If you have a NET SatisFAXtion fax user account already, select the Lookup or change your fax user... option, and click Next.
Fax Server Administrators: Note you can turn off Auto Enroll on the fax server to prevent users from being able to create their own accounts. See 2.4.7 AutoEnroll for more details. Click Prepare New Fax User Message and a new email will open. This email will already be filled in with the necessary information for the NET SatisFAXtion fax server to create a fax user account for you. Simply click Send.
When your fax user account is ready, you will see your assigned user name, as well as the email address that is associated with your account. Click Finish. The FaxOut Client Suite is now installed and configured. See for information on how to send faxes. To receive faxes, your fax server administrator may need to associate your fax user account with an inbound fax number. Fax Server Administrators: See 2.5 Inbound Faxes for more info on routing inbound faxes to your users.
Enter your username in the Fax user field, or enter your email address. Also enter your password, if any. Click the ‘Look Up’ button and you should see the Fax user successfully looked up message. Click Next. 3.2.2 Sending Faxes To send faxes, simply open the file you wish to fax, and print to the FaxOut printer. Proprietary FaxBack, Inc.
Once the document has printed, the FaxOut print controller will open with a preview of your document displayed. If you wish to fax additional documents, leave the FaxOut print controller open and print additional documents. Once you have all documents ready, click Attach to Email. A new Outlook email message will open, with your documents already attached in TIFF format, ready for faxing.
Type in a message (this will go on the cover sheet), and click send. When the email reaches the fax server in a few seconds, a popup will appear at the bottom of your screen. This lets you preview the fax one last time,send the fax, or abort it. When you click Send, either on the popup or the preview window, the fax server will fax your documents if it has a line available. If there are no lines available right now, it will send the fax as soon as it can.
3.2.4.3 Popup Notifier The Popup Notifier provides notification of outbound and inbound faxes, allows previewing of faxes before they are sent, and provides realtime monitoring of fax progress. 3.2.4.4 Office Addin The Office addins provide a “print to fax” link in every Microsoft Office application for easy printing to the FaxOut printer. 3.2.5 Office Integration A Print to Fax button is provided on the AddIns tab of each Microsoft Office application.
The fax will not be sent until you click Send (even if you close the popup by clicking the red X icon). Fax preview can be disabled by unchecking the Preview your outbound faxes... box, but doing so will not send any faxes that are already postponed waiting for preview. To use a different TIFF viewer application to preview your faxes, click the Browse button next to the Launch this application to preview faxes box, and select the program to use for fax previewing.
Normally, the selected cover sheet template will be sent when the email has any text in the message body, but you can disable sending a cover sheet by unchecking the send cover sheet box. Select which cover sheet to send by clicking the dropdown box. This will display all cover sheet templates you currently have assigned. The Default Cover Template option will use the default cover sheet template you have selected.
3.2.9 Scheduling Faxes Once you have prepared an outbound fax, change to the Fax Options tab. Here you will find an option to schedule delivery of this fax for a time and date in the future. Check the Scheduled delivery option, then use the date and time dropdown to choose when to send the fax. Return to the Message tab and click Send. The fax will wait at the fax server until the scheduled time.
3.2.10 Forwarding Received Faxes to A Fax Number To forward a received fax to a fax number, select the fax. Click the Actions menu , then Forward to Fax Number. A new NET SatisFAXtion Fax Send Form will open with the original fax attached. To forward the fax as an email, just click Forward as normal. 3.2.11 Annotating Received Faxes When you have received a fax, you can annotate it with shapes, text, and images.
3.2.12 Using Billing Codes to Track Faxes Once you have prepared an outbound fax, change to the Fax Options tab. Here you will find an option to specify a billing code to assign to this fax. Either type in the billing code to use, or click the Lookup button. When you click Lookup, the list of billing codes is retrieved from the fax server. If there are a lot of them, you can use the search box to find the one you want. Proprietary FaxBack, Inc.
Select a billing code and click OK. The Billing Code field will be filled in with the billing code selected. 3.2.13 Advanced Print Automation The FaxOut print driver can extract information from the printed document in order to determine where to send the fax. These fields can come from the document: Billing Code: Billing code to log for this fax. Company: Recipient’s company name for cover page. Fax Number: Recipient’s fax number. Subject: Subject line for cover page. To: Recipient’s name for cover page.
3.4 Administration Program The NET SatisFAXtion Administration program allows the system administrator to view server status and function, to administer queues and to manage users. Administration is installed by default on the fax server, and can be installed on other workstations as needed from its page on the LaunchPad. Run Administration from the Start menu under Programs ⇨ NET SatisFAXtion ⇨ Administration.
Icon Reference Errors and Warnings Inbox Scheduled Queue Users Administration Active Queue Activity Logs Outbox Proprietary FaxBack, Inc.
Section 4 Appendices 4.1 Error Code Reference 4.1.1 4228–4323: Document Conversion All of these errors are error type DOCUMENT_CONVERSION, and will not be retried. 4228 Could not find a valid file extension 4229 File association not found: Fax server does not have an application to convert this file. 4245 Lost connection to convert process: runcvt.exe died in the middle of converting a document. 4246 Timeout waiting for conversion application to print: The application didn’t print in a timely fashion.
application does not support DMLERR_NOTPROCESSED DDE: Conversion application does not support DDE. 4330 Conversion application does not support DDE: A client’s attempt to establish a conversation has failed.
the CLASS1 driver buffers. This would only occur if the calling application was extremely slow and the pages were very small. Error type: NON_RETRYABLE. 1111 Invalid endofpage signal: After receiving page data, the remote unit should send 1 of 6 different end of page commands. It sent something else.Error type: NON_RETRYABLE. 1112 Busy: A busy tone was detected. Error type: BUSY. 1113 No dial tone: By default, the modem will listen for dial tone before trying to place an outbound call.
was no response received. Error type: RETRYABLE. 1131 No more baud rates to try: After a 4th ppr signal is received, a CTC signal is sent so as to step down the baud to the next configured baud rate. All configured baud rates have been exhausted. Error type: RETRYABLE. 1132 No response to CTC: No response after CTC. Error type: RETRYABLE . 1133 Invalid response to CTC: The expected signal after CTC is CTR. Some other signal was received. Error type: RETRYABLE.
1320 Unspecified transmit phase C error. Error type: RETRYABLE. 1323 Send data underflow. Error type: RETRYABLE. 1331 Response received error in transmit phase D. Error type: RETRYABLE. 1332 No response to MPS repeated 3 times. Error type: RETRYABLE. 1333 Invalid response to MPS. Error type: RETRYABLE. 1334 No response to EOP repeated 3 times. Error type: RETRYABLE. 1335 Invalid response to EOP. Error type: RETRYABLE. 1336 No response to EOM repeated 3 times. Error type: RETRYABLE.
during send or receive or a +FHNG code was greater than 255. Error type: NON_RETRYABLE. 1620 Busy: A busy tone was detected. Error type: BUSY. 1621 No dial tone: By default, the modem will listen for dial tone before trying to place an outbound call. The most common cause of this error is not having a working phone line plugged into this port. If the phone lines do not provide dial tone, the modem must be configured to not detect dial tone before dialing (see dial_progress_mode). Error type: NO_DIAL_TONE.
27981 SIP response sent 7 times with no ACK: Media gateway incompatibility or severe network issues. Error type: RETRYABLE. 27982 Reinvite OK received without T.38 media: Media gateway incompatibility. Error type: RETRYABLE. 27983 SIP bye received before fax was completed: The remote fax device hung up before the fax was completed. The gateway also did not include a Q.850 cause code for this disconnect, otherwise this would likely be 0x7210 Normal Call Clearing instead. Error type: RETRYABLE.
27998 No response to CTC: No response after CTC. Error type: RETRYABLE. 27999 Invalid response to CTC: The expected signal after CTC is CTR. Some other signal was received. Error type: RETRYABLE. 28000 Invalid response after ECM block: After receiving an ECM block, the expected signals are PPS, CTC or RR. Some other signal was received. Error type: NON_RETRYABLE. 28001 Unexpected DCN: During receive, a DCN signal was received at apoint where it is not expected. This most commonly occurs under ECM.
28023 Special Information Tone detected: A SIT has been received. This can include “number out of service” and other PSTN errors beyond the TDM network (where Q.850 cause codes would be used instead). Error type: NO_ANSWER. 28024 Busy tone detected: The destination number is busy at a point beyond the TDM network. Error type: BUSY. 28025 Talking detected with no fax: The call connected, but either there was no reinvite for T.38, or the RTP stream analysis indicated that there was a voice on the line.
28430 414 RequestURI too long. Error type: NON_RETRYABLE. 28431 415 Unsupported media type: The media gateway does not support G.711 μlaw or does not support T.38. Error type: NON_RETRYABLE. 28432 416 Unsupported URI scheme. Error type: NON_RETRYABLE. 28436 420 Bad extension. Error type: NON_RETRYABLE. 28437 421 Extension required. Error type: NON_RETRYABLE. 28439 423 Interval too brief. Error type: NON_RETRYABLE.
4.1.10 28928–28934: SIP 600 Messages 600 class errors are fatal errors returned by the SIP gateway or fax service. The second number listed is the equivalent standard SIP code. Error type: NON_RETRYABLE. 28928 600 Busy Everywhere. Error type: BUSY. 28931 603 Decline. Error type: NON_RETRYABLE. 28932 604 Does Not Exist Anywhere. Error type: NON_RETRYABLE. 28934 606 Not acceptable. Error type: NON_RETRYABLE. 4.1.11 29185–29311: Q.850 Cause Codes These are error codes returned by the ISDN PRI circuit.
exchange. Error type: NON_RETRYABLE. 29198 Cause 14, QoR: ported number: Q.850 description: This cause indicates that an exchange detected that the called number was ported out (see Annex C/Q.769.1). Error type: NON_RETRYABLE. 29200 Cause 16, Normal call clearing: The remote side of the call hung up before the fax was completed. The gateway included a Q.850 cause code 16, which indicates that the call hung up in a “normal” fashion, i.e. there was no TDM network error.
value, gives the result 0. Error type: NON_RETRYABLE. 29210 Cause 26, Nonselected user clearing: Q.850 description: This cause indicates that the user has not been awarded the incoming call. Error type: NON_RETRYABLE. 29211 Cause 27, Destination out of order: Q.850 description: This cause indicates that the destination indicated by the user cannot be reached because the interface to the destination is not functioning correctly.
29225 Cause 41, Temporary failure: Q.850 description: This cause indicates that the network is not functioning correctly and that the condition is not likely to last a long period of time; e.g. the user may wish to try another call attempt almost immediately. Error type: RETRYABLE. 29226 Cause 42, Switching equipment congestion: Q.850 description: This cause indicates that the switching equipment generating this cause is experiencing a period of high traffic. Error type: NON_RETRYABLE.
4.1.11.4 Service or Option Not Available Class 29249 Cause 65, Bearer capability not implemented: Q.850 description: This cause indicates that the equipment sending this cause does not support the bearer capability requested. Error type: NON_RETRYABLE. 29250 Cause 66, Channel type not implemented: Q.850 description: This cause indicates that the equipment sending this cause does not support the channel type requested. Error type: NON_RETRYABLE. 29253 Cause 69, Requested facility not implemented: Q.
29275 Cause 91, Invalid transit network selection (national use): Q.850 description: This cause indicates that a transit network identification was received which is of an incorrect format as defined in Annex C/Q.931. Error type: NON_RETRYABLE. 29279 Cause 95, Invalid message, unspecified: Q.850 description: This cause is used to report an invalid message event only when no other cause in the invalid message class applies. Error type: NON_RETRYABLE. 4.1.11.
AudioCodes MediaPack FXO, Mediant 1000 FXO: These devices will return a protocol error unspecified if it does not detect dial tone. 4.1.11.7 Internetworking Class 29311 Cause 127, Internetworking unspecified: The TDM network could not route the call to another network because of an unspecified fault. Error type: NON_RETRYABLE. Q.850 description: This cause indicates that there has been interworking with a network which does not provide causes for actions it takes.
30088 The port server is busy. Error type: BUSY. 30089 The port server is busy. Error type: BUSY. 4.1.13 30209–30266 Portafax Driver 30209 Timed out waiting for a command: During phase B, the T1 timer expired while waiting for commands from the sending fax machine. This timer is 35 seconds. Error type: NON_RETRYABLE. 30210 Remote fax cannot receive: The remote fax device is configured to not receive faxes. Error type: NON_RETRYABLE.
expected. This most commonly occurs under ECM. For nonECM faxes, a DCN received after page data does not generate an error since some fax machines don’t bother with a post page signal on the last page. Error type: NON_RETRYABLE. 30225 The sender specified a modulation that is not supported: The DCS has an invalid baud rate/modulation specified. Error type: NON_RETRYABLE. 30226 ECM required for V.34: The remote does not support error correction mode which is required for the V.
or the RTP stream analysis indicated that there was a voice on the line. This can be caused by a human or answering machine answering the call. Also some service providers play a recording for outofservice numbers without using a SIT tone. Listen to the RTP stream, or the WAV file in the Queue directory to determine what audio is being received. Error type: NON_RETRYABLE. 30247 Ring back detected with no answer: Call was not answered in the configured time period. The timer is 45 seconds.
18415627 Session Aborted. Error type: NON_RETRYABLE. 18415628 Session Timeout. Error type: NON_RETRYABLE. 4.2 Registry Configuration Reference Note on boolean values: Booleans can be represented in the registry as either a string or dword value. True, on, yes and 1 are all true values, and false, off, no and 0 are false values. 4.2.1 [HKEY_LOCAL_MACHINE\Software\FaxBack] On 64bit Windows these can be found instead under: [HKEY_LOCAL_MACHINE\Software\Wow6432Node\FaxBack]. 4.2.1.
its data is streamed through convert. If convert causes a UAE or fails to convert the data, the debug file remains for later debugging. It should be noted that whenever a message and its attachments is deleted, that this file also gets deleted. Also, see the keep_debug_image_always setting.
filebase_memory_only [boolean]: When the FILEBASE queue driver is enabled, causes the queue to be stored in memory for maximum performance. Provides zero recovery if the system were to be shutdown in a unfriendly manner since the queue will be lost. filebase_on [boolean]: Turns on/off the storage of queue files in an optimized database. Provides no benefit for systems running with under 300 ports. Note that the bypass_filebase setting overrides this one.
multi_page_header_suppression [boolean]: Determines whether or not to suppress the fax page headers of all the pages of a multipage ASCII file when the NO_DEFAULT_HEADER mask is used in the file_list_file entry for that file. If false, only the first page will have no header, and all the remaining pages will have headers. If true, all the pages will have no header. Default: false. pause_before_send [dword 0–65535]: This sets the time in seconds to wait before sending a message that is due to go out.
%8!s! short month name string %9!s! long month name string %10!u! year % 100 (2 digit year) %11!u! hour (for 12 hour am/pm format) %12!s! am/pm string for 12 hour format Be very careful what specify a string type instance, if you put in pointer to a string by would cause a UAE. %6!u!:%7! 2.2u!. you specify in the string as as it is passed directly through and if you for a parameter that is an int you will most likely cause a UAE.
will cause ICANFax to respond with an RTP to the fax driver. This only applies when doing nonECM fax receive and the driver is configured for a post page holdup. If post receive convert is enabled or the debug pages are enabled, ICANFax will always respond to the driver holdup with an MCF as the conversion is not done in real time. This value will take precedence over the rtp_percent. Setting to 0 disables RTN. Default: 10.
chars because the driver assumes the last 2 bytes are CRC bytes). Default: false. pause_before_frh_msecs [dword 0–65535]: Some modems would not be able to understand the AT+FRH=3 command if a slight pause is not inserted following a previous response or command. Since this is usually a very small delay, this was previously implemented in 16 bit as a software timing loop because one clock tick (54ms) was too long to wait.
dial_mode [string]: Selects “tone” dialing or “pulse” dialing. Defines whether the driver sends an ATDT or ATDP. Format: Either TONE or PULSE. Default: TONE. dial_progress_mode [string]: Determines if dial and busy tones are detected. The driver implements this by sending the X# modem command depending upon this value. Format: Comma separated list of DETECT_BUSY_TONE and DETECT_DIAL_TONE. Default: DETECT_DIAL_TONE, DETECT_BUSY_TONE.
pause_before_send_command_msecs [dword 0–65535]: This specifies how long to pause when the protocol state is idle, answering, or dialing, before sending the "AT" command. There are some modems that upon sending an OK from a subsequent command, must have time to get ready to receive new characters from the DTE. Default: 100. periodic_reset_timeout_msecs [dword 0–4294967295]: How often a reset sequence should be done to verify modem integrity.
ser_device_name [string]: Win32 name for the serial port in the format of COMXXX where XXX can be 001–999. This does not need to be specified if the tapi_modem_name is specified. Format: Up to 6 characters. init_string [string]: This is the basic modem initialization string. It should reset the modem and init the required flow control. Format: Up to 80 characters. Default: &F&C1&D2V1E0S0=0S7=90^^. All modem commands start with AT, so this string does not need AT.
send some image types, the corresponding allowed_receive/send_transfer_type setting must include ECM. Format: Comma separated list of the following. Default: 1D,2D,T6,JBIG. 1D 2D T6 JPEG JBIG COLOR 200H_400V 300H_300V 400H_400V allowed_receive_transfer_types [string]: These settings control the type of fax and file transfers that the driver can perform for a device. Format: Comma separated list of the following. Default: FAX,ECM,V34.
states for a carrier from the remote device before hanging up. Default: 45. dial_wait [dword 0–255]: Seconds the driver to wait in the "ringing" state before hanging up. Default: 45. tapi_modem_name [string]: When specified, the driver will utilize TAPI so as to not monopolize the usage of the serial port. This is the name of the modem defined in the control panel modem applet. Format: Up to 128 characters. tapi_modem_name_saved [string]: Copy of tapi_modem_name.
errors occurring. Setting this to lower than 19200 has the possibility that the UART wont be able to keep up with the modem modulation throughput due to extra DLE escaped characters. Default: 38400. dtmf_detection_begin [string]: When the line_type is DTMF_PROMPT, this command is sent to the modem before answering. It should cause the modem to go off hook, emit a prompt tone if possible and collect and report received DTMF digits.
the application sooner when connections fail. Default: 60000. get_send_post_phase_ok_timeout_msecs [dword 0–65535]: This is how long to wait for the OK after sending the +FET command. The modem will receive the post page response during this period. When the driver receives this OK it will send the +FDT signal and wait for a CONNECT or for a +FHNG. get_send_pre_phase_ok_timeout_msecs [dword 0–65535]: This is how long to wait for an OK while in the initial prephase of a fax send.
byte) to be continually sent when the serial helper drivers buffers become empty. This will prevent the modem from dropping carrier when its buffers run dry. If this is disabled and you have a latent filling of the drivers send image buffer by ICANFax, there is the possibility that you might experience a send underrun error because the modem drops carrier before all the page data has been sent. Default: true.
rings_before_answer [dword 0–255]: Number of rings before modem accepts call. Default: 1. ser_device_name [string]: Win32 name for the serial port in the format of COMXXX where XXX can be 001–999. This does not need to be specified if the tapi_modem_name is specified. Format: Up to 6 characters. init_string [string]: This is the basic modem initialization string. It should reset the modem and init the required flow control. Format: Up to 80 characters. Default: &F&C1&D2V1E0S0=0S7=90^^.
2D T6 JPEG JBIG COLOR 200H_400V 300H_300V 400H_400V allowed_receive_transfer_types [string]: These settings control the type of fax and file transfers that the driver can perform for a device. Format: Comma separated list of the following. Default: FAX,ECM,V34. FAX ECM V34 allowed_send_image_types [string]: These settings control the image types that the device can send and receive via the T.30 protocol over the telephone network.
Default: 14400,12000,9600,7200,4800,2400. carrier_wait [dword 0–255]: Seconds the driver to wait in the “dialing” or “answering” states for a carrier from the remote device before hanging up. Default: 45. dial_wait [dword 0–255]: Seconds the driver to wait in the "ringing" state before hanging up. Default: 45. tapi_modem_name [string(128)]: When specified, the driver will utilize TAPI so as to not monopolize the usage of the serial port.
JPEG JBIG COLOR 200H_400V 300H_300V 400H_400V allowed_receive_transfer_types [string]: These settings control the type of fax and file transfers that the driver can perform for a device. Format: Comma separated list of the following. Default: FAX,ECM,V34. FAX ECM V34 allowed_send_image_types [string]: These settings control the image types that the device can send and receive via the T.30 protocol over the telephone network.
audio_qos_latency [string]: Latency of sending RTP RSVP FlowSpec. Default: QOS_NOT_SPECIFIED. audio_qos_delay_variation [string]: DelayVariation of sending RTP RSVP FlowSpec. Default: QOS_NOT_SPECIFIED. audio_qos_service_type [string]: ServiceType of sending RTP RSVP FlowSpec. Default: SERVICETYPE_GUARANTEED. audio_qos_max_sdu_size [dword 0–65535]: MaxSduSize of sending RTP RSVP FlowSpec. Default: 340. audio_qos_minimum_policed_size [dword 0–65535]: MinimumPolicedSize of sending RTP RSVP FlowSpec.
RTP Log each sent or received audio packet. CALL_PROGRESS Log periodic audio state during the RTP portion of the call (preT.38 reinvite). debug_show_tcp_url [string]: Connect to this host:port to log debug information. debug_show_output [string]: Debug output that displays various run time behavior of ICANFax. When specifying the FAX_DEVICE, the ICANFax debug output will be mixed in with the fax drivers debug output.
show_ring0_buffer_size [dword 0–4294967295]: How big of buffer for the page locked debug buffer that ring0 code writes to and ring3 code extracts from (on a thread) to the debugging output. This should be larger for when using serial capture mode since so much more data is written for debug. It should probably be only about 1K for when using T.30 debug since the frequency and amount of T.30 debug is small enough that the ring3 code can easily keep up writing to the show output. Default: 65536.
G729 – Outbound initial INVITE will specify G.729 as the only media. Cannot be used with any other setting. USE_DIVERSION_AS_DNIS – Uses the SIP “Diversion:” header as DID instead of the request URI. USE_TO_AS_DNIS – Uses the SIP “To:” header as DID instead of the request URI. T38_ORIGINATE_REINVITE – On an outbound call, initiate the reinvite to T.38 on the fax server side rather than waiting for the media gateway. Note that this will alter the error codes generated when calling voice (nonfax) numbers.
FlowSpec. Default: 13875. t38_qos_token_bucket_size [dword 0–65535]: TokenBucketSize of sending T.38 RSVP FlowSpec. Default: 680. t38_qos_latency [string]: Latency of sending T.38 RSVP FlowSpec. Default: QOS_NOT_SPECIFIED. t38_qos_delay_variation [string]: DelayVariation of sending T.38 RSVP FlowSpec. Default: QOS_NOT_SPECIFIED. t38_qos_service_type [string]: ServiceType of sending T.38 RSVP FlowSpec. Default: SERVICETYPE_GUARANTEED. t38_qos_max_sdu_size [dword 0–65535]: MaxSduSize of sending T.
4.2.1.6 DotFax Plugin rings_before_answer [dword 0–255]: Number of rings before modem accepts call. Default: 1 send_port_count [dword 0–65535]: Number of sendonly ports to configure. send_receive_port_count [dword 0–65535]: Number of send/receive ports to configure. receive_port_count [dword 0–65535]: Number of receiveonly ports to configure. csid [string(20)]: The CSI for receive and the TSI for send. 4.2.1.7 Administration Configuration key for the Administration program.
CompletionDir [string]: Path to the “finished” directory. If this is blank, completed packets are discarded. DbgOn [boolean]: Undocumented. DbgFile [string]: Undocumented. Domain [string]: Fax server’s domain. DontDeletePackets [boolean]: Disabled. FaxServer [string]: Fax server’s name. PacketPath [string]: Path to the “orders” directory. This directory will be scanned periodically for *.T* and *.S* files.
Network NetworkPassword [binary]: Undocumented. Password [string]: Undocumented. UserName [string]: Undocumented. OtherSettings PrinterSettings Flag [dword]: Undocumented. Legal [string]: Legal printer name. LegalDriver [string]: Legal printer driver name. LegalLength [dword]: Page length for legal. Scale is inches × 16. Default: 0. LegalPort [string]: Legal printer port name. Letter [string]: Letter printer name. LetterDriver [string]: Letter printer driver name.
CgiToCasProcName: Undocumented. CgiToCasMultipartResponse: Undocumented. LANA_NUM: Undocumented. LogPath [string]: Log debug CAS20 communication to this file. IPX_SERVER_TYPE: Undocumented. IPX_SOCKET: Undocumented. IP_BROADCAST: Undocumented. MinKeepAliveMsecs: Undocumented. MaxKeepAliveMsecs: Undocumented. Primary_Server_IP_Address [string]: Used by CAS clients to locate the fax server on a different subnet instead of using broadcast discovery. HttpServerUrl: Undocumented.
the number of CPU cores in the system. ConvertReloadCount [dword]: The number of documents each RunCvt process will convert before being automatically reloaded. Default: 100. ConvertUTF8ToRTF: Undocumented. CoverExtension: Undocumented. DefaultFaxPrefix: Undocumented. DefaultTemplateExt [string]: File extension to use for cover sheets. Default: rtf. DefaultTemplateName: Undocumented. DefPageLengthLines: Undocumented. DiagnosticMode: Undocumented.
ModifyMessageFilters: Undocumented. Name [string]: Server name. NoPreCvtExtensions: Undocumented. NoPrintCapture [boolean]: Undocumented. NtfSubject [string]: Subject to use for fax send notifications when the message did not specify a subject (for example if it came from a Microsoft Fax Client). Default: A fax you sent. PerUserTSID: Undocumented. PortableExtensions [string]: File extension to use for “portable” documents. Format: Semicolon delimited list of file extensions. Default: .emp.
ThreadTraceOn: Undocumented. TraceSessions: Undocumented. UserListDatabase: Undocumented. Default: NET SatisFAXtion Users. WaitForAutoprint [boolean]: Suspend fax state while waiting for the AutoPrint module to load. Default: 1. 4.2.1.
name_receive_fax_prefix [string] name_receive_fax_with_subject [boolean] notify_sender_address [string]: Email address to send from for delivery and nondelivery emails. notify_sender_name [string] per_user_options [boolean] poll_constantly [boolean] process_text_tags [boolean] Protocol receive_fax_format [dword] return_fax_dn_contents return_fax_ndn_contents seconds_between_stopped_exchange send_fpd_to_smtp [boolean] Server server_max_message_count [dword] xml_progid [string] 4.2.1.
notify_copy_name: Undocumented. trap_mode_override: Undocumented. signup_mode: Undocumented. form_mode: Undocumented. log_level: Undocumented. 4.2.1.15 FaxBackX temp_file_path: Undocumented. 4.2.1.16 Install AccessDigits: Undocumented. CSID: Undocumented. DOTFAX_PLUGINInstalled: Undocumented. 4.2.1.17 Logger DbgOn: Undocumented. DbgFile: Undocumented. Parameters Domain: Undocumented. Protocol: Undocumented. Item\CurrentLogFile: Current log file name. Item\LastRotated: Date log was last rotated.
ODBCDSN: Undocumented. ODBCPassword: Undocumented. ODBCUserName: Undocumented. ServerName: Undocumented. TableNames 209: Fax 4.2.1.19 LogonDialog DbgOn: Undocumented. DbgFile: Undocumented. Server [string]: Undocumented. QueryNum: Undocumented. 4.2.1.20 NF_Setup Contains configuration information for the NullFax driver. [string]: Feature set implemented by NullFax port. Format: Either deluxe or junior. Default: deluxe. 4.2.1.21 Nrouter DisableDirectCopy: Undocumented.
Server_Name: Undocumented. 4.2.1.22 POP3Post 4.2.1.23 PropToJSD AdobeUpdaterDay: Undocumented. InternalHTMLHost: Undocumented. ModifyIEPageSettings: Undocumented. PreLoadExe: Programs to “preload” and keep open. PrinterName [string]: Name of printer to use for document conversion. Default: NET SatisFAXtion Document Conversion. PrintDialogTriggers: Undocumented. 4.2.1.24 ReportClient Parameters ClientName: Undocumented. Password: Undocumented. ReportServerDomain: Undocumented. UserName: Undocumented.
ServerName: Undocumented. 4.2.1.26 SMTPPost Allow_CAS_Failure: Undocumented. Allow_Remote: Undocumented. Bind_Localhost: Undocumented. Blacklist: Undocumented. CAS_Password: Undocumented. CAS_User_Name: Undocumented. Convert_Enriched_Text_To_HTML: Undocumented. Reject_Other_Domains: Undocumented. Delete_Messages: Undocumented. Delete_Temp_Files: Undocumented. Extract_RTF_From_TNEF: Undocumented. Fax_Files_Path: Undocumented. Fax_Header_Text: Undocumented. Fixed_From_Address: Undocumented.
Relay: Undocumented. Remote_Port: Undocumented. Render_Fax_Equals: Undocumented. Route_Host_Here: Undocumented. Silent: Undocumented. Split_N_Splice: Undocumented. StripMessageBody: Undocumented. Whitelist: Undocumented. 4.2.1.27 ULImport Undocumented. 4.2.1.28 UserListImport Undocumented. 4.2.1.29 WLoader Contains the modules to load. Synchronized with NETSatisFAXtion.xml. 4.3 Glossary 1D: A synonym for the MH algorithm. 2D: A synonym for the MR algorithm.
MMR Modified Modified Read: A slightly improved version of MR designed for use with lowlinenoise digital telephony connections. MR Modified Read: An improved version of MH fax image compression. RTP Realtime Transfer Protocol: Protocol for transmitting the audio portion of a VoIP call over IP networks. Codecs used are typically G.711 μlaw or G.729. SIP Session Initiation Protocol: Standard VoIP protocol for placing and receiving calls.