Version 1.3 User Manual Copyright © 2014-2016, LibRaw LLC, www.libraw.
FastRawViewer – user manual How FastRawViewer Helps You FastRawViewer (FRV) is the only solution for those who: Shoot in RAW and are tired of wasting hours or days on browsing through piles of shots and sorting them. Tired of rendering all those RAWs into JPEGs so that you can quickly browse through them with your client, CMO, senior designer, editor in chief; or show them to your friends and family members.
FastRawViewer – user manual The convenience of working with the shots taken in the RAW + JPEG mode, with two files being paired: a) While listing through files, you have the option to ignore the second file in the pair. b) JPEGs (including embedded thumbnails) are considered to be “additional images” and are immediately accessible for viewing. c) When you move a file from the RAW + JPEG pair to another folder, the other file follows.
FastRawViewer – user manual Table of Contents How FastRawViewer Helps You ................................................................................................................ 2 Conventions used in this Manual ............................................................................................................. 9 System Requirements............................................................................................................................... 9 Windows .....................
FastRawViewer – user manual Compatibility with RawPhotoProcessor (.rpps files) .......................................................................... 38 Ratings and Labels .............................................................................................................................. 38 Embedded XMP blocks ................................................................................................................... 39 Title and Description..............................................
FastRawViewer – user manual Inspection of Highlights ...................................................................................................................... 65 Adjusting the Image Contrast ............................................................................................................. 66 Using Monitor Profile For Display ...................................................................................................... 66 Support for Cameras Modified to Black and White .......
FastRawViewer – user manual Screen does not fully update .............................................................................................................. 93 Other problems .................................................................................................................................. 93 Debug Information (Debug log) .......................................................................................................... 94 Program Settings ...................................
FastRawViewer – user manual Grid View Panel ................................................................................................................................ 135 EXIF Panel ......................................................................................................................................... 136 XMP Metadata Panel ........................................................................................................................ 137 Exposure Statistics Panel ............
FastRawViewer – user manual Conventions used in this Manual The user manual is the same for Windows and Mac versions of FastRawViewer. All of the standard keyboard shortcuts are given in Windows notation (for example, Ctrl-O). For OS X please use the following substitutions: Ctrl on Windows – is Command on Mac. Alt on Windows – is Option on Mac. All keyboard shortcuts are fully customizable (see below, the “Keyboard Shortcut Settings”).
FastRawViewer – user manual Software Installation Windows Installation The program installation starts by running the executable file of the distribution package (FastRawViewer-1.2.0.xxx--Setup.exe).
FastRawViewer – user manual To proceed with the installation, you must agree to the dialog above, and the usual Setup Wizard will be launched: At the next screens of Setup Wizard: 1. The User License is displayed. 2. An installation folder is suggested; a different folder may be selected by the user. 3. Creating a Group in the Programs menu is suggested. Page 11 of 175 Copyright © 2014-2016, LibRaw LLC, www.libraw.
FastRawViewer – user manual 4. A list of possible additional actions is shown: add FastRawViewer to desktop right-click menu, add icon to the desktop, add icon to the Quick Launch menu: Afterwards, the installation takes place. Upon completion, the following screen appears: In case of any errors during installation, please contact us via www.fastrawviewer.com/contact or technical support forum at www.fastrawviewer.com/forum. Page 12 of 175 Copyright © 2014-2016, LibRaw LLC, www.libraw.
FastRawViewer – user manual Mac OS X Double click on FastRawViewer-1.x.x.dmg to mount the FastRawViewer disk image you've downloaded. The content of the disk image will appear like this: Drag FastRawViewer icon onto the Applications icon. The program will be copied to Applications folder and ready to run. Other items contained in the disk image are: FastRawViewer Manual (FastRawViewer-manual.pdf). Brief description (README.txt) and Changelog (Changelog.txt). End-User License Agreement (EULA.
FastRawViewer – user manual Windows: Hardware Acceleration Method Selection FastRawViewer uses graphics acceleration for many operations. When working in Windows, the following graphics engines can be used: OpenGL (hardware acceleration). DirectX 9. DirectX 11 (Windows 7 and newer only). During FastRawViewer’s first launch, an automatic selection of the graphics engine is made, depending on the operating system and the hardware you have: Windows XP/Windows Vista: DirectX 9 will be selected.
FastRawViewer – user manual Program Activation Activating the Trial Version During the first run FastRawViewer will display a splash screen suggesting the activation of the trial version. Page 15 of 175 Copyright © 2014-2016, LibRaw LLC, www.libraw.
FastRawViewer – user manual Immediately after that, with the main program screen being opened, FastRawViewer will try to connect to Internet to activate the trial version: No private data is transferred during the activation process; the only data that is passed through the Internet is FastRawViewer version number and unique non-reversible 64-bit hash code identifying your computer; this code can’t be decoded to extract any private or personal data.
FastRawViewer – user manual Here you can allow FastRawViewer a one-time Internet access and press Activate Trial button to start 30-day free trial period. If after pressing Activate Trial button FastRawViewer still can’t access activation server an additional button for Manual Activation will appear: Pressing this Manual Activation button will take you to manual activation dialogue (for more details, please see below, in “Manual Activation” section).
FastRawViewer – user manual The Help-Purchase/Activate menu item will now be renamed to Help-Registration data, and the respective dialog will show your registration data: To complete the activation (of both the trial and the fully licensed version) the program needs a onetime access to the Internet. If you cannot grant the appropriate Internet access permissions, you can activate the program manually.
FastRawViewer – user manual After clicking the Manual Activation button, a Manual Trial Activation window will pop up: Depending on your Internet access, you can use one of the 3 ways to obtain the activation code: By using browser (if your browser has an internet connection) – use this if your browser can connect to the Internet. Simply click this link: http://activate.fastrawviewer.com/activate.
FastRawViewer – user manual By using E-mail client with an automatically prepared message – click the mailto:activate@fastrawviewer.com link and your mail client will create a new pre-populated email to activate@fastrawviewer.com You will only need to click send. By using an E-mail client and manually writing the message – you can send an email to activate@fastrawviewer.com using the text in the window below (“I'm unable to activate…”).
FastRawViewer – user manual Using the Program: First Steps Launching FastRawViewer To launch the program: Start it up the usual way (Double-click the icon). Or drag any RAW or JPEG file onto the icon, then the program will open and display that file. Or drag a folder (catalogue) onto the icon - the program will start and will open the first RAW file in the folder. After start-up you will be presented with the program’s main screen.
FastRawViewer – user manual Menu – View – Switch to single image. Navigation by using the “arrowkeys” in the main window or the bottom “Filmstrip” bar and pressing Enter. The program will switch to a Single-File View mode (Single File view): Switching back to Grid mode: Menu – View – Switch to image Grid (or press G). Menu – View – Close single image (or Esc; Esc/close single image also exits full screen mode).
FastRawViewer – user manual o Adjust – actions that alter the XMP Sidecar files: changing exposure, white balance, and orientation. o Select/Batch – actions with several files. o Panels – controls the visibility and layout of information panes; on the above screenshot, those panes are located to the right of the image. o XMP Metadata – allows to choose XMP Ratings / XMP Labels. o Help – the name says it.
FastRawViewer – user manual Aside from the aforementioned, if the window is wide enough, the following buttons will be displayed: o File name o Brief EXIF data for the shot (Exposure settings, ISO setting, applied exposure compensation, use of flash, lens's focal length). o Manual White Balance customization button. o Contrast Curve selection menu. o Image Orientation indicator and Rotation buttons. Additionally, the following settings can be indicated if desired: o The name of the current folder.
FastRawViewer – user manual Workspace The informational panels (Histogram, EXIF, Folders etc.) can be dragged from the main window of the program to the side (for instance, to a second monitor) and be made “floating”. Panels can be turned on/off through the Panel menu (or the F2-F7 hotkeys), the statistics and XMP-data panels are fixed in size, but the sizes of the other panels can be changed. The header of every panel has a settings button (gear icon, allowing one to customize the panel.
FastRawViewer – user manual Setting Preferences – Interface – Disable transparency for panels outside of main window makes a floating panel completely non-transparent when it is placed outside the main program window. The other panel settings are individualized, and are described in the “Informational Panel settings” section. Informational panels can be closed (‘x’ on the upper right corner of the panel or corresponding item in Menu – Panels), and re-opened through Menu – Panels.
FastRawViewer – user manual Menu–Panels–Hide all panels (or, press Tab) – hides all informational panels: With this, the top menu bar is hidden as well (this can turned off through Preferences – Interface – Hide menu bar when hiding information panels). You may, also, hide bottom information bar (status bar) by setting Preferences – Interface – Hide bottom window bar when hiding information panels. Pressing Tab key the second time returns everything to the way it was.
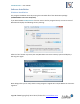
FastRawViewer – user manual Changing the Settings To bring up the settings control window, use Menu–File–Preferences (Ctrl-P) on Windows, Cmd-comma (,) on Mac/. You will be presented with the following: Further in the text, this settings control menu (Preferences) is mentioned many times, each time we refer to particular aspects and features of FastRawViewer. Furthermore, everything is described again in the “Program Settings” section. Page 28 of 175 Copyright © 2014-2016, LibRaw LLC, www.libraw.
FastRawViewer – user manual Help with the Keyboard Shortcuts Every keyboard action can be seen in the Keyboard Shortcuts Help window, which can be reached by pressing F1 function key or through Menu–Help: All keyboard shortcuts can be changed and tuned to your taste. The instructions on how to do this are in the “Adjusting the Keyboard Shortcuts” section below. If the keyboard shortcuts are changed, the help window will show their current state.
FastRawViewer – user manual Navigating the Files in a Folder while in Grid mode In Grid mode, the main section of the window contains the Thumbnail previews of all of the supported files from the current folder. In the upper-right corner of this section are the following icons (from left to right): Turning the following information panels on and off: EXIF-data, RAW-histogram, exposure statistics for the selected file. By default, these panels are turned off to save space and maximize speed.
FastRawViewer – user manual You can customize the file preview using the “gear” icon in the upper-right corner of the “Grid” mode window: A detailed description of the settings can be found in the “Customizing Display Modes” section below. Page 31 of 175 Copyright © 2014-2016, LibRaw LLC, www.libraw.
FastRawViewer – user manual Working with a Single File While in Grid mode, the following operations can be carried out with a file: Switching to single-file mode: double-click or Menu – View – Switch to single image or pressing Enter (if the keyboard focus is on the window with the file previews). Rotation (Menu-Adjust-Rotate), the new orientation data will be recorded in the XMP-file (see below).
FastRawViewer – user manual Copying and Moving Single Files The current (highlighted) file in the Grid View can be copied to another folder with Menu – File – Copy filename to – [Select Folder] (or pressing C). The dialog to select the destination folder will appear, and after the destination folder is selected the file will be copied. The names of the folders which were used for copy operations are stored in the menu items below Menu – File – Copy .. to – [Select folder].
FastRawViewer – user manual Moving files works much the same way: after a file is moved to a destination via the (Menu – File – Move .. to – [Select folder] or pressing M) the path to this destination folder will be stored as an element of the menu under [Select folder], and can be used in the future without subsequently choosing the destination, using the following dialog: The lists for copy and move destinations are kept separately.
FastRawViewer – user manual Deleting Files: the _Rejected folder FastRawViewer doesn’t allow one to delete files directly from the current folder. Instead, the files you intend to delete can be moved to a _Rejected subfolder, located in the current folder. This folder is created the first time a user requests that a file be moved to said folder.
FastRawViewer – user manual The additional Delete read-only files too checkmark allows one to delete files with the Read-Only attribute; if this checkmark is not set then those files will be ignored and will remain in _Rejected. Attention: Mac OS X does not support the Read-Only attribute on the FAT/exFAT systems, so on OS X the Read-Only checkmark will only work on local and network drives, but will not work (i.e. checked on) on removable media (memory cards).
FastRawViewer – user manual Ratings and marks (please see below). Title (title) and description (description) of an image (see below). If a folder contains files with the same name (for example, the source CR2 file and the result of its conversion to DNG), then, while recording an XMP file, a naming conflict may happen: it is necessary to record filename.XMP for filename.CR2 file, but a filename.XMP already exists in the folder, for filename.DNG file.
FastRawViewer – user manual Exposure compensation and white balance are written to newly created XMP files according to the setting of Adobe Process Version in Preferences – XMP – Adobe process version for newly created XMP files. To set color labeling scheme to be compatible with CaptureOne, set Preferences – XMP – Write photoshop:Urgency tag with color labels (for PhaseOne C1).
FastRawViewer – user manual To clear the rating, please press [X] button in the upper row of the XMP Metadata panel, or you can also use Menu – XMP Metadata – No Rating. For the compatibility with Adobe Bridge FastRawViewer supports Reject rating (-1). To enable this, set Preferences – XMP – Use XMP Reject rating to ON (this is also switched on automatically if XML Label style: Adobe Bridge is selected).
FastRawViewer – user manual Title and Description FastRawViewer can record the title and description of the image in XMP files. To call up the editing dialog, use Menu – Metadata – Edit Title/Description or the corresponding macro (Alt-D), or double-click on the title or description field in the XMP Metadata panel; this summons the editing dialog: After editing the name and description they are shown in: 1. The floating tooltip in the Filmstrip/Thumbnails panel. 2.
FastRawViewer – user manual Filtering Files Using Labels and Ratings This can be accomplished using Menu – File – Filter files by rating/label or by clicking the “funnel” icon ( ) on the Filmstrip and Grid panels: When this menu item is selected or the funnel icon is clicked, the dialog to set the filtration parameters is activated. In this dialog, you can set: The desired XMP-rating (“any” or some combination of ratings) The desired XMP-label Page 41 of 175 Copyright © 2014-2016, LibRaw LLC, www.
FastRawViewer – user manual After the Apply button is pressed, the Thumbnails and Grid View will keep displaying only those images that pass the filtration criteria. When the filtration is on, the funnel icon is displayed brighter. When filtration is activated in the current folder for the first time, the program will read all of the XMP files in the folder and store their ratings and labels.
FastRawViewer – user manual uses the first file instead; the selected range starts with the first file and goes to the one that was Shift-Click'ed Through the actions in Menu – Select/Batch o (De)select current file – reverses the mark status. o (De)select and move to next – reverses the mark status and navigates to the next file. o Select All, Invert Selection, Deselect All. o Select by Rating/Label – marks files based on their labels/ratings.
FastRawViewer – user manual Settings labels and ratings. Copying to another folder. Moving to another folder. Passing to an external program. “Deleting” (moving) to the _Rejected subfolder. To perform these actions, you can use the corresponding menu items either from Menu – Select/Batch menu. Context menu (activated by right-clicking on any of the marked files): Page 44 of 175 Copyright © 2014-2016, LibRaw LLC, www.libraw.
FastRawViewer – user manual If some files with the same name (but different extensions, such as CR2 / DNG pair) are highlighted, then the operations to change the orientation or to change / set ratings or labels will be disabled: it is impossible to apply such operations over a pair of files files with the same name and different extensions, because for such a pair only one XMP file can exist: To allow XMP operations, disable the setting "XMP settings - Disable batch XMP operations if files with same name
FastRawViewer – user manual EXIF, Histogram, and Exposure statistics in Grid Mode The defaults for the Grid mode are optimized for speed. Only preview and XMP-data are read for a file, the decoding of the RAW data is not preformed. Thus, the Histogram, Exposure Statistics, and EXIF Data panels remain empty: To switch decoding of RAW data on, press the “statistics” ( ) button in the upper-right corner of the Grid mode display window. Page 46 of 175 Copyright © 2014-2016, LibRaw LLC, www.libraw.
FastRawViewer – user manual When you click this icon, it brightens up and the decoding of the RAW data is turned on, thus enabling the display of the Histogram, Statistics, and EXIF data: RAW data decoding takes some time; during the decoding the active file (for which the RAW data is read and decoded) is highlighted with a red frame: Page 47 of 175 Copyright © 2014-2016, LibRaw LLC, www.libraw.
FastRawViewer – user manual Folder Navigation Folders can be navigated via the Folders panel, the standard location of which is to the left of the main program window: The folders can be navigated with the: 1. Mouse: a. Clicking on the triangle to the left of the folder name opens the subfolder tree. A second click on the triangle closes the subfolder tree. b. Clicking once on the folder name loads the first preview in the Filmstrip panel. c.
FastRawViewer – user manual Limiting the displayed folder tree Upon right-clicking on a folder in the Folders panel, the following context menu appears: Upon choosing Start folder tree at folder name, that folder will serve as the root of the folder tree, with its subfolders also being displayed: Also, an informational panel appears at the top of the tree with two icons and a Folder filter: ON message. The buttons/icons work in the following manner: Page 49 of 175 Copyright © 2014-2016, LibRaw LLC, www.
FastRawViewer – user manual (x) – turns off the filtration, and displays the entire folder tree again. [↑] –moves the "root" of the filtration one level up. Furthermore, the folder filtration will cease when opening a file or a folder outside of the current tree branch (for example, when opening something through File-Open or by Drag-and-Dropping something into the program window). With default settings, folder filtration is not re-applied when re-launching the program.
FastRawViewer – user manual Un-mounting (Ejecting) Removable Media If the removable media doesn’t use any application except FastRawViewer, then it can be ejected without closing the program. For this, one needs to right-click the respective media icon in the Folders panel and to select in the context menu the (only) item, Unmount MediaName: After a successful un-mount, the media will be freed up without additional messages.
FastRawViewer – user manual Favorite Folders Panel: Easy Access to Select Folders An additional Favorite Folders panel can be found at the bottom of the Folders panel. Favorite Folders panel is intended to be used to store a list of select folders in the file system, for easy and fast access. The “behavior” of the elements in this panel is analogous to that of the Folders panels: One click: the Thumbnails panel will be populated with the previews of the files in the chosen folder.
FastRawViewer – user manual 2. 3. The context menu in the Folders panel allows you to do the same with a chosen folder (Add *folder name* to favorite folders): Clearing the list: 1. Panel menu: Clear favorites list (see above) clears the entire list. 2. The context menu for a single item on the list allows you to delete that one item: Page 53 of 175 Copyright © 2014-2016, LibRaw LLC, www.libraw.
FastRawViewer – user manual “Close” File/Folder FastRawViewer background process scans files and receives system signals upon folder updates. This prevents safe ejecting of removable media, including flash memory cards and cameras connected to the computer via a cable. Menu – File – Close File (or Ctrl-U) «closes» the currently opened file: All background processes are stopped as fast as possible. The monitoring of the current folder is cancelled. The current file display is cancelled.
FastRawViewer – user manual Single File View Mode and the Filmstrip Panel When activating one of the files in the Grid View mode (double-click, press Enter on the file, Menu – View – Switch to single image) the program switches to Single File View mode. With default settings, the Filmstrip panel appears under the main window.
FastRawViewer – user manual Additional Methods of Navigating Folder Files Aside from visual navigation through folders and files, FastRawViewer also supports additional methods of opening files or folders. Opening a File/Folder Using the Menu To open a file, you can use one of the following: Menu – File – Open (or Ctrl-O). Through the list of recently opened files (Menu – File – Recent Files). Drag-n-Drop the file onto the program icon. Drag-n-Drop the file onto the program window.
FastRawViewer – user manual Program Start Modes During the launch of FastRawViewer, one can additionally pass a filename or a folder to the program through one of the following methods: A RAW or JPEG file can be opened through the Open With menu, accessible through the rightclick in the Windows Explorer/OS X Finder.
FastRawViewer – user manual Starting without a Filename If FastRawViewer is started without a filename to view (like with double-clicking on the program icon) and the settings under Preferences – File Handling – Start without filename are at defaults no RAW file will be initially opened. To change this default behavior, please go to Preferences – File Handling – Start without filename: Empty Screen – FastRawViewer starts up "without file".
FastRawViewer – user manual Working with a Single Image In single image display mode, FastRawViewer displays the image in the main window, while the auxiliary data (EXIF, histogram, exposure statistics, XMP-data) are displayed in additional panels: Embedded and External JPEG For every file, there can be up to three “representations”: RAW file. Embedded JPEG preview (Internal JPEG). External JPEG file with the same name (if the setting Preferences – RAW+JPEG – Handle RAW+JPEG together is on).
FastRawViewer – user manual The existence of representation is displayed in the status (lower) bar of the program, between the file dimensions in pixels and the EXIF data: R I – denotes the existence of RAW and Internal JPEG. R I E – RAW, Internal JPEG, External JPEG. J – only JPEG, without a RAW-file. A capital letter indicates that the representation is available for viewing.
FastRawViewer – user manual Zooming and Panning To change the zoom level of the displayed image, you can use the following commands available through Menu - View and also through the keyboard shortcuts: Menu – View – Zoom In or Ctrl-+ – magnifies the image on the display. Menu – View – Zoom Out or Ctrl—(Ctrl-Minus) – zooms out.
FastRawViewer – user manual Changing Image Orientation When you open the image, its orientation is calculated from the XMP file (if it exists), or from the EXIF data and the image is rotated accordingly. Menu – Adjust – Rotate 900 CCW (or Ctrl-7) – turns the image 90 degrees counter-clockwise. Menu – Adjust – Rotate 900 CW (or Ctrl-9) – turns the image 90 degrees clockwise. The orientation changes are recorded in an XMP-file.
FastRawViewer – user manual To fine-tune the amount and mode of sharpening, you can use Preferences – Image Display – Onscreen sharpening. We will cover this in more detail in the “Program Settings” section below. This is also the place where you can switch off the sharpening for JPEG representation, turning on the Sharpen RAW files only setting.
FastRawViewer – user manual Boosting the Shadows The Boost Shadows mode is intended to assess the quality of the shadows in the RAW: it opens up the shadows at the expense of companding the highlights: For the image above: on the left part the shadow boost mode is on, on the right, it is off. When the mode is on the indicating S in the EDS group on the bottom bar turns bright white. You can turn the boost on/off through Menu - View – Boost Shadows (or by pressing Shift-S on the keyboard).
FastRawViewer – user manual Inspection of Highlights Highlight Inspection mode (Menu – View – Highlights inspection or Shift-H) does the “opposite” of the Shadow Boost mode: The brightness of the shadows and midtones is decreased, and as a result the image looks darker. The contrast in the highlights is increased. Additionally, you can “cancel” the white balance, by setting it to “UniWB” in the Highlights inspection settings.
FastRawViewer – user manual Adjusting the Image Contrast FastRawViewer allows one to apply “standard” tone curves (sRGB, Gamma 1.8 и 2.2, L*), but also offers the Variable Contrast mode for tone curves. To switch between those two types, you can use Preferences – Image Display – Contrast Curve Type. In Variable Contrast mode, the image contrast can be adjusted in “grades”: -5 to +5 for “normal contrast”. U+0 to U+5 for “ultra contrast” (useful, for example, for underwater photography).
FastRawViewer – user manual Support for Cameras Modified to Black and White FastRawViewer supports black and white cameras that are made from color cameras by removing the color filter array (CFA) from the sensor. This mode is turned on through Preferences – Image Display – Force Black-White mode for Bayer images. In this mode: Demosaicking (de-Bayerization) is skipped. Per-channel viewing is turned off. White balance preferences are turned off.
FastRawViewer – user manual Working with Exposure FastRawViewer offers several tools to analyze the exposure on a photograph, recommend exposure adjustments during a shooting session, and select exposure adjustment during RAW conversion: RAW-histogram. Over/Underexposure statistics. Showing the areas of over- and underexposure on the image. Automatic setting of positive (lightening) exposure adjustment. Manual Exposure adjustment setting.
FastRawViewer – user manual When applying exposure adjustment (see below) the histogram itself does not change – instead the horizontal axis shifts. During a positive exposure adjustment, the EV0 level shifts in the direction of the shadows (because the shadow sections shifts to brighter ones – closer to middle gray), correspondingly the other vertical marks move as well (and if needed, the numbers for the marks change as well).
FastRawViewer – user manual 8EV is a standard value for the photographically usable dynamic range. You can change it to match your particular camera through Preferences – Exposure – Underexposure detection limit. If positive exposure compensation was applied to the image the table may contain an additional column OE+Corr, indicating the number of pixels, which will be above the maximum value after the exposure compensation is applied.
FastRawViewer – user manual In the same settings menu, you can also enable the count of the number of over- and underexposed pixels by checking Show pixel counts: Page 71 of 175 Copyright © 2014-2016, LibRaw LLC, www.libraw.
FastRawViewer – user manual Spotlighting the Areas of Over- and Underexposure The over/underexposure areas can be identified using a colored overlay. Spotlighting the overexposure zones can be turned on and off through Menu–View–Overexposure Display (or by pressing the O key on the keyboard): If some pixels of a channel hit the overexposure limit the values for such pixels are clipped.
FastRawViewer – user manual With standard settings, the positive exposure adjustment has the effect on the overexposure area display: the areas shown are the ones that would be overexposed, if we had taken the shot with this exposure compensation on the camera.
FastRawViewer – user manual Exposure adjustments do not affect the display of underexposure areas (or underexposure statistics). For this shot, part of the foreground is underexposed; also, one can see areas with the red channel underexposed (red), and, also areas where both red and blue channels are underexposed (magenta).
FastRawViewer – user manual The following settings for the automatic exposure correction are user-adjustable: Mode: a. Fixed shift by the given amount of stops (EV), the value is controlled through Preferences – Exposure – Auto Exposure – Fixed Exposure shift. b. Automatic calculation of the exposure compensation to shift the histogram ‘to the right’, controlled through Preferences – Exposure – Auto Exposure – ETTR-style autoexposure (shift histogram to the right).
FastRawViewer – user manual Recording of the exposure correction to XMP files: Interaction with Adobe Programs Exposure adjustment is recorded in XMP-file in the FastRawViewer format (if reading/recording XMP is on). Moreover, exposure adjustment in a format that is compatible with Adobe (Bridge, Camera Raw, Lightroom) is recorded in XMP as well. This recording can be turned off through Preferences – XMP – Adobe Compatible Exposure and White Balance.
FastRawViewer – user manual The available white balance indication modes are chosen through Preferences – White Balance – White balance display mode a. b. c. d. Color Temperature/Tint – a mode commonly used in RAW converters. Mired/Tint – instead of correlated color temperatures, the value indicated is in Mired. WB Coefficients – the per-channel coefficients (factors) of white balance are shown. Channel EV Correction – the per-channel correction factors in EV (stops) of white balance are shown.
FastRawViewer – user manual White Balance Presets For the majority of modern cameras, FastRawViewer contains a large amount of standard presets (settings) of white balance. Choosing a preset can be done via the drop-down list menu in the lower bar of the program window: Virtually everything is in this menu: As Shot (excluding a small amount of old cameras, which don’t record white balance in RAW). Daylight. Auto. UniWB (sets all coefficients of white balance to 1.0).
FastRawViewer – user manual Standard white balance modes (As Shot, Daylight, Auto, Custom) can be cycled through using Menu– Adjust–Toggle White Balance (or by pressing W key on the keyboard). If the RAW file contains a list of standard white balances in its EXIF data, this list will be shown in the drop-down menu (between Auto and UniWB). If there is no list of white balances in the file, then the generic table for the camera model that took the shot will be used instead.
FastRawViewer – user manual Manually Setting the Color Temperature When pressing the button with the values of color temperature/shades (to the right of the dropdown list with white balance presets) the manual white balance adjustment dialogue appears: The changes made in this dialogue are applied to the image on the screen on the screen with a slight delay (up to 200ms). If the changes you’ve made satisfy you, hit OK. If not, continue adjusting, or hit Cancel to disregard any changes.
FastRawViewer – user manual Outlining In-Focus and Highly Detailed Areas FastRawViewer can help identifying if the sharp areas are indeed where you wanted them to be on the image. This is accomplished through outlining the following: Bold high contrast edges. Areas containing small (“pixel-level”) sharp details. Additionally, you can turn on the simultaneous display of both types of outlines (not possible for some video cards).
FastRawViewer – user manual The Fine Detail Filter outlines small, acute, but not necessarily contrasting details: When this filter is on the letter D in the USM EDSH group on the bottom bar takes the same color that is used for the outline (red by default). The colors that are used outlines for both filters, as well as the opacity of the filter overlay are controlled through the settings in the Preferences – GPU Processing – Focus Peaking mode section.
FastRawViewer – user manual Performance Settings Depending on the characteristics of your computer, the most important ones being Amount of RAM. Number of processors and cores per processors. Type and performance of the video card. You may need to tune the performance settings of FastRawViewer to be more comfortable. FastRawViewer is optimized for work with files on modern high-speed storage devices: SSD drives, disk arrays (RAIDs), fast flash cards (UHS-I and similar in fast USB3 readers).
FastRawViewer – user manual Flash Cards and Network Volumes Like HDDs, portable media and network volumes work slower than modern SSD storage devices. FastRawViewer can additionally limit the parallel functionality when working with such devices.
FastRawViewer – user manual Customizing Display Modes FastRawViewer uses the advanced features of modern video cards to display images. In particular, zooming in and out is performed using video card processor, GPU.
FastRawViewer – user manual o Suppress downsampling artifacts – we recommend turning this on when you are viewing a noisy image (high ISO, underexposure, deep shadows bumped, etc.) Not all of the above-listed modes are available on all video cards. If you have an older video-card, Bicubic and artifact suppression may not be available at all.
FastRawViewer – user manual Troubleshooting Windows: Changing the Active Graphics Engine In some cases (to the best of our knowledge, this will only happen due to an old graphics driver), FastRawViewer cannot use the automatically selected graphics engine.
FastRawViewer – user manual OpenGL mode, context is not initialized properly FastRawViewer informs the user that the version of OpenGL available in the system does not support the features necessary for the program to operate, and offers to manually switch to the graphics acceleration through DirectX 9 (see below, the section “Manually Changing Graphics Modes”).
FastRawViewer – user manual DirectX11, context is not initialized properly FastRawViewer informs the user that the version of DirectX 11 available in the system does not support the features necessary for the program to operate; and switches to DirectX9, which will be used upon the next program launch. Page 89 of 175 Copyright © 2014-2016, LibRaw LLC, www.libraw.
FastRawViewer – user manual Manually Changing Graphics Modes When installing FastRawViewer on a Windows platform, several additional items are installed into the Start menu, which allow one to change the graphics engine without launching FastRawViewer (if the automatically selected graphics engine turns to be inadequate, then access to the settings is impossible, as the program itself cannot be launched).
FastRawViewer – user manual Windows 8/8.1, access through the list of Windows 8 programs LibRaw, Set Graphics Mode to: The Registry scripts shown above must be used in the case that FastRawViewer informs the user that the available version of OpenGL is inadequate and suggests switching to DirectX. Page 91 of 175 Copyright © 2014-2016, LibRaw LLC, www.libraw.
FastRawViewer – user manual OpenGL Error Warning when Starting the Application During the first start-up, FastRawViewer may warn the user of an error with the graphics subsystem, showing the following dialog window: This window indicates that the graphics driver cannot process those sub-routines that FastRawViewer needs to execute on the video card. Possible solutions: 1. Switch to the other version of the graphics engine (if you're using OpenGL – change to DirectX and vice versa).
FastRawViewer – user manual Black Screen in Image Display Window When opening a file, a black screen is shown instead of the image. This problem is due to some incompatibility between FastRawViewer and the installed graphics drivers. Possible solutions: 1. Switch to the other version of the graphics engine (if you're using OpenGL – change to DirectX and vice versa). A description of the engine switch is given in the previous section. 2. Update the driver of your video card to the newest version.
FastRawViewer – user manual Debug Information (Debug log) To turn on the output of debug information, turn on Other – Enable FastRawViewer debug log in the Preferences and restart the application. After turning it on, the Debug log appears in the Help menu, and pressing it will display a window with the debug info: The contents of the window: Can be saved in a text file (the Save to file button).
FastRawViewer – user manual Program Settings File Handling This group of settings controls the file processing rules Program startup group: Start without filename – to set the behavior if FastRawViewer was started without passing a filename to view: o Empty Screen – FastRawViewer starts up "without file". o Last opened file – opens the top (last) file from the Recent Files list.
FastRawViewer – user manual Do not recall network/removable media – forbids the automatic display of files/folders from network volumes and removable media. Reset folder tree filtering on start – will clear folder filtering on program start. File Browsing group Warn on broken RAWs – turns on the warning if a damaged RAW file is encountered. Remember last opened file in folder – turns on the setting to memorize the last opened file in the folder. A small .fastrawviewer.
FastRawViewer – user manual Copy/Move/Reject Use global rejected folder – sets the folder for Rejected files as a global folder, or as a subfolder in the current folder (checkbox is unchecked). Subfolder for rejected files – the name of the subfolder to store the rejected files. Warn when file(s) are moved to rejected – customizes the warning settings for when files are moved to the _Rejected subfolder: o No – never warn me. o Always – always warn me.
FastRawViewer – user manual Removable Media This group of settings sets the specifics of work with removable media and network volumes. On removable media arrive – what to do when removable media is detected: o Open most recent subfolder in – opens the most recent (by date of modification) subfolder in the selected folder (/DCIM by default). o Open folder – opens the selected folder. o Do nothing – Do Nothing.
FastRawViewer – user manual this panel (if this setting is Off, the network devices that do not have a drive letter assigned will not be displayed). Monitor folder changes on removable media/network volumes – monitor changes in removable media/network volume folders, updating the Folders and Filmstrip panels when new subfolders and files are added. Prefetch depth on removable media/network volumes – sets how many files to decode before moving to the next file.
FastRawViewer – user manual o Decode and show external JPEGs – enables the decoding and the display of external JPEG files. o Analyze external JPEG Orientation tag and image dimensions to match RAW – FastRawViewer will rotate the external JPEG if necessary, to match the orientation of the RAW image. Ignore internal JPEGs – unconditionally disables decoding of embedded JPEG previews. Automatically turns on and disables changing of Do not show internal JPEG if external JPEG is present setting.
FastRawViewer – user manual XMP This group of settings controls the processing of XMP files Use XMP for RAW files – turns on/off the use of XMP files. Read Only XMP – turns on the mode, where XMP files are read, but not changed. Warn about XMP writing errors – informs the user of any errors that occurred during the XMP file recording process.
FastRawViewer – user manual orientation, white balance, exposure adjustment, labels and ratings). Useful for automatic propagation of adjustments to the next file. Refresh XMP metadata and thumbnails after batch operation – turns on the unconditional rereading of the current folder after an operation over a group of files is preformed. XMP rating and labels Section: o Use XMP Reject Rating – turns on the possibility of setting the rating to -1. This rating is supported in Adobe Bridge.
FastRawViewer – user manual Interface The group of settings to control the user interface. Panels group Panel’s font size: sets the font size in the informational panels. Panels color scheme – sets the brightness of the panel background. Hide Menu bar when hiding information panels – for the hide informational panels mode (Tab), controls if the menu bar should be hidden too.
FastRawViewer – user manual o Do not hide – do not hide floating panels Further Settings Bottom bar font size – controls bottom bar font size (Small – Extra Large on Windows and Normal – Extra Large on OS X). Background Gray level allows you set the brightness of the main program window background. Selected files background – allows one to set the background color for selected files.
FastRawViewer – user manual Zoom Image zoom on next file – sets the zoom factor to be used when displaying the next file: o Keep zoom ratio – will keep the zoom factor. o Keep image width – will keep the visible width of the image o Fit to window – the Fit to screen mode will be turned on. Zoom and Drag Zoom to – sets zoom factor to use in the Zoom and Drag mode (Shift – left mouse click). Zoom and Pan Zoom to – sets zoom factor to use in the Zoom and Pan mode (Shift – right mouse click).
FastRawViewer – user manual The last two settings are designed to be used while zooming with the Mouse Wheel or trackpad. Zoom+Pan within visible area – if this setting is on, then the panning will take place inside the area visible before the start of the panning. If it is off, then the panning will be over the entire image.
FastRawViewer – user manual Grid/Filmstrip The settings in this group control the display of the image in Grid mode and the Filmstrip panel. Enable Grid mode – Turns on/off support for Grid Mode. You must restart the program for the change to take effect. Start in Grid mode – when launched without passing a filename, FastRawViewer will start in Grid mode. Remember Grid/Single file state on exit – turns on restoration of the previous mode for the next time FastRawViewer is launched.
FastRawViewer – user manual Hide Filmstrip in Grid mode – customizes the visibility of the Filmstrip panel in Grid Mode (the Filmstrip panel can be brought back to display through Menu – Panels – Filmstrip): o No – do not hide the Filmstrip panel o If Docked at bottom – if the Filmstrip panel is at the bottom of the program window, it will be hidden upon switching to Grid Mode. The setting has no effect for a Filmstrip that is anywhere else.
FastRawViewer – user manual Image Display The settings in this group control the processing and the display of the images (except for white balancing, as the WB settings are in a separate group). Contrast curve – sets the tone curve to be used when displaying the image: o Gamma 1.8, Gamma 2.2, sRGB, L* - sets one of the standard tone curves, typically used in image editing. o Variable contrast – corresponds to the variable tone/contrast curve, see Adjusting image contrast section for details.
FastRawViewer – user manual Use embedded color data for – controls the use of color data embedded into RAW files and allows using that data instead of data that comes with FastRawViewer. On-screen sharpening – enables sharpening for display. o Preset 1/Mode: Always on – sharpening for display is always on Button/Shortcut – turns on when the button is press.
FastRawViewer – user manual Exposure Apply Adobe hidden exposure correction – switches ON the automatic exposure correction similar to the one used by Adobe RAW converters, such as Camera Raw and Lightroom. With this correction ON, same values in exposure correction will result in overall image brightness being similar between Adobe converters and FastRawViewer. Set hidden exposure correction to – allows setting a user-defined value for the hidden automatic exposure correction.
FastRawViewer – user manual Exposure correction on file open: o No correction – no additional exposure correction (apart from the Adobe-style one, if it is ON) is applied when a file is opened, unless the correction is found in the accompanying XMP sidecar file. o Autoexposure – automatic exposure correction is applied, according to the settings listed below. o Keep from prev.
FastRawViewer – user manual White Balance This group contains all the white balance processing controls: White Balance Sampler size – for “click-on-gray” (Alt-Click) method, sets the size of the area used to evaluate the white balance White Balance for next file (same camera) – sets the white balance mode when opening a file coming from the same camera model as the current file. Choices here are: o Same as previous – keep the current white balance choice.
FastRawViewer – user manual o WB Coefficients – the per-channel multipliers for white balance are indicated. o Channel EV Correction – per-channel correction in EV (stops) for white balance are indicated. White Balance edit mode: o Color Temperature/Tint – a mode commonly used in many RAW converters, including those by Adobe o Channel EV Correction – per-channel correction in EV (stops) for white balance are indicated.
FastRawViewer – user manual Color Management This group of settings controls the appearance of the color on-screen in respect to color management: Enable Color Management – turns on ICC-compatible color management. Use system profile (for monitor where program starts) – the ICC profile chosen in the system for that monitor where the program is being started will be used as the profile for the monitor. Display Color profile – allows one to specify a file with the ICC profile for the monitor.
FastRawViewer – user manual GPU Processing This group controls the video card modes and how the sharp areas of the image will be displayed. Graphics Engine (Windows only): sets the method of using the graphics hardware acceleration: DirectX 9, DirectX 11 (Windows7 and newer), OpenGL, OpenGL emulator. The last option can only be set through an external script, as it results in extremely low performance, and can be selected only for the purposes of testing.
FastRawViewer – user manual o Generate low resolution previews – low-resolution previews are rendered in advance with the help of video card driver. Requires additional memory for the graphic textures, compatible with all video cards. o Suppress downsampling artifacts – suppresses the colored noise on the high ISO images. Not supported on all video cards. Focus peaking mode: o High contrast edges – enables the outlines for contrasty details using color contouring.
FastRawViewer – user manual External Editors This window displays the paths to external programs. FastRawViewer can launch those, passing to them the name of the currently displayed file. Supports batch processing: if this checkbox is marked for the program, then this program will be included in both Menu – Select/Batch – Batch Run program and in the context menu for groups of files. Use […] buttons to lookup executable file on your system.
FastRawViewer – user manual Performance Memory usage and performance Group Decoded RAW cache size – the number of decoded RAW files that are kept in the operational memory (RAM) to boost the speed of the browsing. JPEG cache size – the number of JPEG files that are kept in the operational memory to boost the speed of the browsing. Number of simultaneous RAW decode threads – the number of concurrent processes of RAW decoding.
FastRawViewer – user manual Use high speed preview for Fujifilm X-Trans – this preference turns on faster (but lower quality) processing for files created by Fujifilm X-Trans sensors. This mode is recommended if you are not satisfied with the display rate of these files in standard mode. Automatically turns on during the first start-up, and when resetting to default the preferences if the system has one of the following processors: o Intel Core2Duo and older.
FastRawViewer – user manual Other This section contains other settings that cannot be grouped with any other preceding group: Write RPPS files – saves an .rpps file (for RawPhotoProcessor) if manual changes of WB/exposure are applied to the image o Force RPPS files creation – saves an .rpps file with automatic settings for WB/Exposure when a RAW file is opened.
FastRawViewer – user manual Debug log messages – turns on the debug mode, the debug messages are available through Menu – Help – Debug log. Run single program instance – (Windows only) turns on the “one instance” mode of the program. At an attempt of starting the second instance, the file is displayed in the already existing program window. Faster program close – (Windows only) turns on the fast program completion mode.
FastRawViewer – user manual Additional Settings A few of FastRawViewer’s settings are accessible only by running scripts that are installed alongside the program. These “hidden” settings are needed extremely rarely, and should be applied, as a rule, only once. These scripts should only be used while the program is not running; otherwise FastRawViewer will overwrite the configurations with the old values during the program exit.
FastRawViewer – user manual Registry Editor will run, which will first display a Windows UAC message: Press Yes to agree to the warning, after which Register Editor will warn you again: Once again confirm by pressing Yes, and Registry Editor will inform you of your success: Page 124 of 175 Copyright © 2014-2016, LibRaw LLC, www.libraw.
FastRawViewer – user manual Using Additional Settings Scripts: Mac OS X The Mac version of FastRawViewer contains additional settings scripts in the Scripts folder in the installation icon (FastRawViewer-1.2.N.MMM.dmg). To use the scripts: 1. Mount the disk image (double-click on the regular FastRawViewer installation dmg you’ve downloaded from our site): Page 125 of 175 Copyright © 2014-2016, LibRaw LLC, www.libraw.
FastRawViewer – user manual 2. Go to the Scripts folder: 3. Open the Terminal program Applications – Utilities – Terminal. 4. Drag the needed script onto the Terminal window, and you will see the full path to the script you are about to execute. 5. Switch to the Terminal window and press Enter. The script will be executed without any output to the Terminal window; if there’s some sort of message, it means that there was an error. Page 126 of 175 Copyright © 2014-2016, LibRaw LLC, www.libraw.
FastRawViewer – user manual Additional Settings Description Name of script file Description Advanced Troubleshooting Windows: choosing the program graphics acceleration method GraphicsToDirectX9 Sets the graphics “engine” DirectX9, OpenGL, or DirectX11 GraphicsToOpenGL GraphicsToDirectX11 Turning resource-intensive graphics operations on and off EnableAdvancedShaders Turns on (default)/off resource-intensive graphics operations: DisableAdvancedShaders Bicubic interpolation Simultaneous use of
FastRawViewer – user manual Name of script file Description Disable: FastRawViewer starts with a closed Folders panel. It can be opened through Menu – Panels – Folders. This setting is intended, first of all, as a test in extraordinary situations – in a few rare cases, the monitoring of the removable media status and/or the use of the folder/disc system icons leads to FastRawViewer not being able to work.
FastRawViewer – user manual Name of script file Description DNGSDKMultiThread Use/do not use DNG SDK in multi-thread mode. Multi-thread mode gives greater efficiency, but may take up over the processor, getting in the way of other computer programs running at the same time.
FastRawViewer – user manual Name of script file Description Default delay is 30 milliseconds. If one wants to increase/decrease this delay – copy the script and edit it. FileArrivalDefaultDelay NoFileArrivalDelay Designed to prevent FastRawViewer from attempting to display files that are not yet fully copied into the current folder.
FastRawViewer – user manual Name of script file GlobalAlternateKeyHandler NoGlobalAlternateKeyHandler Description For alternate shortcuts handler (see above): turns on global shortcut capture in all panels (by default – only in main window area). Performance SetProcessingMaxParallel By default, FastRawViewer uses all of the available processing cores to process RAW data. Setting the Prefs.
FastRawViewer – user manual Backing up the Settings Windows: to back up the settings, please use the BackupSettings.cmd script, which is installed in the same C:\Program Files\LibRaw\FastRawViewer\scripts\ folder as the scripts described above. As a result of running this script, an FRV-backup folder will be created in your Documents folder. This FRV-backup folder will contain three files containing a copy of your program’s settings: Preferences.
FastRawViewer – user manual Informational Panel Settings The settings icon ( ) is located in the header of the informational panels, allowing one to perform actions or change preferences for the current panel. These setting can be changed at any moment while the program is running and are effective immediately. Folders Panel Refresh folder tree – re-reads the folder tree.
FastRawViewer – user manual Shorten long folder names: for folders with names longer than 8 characters, the displayed name for the folder will be automatically shortened to fit in the window. This is done by removing the middle of the folder name from the display. Any folder names shorter than 9 symbols aren’t affected. Favorite Folders Panel Add current folder to favorites – adds the current folder to the list of favorites Clear favorites list – clears the list of favorite folders.
FastRawViewer – user manual Show filenames – sets a mode for file name display in the Filmstrip: don’t show, show under the icon, or show over the icon. Show Rating/Label – sets a mode for XMP Rating/Label display in the Filmstrip: don’t show, show under the icon, or show over the icon. Thumbnail size: setting the size of the Thumbnail preview : o 11 sizes, starting with 75 and up to 600 pixels on the longer side.
FastRawViewer – user manual These settings are very much like those for the Thumbnail panel, with the following exceptions: The list of sizes is different: from 125 to 800 pixels on the longest side. There is no setting to switch off the display of Thumbnails. EXIF Panel EXIF Display preferences runs a dialog for editing EXIF display: Page 136 of 175 Copyright © 2014-2016, LibRaw LLC, www.libraw.
FastRawViewer – user manual In this dialog: The up/down arrows allow one to move the groups of the displayed information. In each group, one can choose the elements that are necessary during display. Do not show empty values – forbids the output of empty lines (for which the displayed RAW has no data). Show row labels – turns the left column of the EXIF-table (field names) on/off. XMP Metadata Panel Page 137 of 175 Copyright © 2014-2016, LibRaw LLC, www.libraw.
FastRawViewer – user manual Move to next file after – sets the automatic progression to the next file after setting a rating or mark: o Do not move – doesn’t move. o Rating is set – moves when a rating is set. o Label is set – moves when a mark is set. o Rating or label – moves when setting either parameter. Show Title/Description – Shows the title and description in the XMP panel.
FastRawViewer – user manual This settings window pops up: Each line on the table corresponds to one element of the program’s status bar, and can be set to one of three positions: Visibility always: always shows the element. If the program window size is too small, then the elements will overlap. If fits: The element is shown only if the size of the window is such that the elements do not get in each other’s way. Hide: The element is not shown.
FastRawViewer – user manual o Current filename: File name (without the name of the folder). o Current file selection status: Sel (in red) If current file is selected via Select/Batch, empty field otherwise. File and Display information: o Current image size: size of the image in pixels o EXIF summary: shooting data (exposure, flash, lens’s focal length). o Zoom ratio and zoom buttons: current file zoom (clicking causes Fit to Window) Zoom In/Zoom Out buttons.
FastRawViewer – user manual Setting the Keyboard Shortcuts FastRawViewer allows you to re-define all keyboard shortcuts, assigning an arbitrary amount of alternative keystroke and mouse button combinations to each of the actions possible in FastRawViewer. To define or modify the sequences for the actions use the editor under Menu – File – Keyboard Shortcuts (Ctrl-K): The left pane contains the list of groups of actions.
FastRawViewer – user manual When pressing the buttons to add or edit the combination the following dialogue appears: Hit the combination of keys (and mouse buttons), which you want to assign to the action, and it will be memorized. To close the window without modifying the current status (that is, to cancel the assignment), press the Shift key three times.
FastRawViewer – user manual Settings for Apple Magic Mouse/Trackpad The standard settings for Apple Magic Mouse in OS X 10.9 и 10.10 are designed for smooth scrolling (Natural Scroll). With these settings trackpad and Magic Mouse continue to send scrolling events for some time even after the user stopped moving his finger. The settings are very suitable for panning; but cause erratic behavior if we want to associate some action to the trackpad or mouse.
FastRawViewer – user manual Standard FastRawViewer Keyboard Shortcuts Key Sequence Windows Action Key Sequence Mac OS X File Handling Open file Ctrl+O ⌘O Open first file in folder Ctrl+Shift+Left Ctrl+Shift+Num+Left ⇧⌘← ⇧⌘+Num← Open previous file Ctrl+Left Backspace Ctrl+Num+Left Left Num+Left ⌘← ⌫ ⌘+Num← ←Num ← Open next file (in current folder) Ctrl+Right Space Ctrl+Num+Right Right Num+Right ⌘→ Space ⌘+Num→ → Num→ Open last file in folder Ctrl+Shift+Right Ctrl+Shift+Num+Right ⇧⌘→ ⇧⌘+Num
FastRawViewer – user manual Copy file to folder (ask destination) C C Copy file to last used folder Shift+C ⇧C Copy file to 2nd used folder Alt+Shift+C ⌥⇧C Copy file to 3rd used folder Ctrl+Shift+C ⇧⌘C Copy file to 4th used folder Ctrl+Alt+C ⌥⌘C Copy file to 5th used folder Ctrl+Alt+Shift+C ⌥⇧⌘C Zoom-Pan-Rotate Toggle view: Image/Grid G G Toggle show EXIF/Histogram/Statistics in grid view Shift+G ⇧G Zoom In Ctrl++ Ctrl+= Shift+Wheel Up ⌘+ ⌘= Zoom Out Ctrl+Shift+Wheel Down ⌘- Mo
FastRawViewer – user manual Display R channel Ctrl+3 ⌘3 Display G channel Ctrl+4 ⌘4 Display B channel Ctrl+5 ⌘5 Display BW conversion Ctrl+6 ⌘6 Switch data to display (RAW, embedded JPEG, ext.
FastRawViewer – user manual Show/Hide OE/UE Stats F4 F4 Show/Hide XMP Metadata panel F5 F5 Show/Hide Filmstrip panel F6 F6 Show/Hide Folders panel F7 F7 Show/Hide Favorite Folders sub panel Shift+F7 ⇧F7 Hide all panels Tab ⇥ Reset panels positions Alt+F10 ⌥F10 No Rating Alt+0 ⌥0 Set Rating to Reject Alt+Del ⌥⌫ Set Rating to 1 Alt+1 ⌥1 Set Rating to 2 Alt+2 ⌥2 Set Rating to 3 Alt+3 ⌥3 Set Rating to 4 Alt+4 ⌥4 Set Rating to 5 Alt+5 ⌥5 Decrease Rating Alt+, ⌥, Incre
FastRawViewer – user manual Run External Program 2 Alt+R ⌥R Run External Program 3 Ctrl+R ⌘R Run External Program 4 no shortcuts set no shortcuts set Run External Program 5 no shortcuts set no shortcuts set Run External Program 6 no shortcuts set no shortcuts set Run External Program 7 no shortcuts set no shortcuts set Run External Program 8 no shortcuts set no shortcuts set Run External Program 9 no shortcuts set no shortcuts set Run External Program10 no shortcuts set no shortcut
FastRawViewer – user manual Batch: Set Rating to 4 no shortcuts set no shortcuts set Batch: Set Rating to 5 no shortcuts set no shortcuts set Batch: Decrease Rating no shortcuts set no shortcuts set Batch: Increase Rating no shortcuts set no shortcuts set Batch: Clear XMP Label no shortcuts set no shortcuts set Batch: Red no shortcuts set no shortcuts set Batch: Yellow no shortcuts set no shortcuts set Batch: Green no shortcuts set no shortcuts set Batch: Blue no shortcuts set no s
FastRawViewer – user manual Run Program #3 no shortcuts set no shortcuts set Run Program #4 no shortcuts set no shortcuts set Run Program #5 no shortcuts set no shortcuts set Run Program #6 no shortcuts set no shortcuts set Run Program #7 no shortcuts set no shortcuts set Run Program #8 no shortcuts set no shortcuts set Run Program #9 no shortcuts set no shortcuts set Run Program #10 no shortcuts set no shortcuts set General Functions Edit Preferences Ctrl+P ⌘, Edit Keyboard Short
FastRawViewer – user manual List of Supported Cameras (RAW formats) ARRIRAW format AVT o F-080C o F-145C o F-201C o F-510C o F-810C Adobe Digital Negative (DNG) AgfaPhoto DC-833m Alcatel 5035D Apple o QuickTake 100 o QuickTake 150 o QuickTake 200 Baumer TXG14 BlackMagic o Cinema Camera o Micro Cinema Camera o Pocket Cinema Camera o Production Camera 4k o URSA o URSA Mini Canon o PowerShot A5 o PowerShot A5 Zoom o PowerShot A50 o PowerShot A460 (CHDK hack) o PowerShot A470 (CHDK hack)
FastRawViewer – user manual o o o o o o o o o o o o o o o o o o o o o o o o o o o o o o o o o o o o o o o o o o o o o o PowerShot G1 X PowerShot G1 X Mark II PowerShot G2 PowerShot G3 PowerShot G3 X PowerShot G5 PowerShot G5 X PowerShot G6 PowerShot G7 (CHDK hack) PowerShot G7 X PowerShot G9 PowerShot G9 X PowerShot G10 PowerShot G11 PowerShot G12 PowerShot G15 PowerShot G16 PowerShot S2 IS (CHDK hack) PowerShot S3 IS (CHDK hack) PowerShot S5 IS (CHDK hack) PowerShot SD300 (CHDK hack) PowerShot SD950 (CHDK
FastRawViewer – user manual o o o o o o o o o o o o o o o o o o o o o o o o o o o o o o o o o o o o o o o o o o o o o o EOS 5D Mark II EOS 5D Mark III EOS 6D EOS 7D EOS 7D Mark II EOS 10D EOS 20D EOS 20Da EOS 30D EOS 40D EOS 50D EOS 60D EOS 60Da EOS 70D EOS 80D EOS 300D / Digital Rebel / Kiss Digital EOS 350D / Digital Rebel XT / Kiss Digital N EOS 400D / Digital Rebel XTi / Kiss Digital X EOS 450D / Digital Rebel XSi / Kiss Digital X2 EOS 500D / Digital Rebel T1i / Kiss Digital X3 EOS 550D / Digital Rebel
FastRawViewer – user manual o o EOS-1Ds Mark III EOS-1D X Mark II Casio o o o o o o o o o o o o o o o o o o o o o o o o o o o o o o o o o o o o o o o o o o o QV-2000UX QV-3000EX QV-3500EX QV-4000 QV-5700 QV-R41 QV-R51 QV-R61 EX-F1 EX-FC300S EX-FC400S EX-FH20 EX-FH25 EX-FH100 EX-S20 EX-S100 EX-Z4 EX-Z50 EX-Z500 EX-Z55 EX-Z60 EX-Z75 EX-Z750 EX-Z8 EX-Z850 EX-Z1050 EX-ZR100 EX-Z1080 EX-ZR700 EX-ZR710 EX-ZR750 EX-ZR800 EX-ZR850 EX-ZR1000 EX-ZR1100 EX-ZR1200 EX-ZR1300 EX-ZR1500 EX-ZR3000 EX-100 EX-100F EX-10
FastRawViewer – user manual o o Exlim Pro 600 Exlim Pro 700 Contax N Digital Creative PC-CAM 600 DJI 4384x3288 DXO One Digital Bolex o D16 o D16M Epson o R-D1 o R-D1s o R-D1x Foculus 531C FujiFilm o E505 o E900 o F700 o F710 o F800 o F810 o S2Pro o S3Pro o S5Pro o S20Pro o S1 o S100FS o S5000 o S5100/S5500 o S5200/S5600 o S6000fd o S7000 o S9000/S9500 o S9100/S9600 o S200EXR o S205EXR o SL1000 o HS10 o HS11 o HS20EXR o HS22EXR o HS30EXR o HS33EXR o HS35EXR o HS50EXR o F505EXR Page 155 o
FastRawViewer – user manual o o o o o o o o o o o o o o o o o o o o o o o o o o o o o o F550EXR F600EXR F605EXR F770EXR F775EXR F800EXR F900EXR X-Pro1 X-Pro2 X-S1 XQ1 XQ2 X100 X100S X100T X10 X20 X30 X70 X-A1 X-A2 X-E1 X-E2 X-E2S X-M1 XF1 X-T1 X-T1 Graphite Silver X-T10 IS-1 HTC o o o UltraPixel One (A9) One (M9) Hasselblad o H5D-60 o H5D-50 o H5D-50c o H5D-40 o H4D-60 o H4D-50 o H4D-40 o H4D-31 o H3DII-22 o H3DII-31 o H3DII-39 Page 156 of 175 Copyright © 2014-2016, LibRaw LLC, www.libraw.
FastRawViewer – user manual o o o o o o o o o o o o o o o o o H3DII-50 H3D-22 H3D-31 H3D-39 H2D-22 H2D-39 CFV CFH CF-22 CF-31 CF-39 V96C Lusso Lunar Stellar Stellar II HV ISG 2020x1520 Ikonoskop o A-Cam dII Panchromatic o A-Cam dII Imacon o Ixpress 96, 96C o Ixpress 384, 384C (single shot only) o Ixpress 132C o Ixpress 528C (single shot only) JaiPulnix o BB-500CL o BB-500GE Kinefinity o KineMINI o KineRAW Mini o KineRAW S35 Kodak o DC20 o DC25 o DC40 o DC50 o DC120 o DCS200 o DCS315C o DCS
FastRawViewer – user manual o o o o o o o o o o o o o o o o o o o o o o o o o o o o o o Konica o o DCS520C DCS560C DCS620C DCS620X DCS660C DCS660M DCS720X DCS760C DCS760M EOSDCS1 EOSDCS3B NC2000F ProBack PB645C PB645H PB645M DCS Pro 14n DCS Pro 14nx DCS Pro SLR/c DCS Pro SLR/n C330 C603 P850 P880 S-1 Z980 Z981 Z990 Z1015 KAI-0340 KD-400Z KD-510Z Leaf o o o o o o o o o o o o AFi 5 AFi 6 AFi 7 AFi-II 6 AFi-II 7 AFi-II 10 AFi-II 10R Aptus-II 5 Aptus-II 6 Aptus-II 7 Aptus-II 8 Aptus-II 10 Page 158 of
FastRawViewer – user manual o o o o o o o o o o o o o o o o o o o o o o o o o Aptus-II 12 Aptus-II 12R Aptus 17 Aptus 22 Aptus 54S Aptus 65 Aptus 65S Aptus 75 Aptus 75S Cantare Cantare XY CatchLight CMost Credo 40 Credo 50 Credo 60 Credo 80 (low compression mode only) DCB-II Valeo 6 Valeo 11 Valeo 17 Valeo 17wi Valeo 22 Valeo 22wi Volare Leica o o o o o o o o o o o o o o o o o o o o C (Typ 112) Digilux 2 Digilux 3 Digital-Modul-R D-LUX2 D-LUX3 D-LUX4 D-LUX5 D-LUX6 D-Lux (Typ 109) M8 M8.
FastRawViewer – user manual o o o o o o o o o o o o o o o o o Q (Typ 116) S S2 S (Typ 007) SL (Typ 601) T (Typ 701) X1 X (Typ 113) X2 X-E (Typ 102) X-U (Typ 113) V-LUX1 V-LUX2 V-LUX3 V-LUX4 V-Lux (Typ 114) X VARIO (Typ 107) Lenovo a820 Logitech Fotoman Pixtura Mamiya ZD Matrix 4608x3288 Micron 2010 Minolta o RD175 o DiMAGE 5 o DiMAGE 7 o DiMAGE 7i o DiMAGE 7Hi o DiMAGE A1 o DiMAGE A2 o DiMAGE A200 o DiMAGE G400 o DiMAGE G500 o DiMAGE G530 o DiMAGE G600 o DiMAGE Z2 o Alpha/Dynax/Maxxum 5D
FastRawViewer – user manual o o o o o o o o o o o o o o o o o o o o o o o o o o o o o o o o o o o o o o o o o o o o o o D2Xs D3 D3s D3X D4 D4s D40 D40X D5 D50 D60 D70 D70s D80 D90 D100 D200 D300 D300s D500 D600 D610 D700 D750 D800 D800E D810 D810A D3000 D3100 D3200 D3300 D5000 D5100 D5200 D5300 D5500 D7000 D7100 D7200 Df 1 AW1 1 J1 1 J2 1 J3 1 J4 Page 161 of 175 Copyright © 2014-2016, LibRaw LLC, www.libraw.
FastRawViewer – user manual o o o o o o o o o o o o o o o o o o o o o o o o o o o o o o o o o o o 1 J5 1 S1 1 S2 1 V1 1 V2 1 V3 E700 ("DIAG RAW" hack) E800 ("DIAG RAW" hack) E880 ("DIAG RAW" hack) E900 ("DIAG RAW" hack) E950 ("DIAG RAW" hack) E990 ("DIAG RAW" hack) E995 ("DIAG RAW" hack) E2100 ("DIAG RAW" hack) E2500 ("DIAG RAW" hack) E3200 ("DIAG RAW" hack) E3700 ("DIAG RAW" hack) E4300 ("DIAG RAW" hack) E4500 ("DIAG RAW" hack) E5000 E5400 E5700 E8400 E8700 E8800 Coolpix A Coolpix P330 Coolpix P340 Cool
FastRawViewer – user manual o o o o o o o o o o o o o o o o o o o o o o o o o o o o o o o o o o o o o o o o o o o o o o C7070WZ C70Z,C7000Z C740UZ C770UZ C8080WZ X200,D560Z,C350Z E-1 E-3 E-5 E-10 E-20 E-30 E-300 E-330 E-400 E-410 E-420 E-450 E-500 E-510 E-520 E-600 E-620 E-P1 E-P2 E-P3 E-P5 E-PL1 E-PL1s E-PL2 E-PL3 E-PL5 E-PL6 E-PL7 E-PM1 E-PM2 E-M1 E-M10 E-M10 Mark II E-M5 E-M5 Mark II Pen F SP310 SP320 SP350 SP500UZ Page 163 of 175 Copyright © 2014-2016, LibRaw LLC, www.libraw.
FastRawViewer – user manual o o o o o o o o o o o o o SP510UZ SP550UZ SP560UZ SP565UZ SP570UZ STYLUS1 STYLUS1s SH-2 SH-3 TG-4 XZ-1 XZ-2 XZ-10 OmniVision OV5647 (Raspberry Pi) Panasonic o DMC-CM1 o DMC-FZ8 o DMC-FZ18 o DMC-FZ28 o DMC-FZ30 o DMC-FZ35/FZ38 o DMC-FZ40 o DMC-FZ50 o DMC-FZ7 o DMC-FZ70 o DMC-FZ100 o DMC-FZ150 o DMC-FZ200 o DMC-FZ300/330 o DMC-FZ1000 o DMC-FX150 o DMC-G1 o DMC-G10 o DMC-G2 o DMC-G3 o DMC-G5 o DMC-G6 o DMC-G7/G70 o DMC-GF1 o DMC-GF2 o DMC-GF3 o DMC-GF5 o DMC-GF6 o DMC-GF7 o DM
FastRawViewer – user manual o o o o o o o o o o o o o o o o o o o o o o o o DMC-GH3 DMC-GH4 AG-GH4 DMC-GM1 DMC-GM1s DMC-GM5 DMC-GX1 DMC-GX7 DMC-GX8 DMC-GX80/85 DMC-L1 DMC-L10 DMC-LC1 DMC-LX1 DMC-LF1 DMC-LX2 DMC-LX3 DMC-LX5 DMC-LX7 DMC-LX100 DMC-TZ60/61/SZ40 DMC-TZ70/71/ZS50 DMC-TZ80/81/85/ZS60 DMC-TZ100/101/ZS100 Pentax o o o o o o o o o o o o o o o o o o o o o *ist D *ist DL *ist DL2 *ist DS *ist DS2 GR K10D K20D K100D K100D Super K110D K200D K2000/K-m K-x K-r K-01 K-1 K-3 K-3 II K-30 K-5 Page 165 of
FastRawViewer – user manual o o o o o o o o o o o o o o o o o o K-5 II K-5 IIs K-50 K-500 K-7 K-S1 K-S2 MX-1 Q Q7 Q10 QS-1 Optio S Optio S4 Optio 33WR Optio 750Z 645D 645Z PhaseOne o IQ140 o IQ150 o IQ160 o IQ180 o IQ180 IR o IQ250 o IQ260 o IQ260 Achromatic o IQ280 o IQ3 50MP o IQ3 60MP o IQ3 80MP o IQ3 100MP o LightPhase o Achromatic+ o H 10 o H 20 o H 25 o P 20 o P 20+ o P 21 o P 25 o P 25+ o P 30 o P 30+ o P 40+ o P 45 Page 166 of 175 Copyright © 2014-2016, LibRaw LLC, www.libraw.
FastRawViewer – user manual o o o P 45+ P 65 P 65+ Photron BC2-HD Pixelink A782 Polaroid x530 (embedded JPEGs only) PtGrey GRAS-50S5C Ricoh o GR o GR Digital o GR Digital II o GR Digital III o GR Digital IV o GR II o GX100 o GX200 o GXR MOUNT A12 o GXR MOUNT A16 24-85mm F3.5-5.5 o GXR, S10 24-72mm F2.5-4.4 VC o GXR, GR A12 50mm F2.5 MACRO o GXR, GR LENS A12 28mm F2.
FastRawViewer – user manual o o o o o o o o o o o o o o o o o NX20 NX200 NX210 NX2000 NX30 NX300 NX300M NX3000 NX500 NX mini Pro815 WB550 WB2000 S85 (hacked) S850 (hacked) Galaxy S3 Galaxy Nexus Sarnoff 4096x5440 Seitz o 6x17 o Roundshot D3 o Roundshot D2X o Roundshot D2Xs Sigma (embedded JPEGs only) o SD9 o SD10 o SD14 o SD15 o SD1 o SD1 Merill o DP1 o DP1 Merill o DP1S o DP1X o DP2 o DP2 Merill o DP2S o DP2X o DP3 Merill o dp0 Quattro o dp1 Quattro o dp2 Quattro o dp3 Quattro Sinar o eMotion 2
FastRawViewer – user manual o o o o o o o o eSpirit 65 eMotion 75 eVolution 75 3072x2048 4080x4080 4080x5440 STI format Sinarback 54 Sony o o o o o o o o o o o o o o o o o o o o o o o o o o o o o o o o o o o o o A7 A7 II A7R A7R II A7S A7S II ILCA-68 (A68) ILCA-77M2 (A77-II) ILCE-3000 ILCE-5000 ILCE-5100 ILCE-6000 ILCE-6300 ILCE-QX1 DSC-F828 DSC-R1 DSC-RX1 DSC-RX1R DSC-RX1R II DSC-RX10 DSC-RX10II DSC-RX10III DSC-RX100 DSC-RX100II DSC-RX100III DSC-RX100IV DSC-V3 DSLR-A100 DSLR-A200 DSLR-A230 DSLR-A290 D
FastRawViewer – user manual o o o o o o o o o o o o o o o o o o o o o o o o o o o o o o o o o o o DSLR-A500 DSLR-A550 DSLR-A560 DSLR-A580 DSLR-A700 DSLR-A850 DSLR-A900 NEX-3 NEX-3N NEX-5 NEX-5N NEX-5R NEX-5T NEX-6 NEX-7 NEX-C3 NEX-F3 NEX-VG20 NEX-VG30 NEX-VG900 SLT-A33 SLT-A35 SLT-A37 SLT-A55V SLT-A57 SLT-A58 SLT-A65V SLT-A77V SLT-A99V XCD-SX910CR IMX135-mipi 13mp IMX135-QCOM IMX072-mipi IMX298-mipi 16mp IMX219-mipi 8mp YUNEEC CGO4 Page 170 of 175 Copyright © 2014-2016, LibRaw LLC, www.libraw.
FastRawViewer – user manual Copyrights and Acknowledgements FastRawViewer uses Qt 5.3, LibRaw library, RawSpeed library, LibXML2 and LibJPEG-turbo libraries, Adobe XMP and DNG SDK, and Microsoft Visual Studio 2010 runtime library. All trademarks mentioned in this manual are the property of their owners. LibRaw LibRaw: raw images processing library Copyright (C) 2008-2014 LibRaw LLC (http://www.libraw.org, info@libraw.org) Qt 5.3 Copyright (C) 2014 Digia Plc and/or its subsidiary(-ies). Contact: http://www.
FastRawViewer – user manual 1. The origin of this software must not be misrepresented; you must not claim that you wrote the original software. If you use this software in a product, an acknowledgment in the product documentation would be appreciated but is not required. 2. Altered source versions must be plainly marked as such, and must not be misrepresented as being the original software. 3. This notice may not be removed or altered from any source distribution.
FastRawViewer – user manual Adobe XMP SDK The BSD License Copyright (c) 1999 - 2013, Adobe Systems Incorporated All rights reserved. Redistribution and use in source and binary forms, with or without modification, are permitted provided that the following conditions are met: Redistributions of source code must retain the above copyright notice, this list of conditions and the following disclaimer.
FastRawViewer – user manual 1. LICENSE GRANT Software License. Subject to the restrictions below and other terms of this Agreement, Adobe hereby grants you a non-exclusive, worldwide, royalty free license to use, reproduce, prepare derivative works from, publicly display, publicly perform, distribute and sublicense the Software for any purpose. Document License.
FastRawViewer – user manual 5. INDEMNIFICATION If you choose to distribute the Software in a commercial product, you do so with the understanding that you agree to defend, indemnify and hold harmless Adobe against any losses, damages and costs arising from the claims, lawsuits or other legal actions arising out of such distribution. 6. TRADEMARK USAGE Adobe and the DNG logo are the trademarks or registered trademarks of Adobe Systems Incorporated in the United States and other countries.