
User's Manual
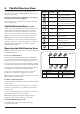

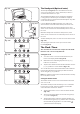
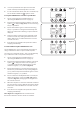
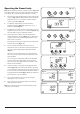
Table Of Contents
- 1. Before You Start...
- 2. Cooker Overview
- 3. Using the Glide-out Grill™
- 4. The Multifunction Oven
- 5. The Steam Cavity
- 6. Cleaning Your Cooker
- 7. Troubleshooting
- 8. Installation
- Dear Installer
- Safety Requirements and Regulations
- Provision of Ventilation
- Location of Cooker
- Positioning the Cooker
- Moving the Cooker
- Lowering the Two Rear Rollers
- Completing the Move
- Fitting the Stability Bracket
- Repositioning the Cooker Following Connection
- Levelling
- Electrical Connection
- Connection in New Zealand
- Fixed Wiring
- Final Checks
- Final Fitting
- Customer Care
- 9. Servicing
- 10. Circuit Diagram
- 11. Technical Data
26
Steam Cavity Functions
The steam cavity has three main functions:
steam
grill
descale
Switch the oven on and tap the [ + ] or [ - ] buttons to scroll
through these functions.
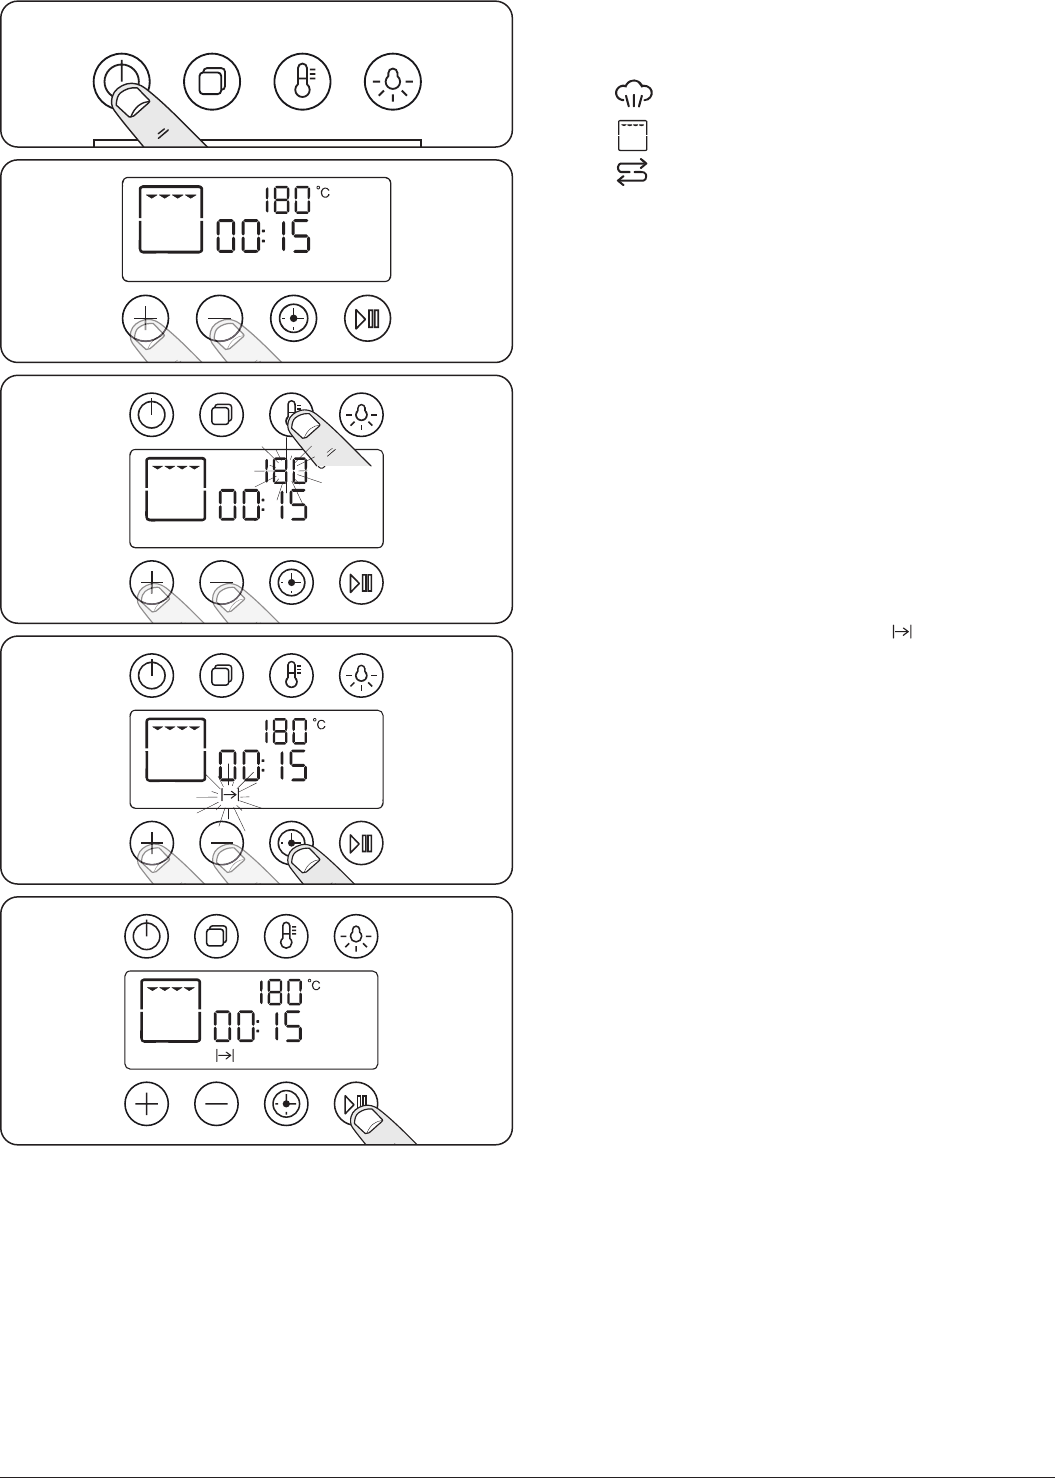
Using the Steam Grill
1. Touch and hold the standby button to switch the steam
cavity on (Fig. 5.13) then use the [ + ] or [ - ] buttons to
scroll through to the grill function (Fig. 5.14).
2. The default temperature is 180
º
C. To adjust the
temperature, touch the temperature button then use
the [ + ] or [ - ] buttons to adjust (Fig. 5.15). An audible
beep will sound when the grill is up to temperature.
The maximum temperature is 200
º
C and the minimum
temperature is 40
º
C.
3. To adjust the cook period, tap the timer button once, to
adjust the hours use the [ + ] or [ - ] buttons
(Fig. 5.16). Tap the timer button again to adjust the
minutes. The cook duration symbol [ ] will ash
during this procedure.
4. A beeping sound will be heard once the grill has
reached the set temperature.
5. To begin grilling tap the start / pause button (Fig. 5.17).
Fig. 5.13
Fig. 5.14
Fig. 5.15
Fig. 5.16
Fig. 5.17