
User's Manual


23
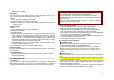
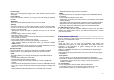
Key Setting Key Setting
1 Effects 3 Flash
2 White Balance 4 Night Mode
* Go to Video Player
Video Recorder Settings
• White Balance (Auto / Daylight / Tungsten / Fluorescent / Cloud /
Incandescence)
• Flash (On/Off): You can set the video flashlight on or off with this setting.
• EV (-4/-3/-2/-1/0/+1/+2/+3/+4): You can set the EV (Exposure Value) and
the preview will look darker in lower EV and brighter in higher EV.
• Night Mode (On/ Off)
• Banding (50Hz/60Hz): You can select the sampling bandwidth of the
camera sensor. When bandwidth increases, the memory size and the
picture quality will increase.
• Video Size (QCIF (176x144)/CIF (352x288))
• Video Quality (Low/Normal /High/Fine): The recorded file’s memory size
will increase if you choose higher quality.
• File Size Limit (No Limit/ 95k/ 195k/ 295k)
• Record Time Limit (No Limit/ 15sec/ 30sec/ 60sec)
• Record Audio (On/ Off)
• Encode Format (H.263/ Mpeg4)
• Effects (Normal, Grayscale, Sepia, Sepia Green, Sepia Blue, Color
Invert, Gray Invert, Blackboard, Whiteboard, Copper Carving, Blue
Carving, Embossment, Contrast, Sketch)
• Save To Phone: allows you to select the storage for saving files.
• Restore Default: This menu allows you to restore to the video recorder’s
default settings.
5.4 Video Player
You can view the recorded video with the Video Player. Press the side
volume key to adjust the volume.
By pressing the * key, you can view the recorded video with the width
screen.
By pressing the “0” key, you can capture the image. The captured image
will be displayed in [Photo Viewer] menu.
Options:
1) Play: allows you to play the recorded video
2) Forward: allows you to forward the video image to Phone Book, MMS,
E-mail and Bluetooth.
3) Rename: allows you to rename the video file
4) Delete: allows you to delete the video file
5) Delete All Files: allows you to delete entire recorded video files.
6) Sort: allows you to sort video files by name, type, time and size
7) Storage (Phone / Memory Card): allows you to select the storage for
saving video files.
5.5 Photo Editor
Photo Manager
You can edit photo image with this function..
1. Select the image file you want to edit in the File Manager storage.
2. Choose ‘Auto Resize’, ‘Main LCD Clip’.
(1) Auto Resize function resizes the selected image to full image
(2) Main LCD Clip function clips a part of image to fit in 320x240 pixels..
3. Option
1) Save As: after editing the selected image, save the image to other file
name. Phone automatically issues a file name. You can also edit the
file name.
2) Add Effect: you can add effect such as Sepia, Grayscale, and so on.
Press the left or right navigation keys to change selection.
3) Add Frame: press left or right navigation keys to change selection of
picture frames.
4) Add Icon: Use the Navigation keys to select the icon. Press the [OK]
key to stamp the icon on the image.
5) Add Text: Edit the text and you can change text color, border color,
shadow color, font size (depending on language), and italic the font.
Press the up, down, left or right navigation key to move the text.
Press the center navigation key to stamp the text.
6) Adjustment: you can adjust brightness, contrast, saturation, hue, and
color (RGB) of the image.
7) Flip: you can flip the image in horizontal left/right, vertical up/down.
8) Expand Canvas: when the image is smaller than 240x320 pixels, you
can expand canvas size to full screen.
9) Help: you can get the method how to add effect, frame, icon and text.
Image Tile
You can edit photo image by using several shots you saved at Photo
Viewer and combine them in one frame. You can select the layout (2