
User Guide Owner's manual
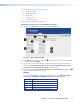


OSD Sub-menu
The OSD sub‑menu allows you to determine what information is overlaid on the
loop‑through display.
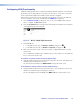
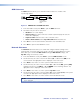
OSD
MENU
NEXT
OSD
[Disable]
NEXT
Disable
Device Name
Input Resolution
Both
Figure 77. VNE 250 Encoder OSD Sub-menu
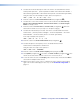
1. In the main OSD screen, press Next to open the OSD sub‑menu.
2. Use either rotary encoder to select from:
z Disable the on‑screen display.
z Device name (if the device name has not been set previously by the user, the
DeviceID is displayed).
z Input resolution and frame rate of the connected source.
z Both the Device Name and the Input Resolution with the frame rate.
3. Press Next to save the selected values and return to the main OSD screen.
4. Press Menu to open the main Network screen.
Network Sub-menu
The Network sub‑menu allows you to review and configure network settings for the
streaming and control ports and for the system controller. The three upper level screens,
which allow you to review the LAN1-Control settings, LAN2-Stream settings, and
SysCtrl settings are read‑only screens.
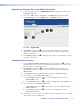
1. In the main Network screen, press Next to open the LAN 1-Control screen.
2. Use the left rotary encoder to select the IP address (IP) or subnet mask (SM) for the
control network. The appropriate value is displayed on the LCD screen.
3. Press Next for less than 3 seconds to open the LAN 2‑Stream screen.
4. Use the left rotary encoder to select IP address (IP), subnet mask (SM), gateway (GW),
maximum transmission unit (MTU), or Mode (MODE) for the streaming network. The
appropriate value is displayed on the LCD screen.
5. Press Next for less than 3 seconds to open the Sys Ctrl screen.
6. Use the left rotary encoder to select IP address (IP) or port number (Port) for the system
controller. The appropriate value is displayed on the LCD screen.
7. Press Next for less than 3 seconds to return to the main Network screen.
NOTE: These screens are read only. They allow you to select and view a parameter but
not to change it.
VNM 250 • Front Panel Menu Configuration 94