
Setup Guide


4 SMX System MultiMatrix Switcher • Installation
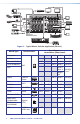
The Ethernet connection indicator LEDs marked "Link" and "Act"
indicate the status of the SMX Ethernet connection. The Link LED
lights green when connected to an Ethernet LAN, and the Act LED
flickers amber, as the devices communicate.
NOTE: Do not use standard telephone cables, as they do not
support Ethernet or fast Ethernet. Do not stretch or bend
cables as transmission errors could occur.
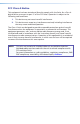
Remote port — For serial RS-232 or RS-422 control, connect a host
computer or control system through this 9-pin D connector. RS-232
protocol (default values):
• 9600 baud • 1 stop bit • no parity • 8 data
bits
• no flow
control
NOTE: See the SMX User Guide for more details.
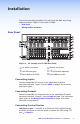
Connecting Power
Plug in a standard IEC power cord from a 100 to 240 VAC, 50-60 Hz
power source into the rear panel.
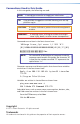
Setting Plane Addresses
Set the plane address (0-15) of each I/O board with the
16 position (0-F) rotary encoder. Each board can be set
to any plane address, including multiple boards to the
same address.
Installing Additional I/O Boards
The I/O boards used in any installation will vary and can be installed
and changed as desired.
NOTE: All boards are hot-swapable and can be installed without
shutting down the SMX or removing the power.
See Installing New Boards on page 38 to reconfigure or populate the
SMX frame.
Wiring Audio Connectors
Audio input connectors — Connect audio input devices to the
3.5 mm, 5-pole captive screw connectors (up to two groups of eight
sets possible). Wire the input connector for the appropriate signal
type (see gure 3).
Do not tin the wires!
ADDRESS