
Installation guide


Installation
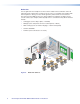
Overview
This section provides an overview of the ve stages of installation for the VoiceLift
system and the steps required for each stage.
Stage 1 — Install the VLR 102 Receiver
Choose one of these installation types:
1a. Drop ceiling
c Cut a hole in the ceiling tile (page 17).
c Mount the receiver housing to the ceiling tile (page 17).
c (Optional) Attach a conduit to the back plate if needed (page 17).
1b. Junction box
c Install the junction box (page 18).
c Attach the receiver housing to the junction box (page 18).
c Attach a conduit to the junction box if needed (page 18).
1c. Wall or other hard surface
c Install a raceway if needed (page 19).
c Mark the mounting screw hole locations on the surface (page 19).
c If using a raceway, remove the appropriate knockout in the receiver
housing (page 19).
c Mount the receiver housing to the surface (page 20).
1d. Pole
c Attach the pole to the ceiling (page 21).
c Mount the receiver housing to the pole (page 21).
Stage 2 — Install the FF 120 Speakers (VLS Only)
c Cut the ceiling tile (page 23).
c Install the speakers in the drop ceiling (page 23).
c (Optional) Install a seismic safety cable at each speaker location (page 24).
c Terminate the speaker cable for the PVS switcher (page 24).
Stage 3 — Install the PVS 405D Switcher (VLS Only)
c Install the PoleVault switcher (page 26).
See the PoleVault Systems Featuring the PVS 405D Switcher Installation Guide
for the procedures.
VoiceLift System with PVS 405D Installation Guide • Installation — Overview 13