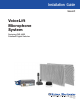
Installation Guide VoiceLift VoiceLift Microphone System Featuring PVS 405D PoleVault Digital Switcher 68-2548-20 Rev.
Safety Instructions Safety Instructions • English WARNING: This symbol, , when used on the product, is intended to alert the user of the presence of uninsulated dangerous voltage within the product’s enclosure that may present a risk of electric shock. ATTENTION: This symbol, , when used on the product, is intended to alert the user of important operating and maintenance (servicing) instructions in the literature provided with the equipment.
FCC Class A Notice This equipment has been tested and found to comply with the limits for a Class A digital device, pursuant to part 15 of the FCC rules. The Class A limits provide reasonable protection against harmful interference when the equipment is operated in a commercial environment. This equipment generates, uses, and can radiate radio frequency energy and, if not installed and used in accordance with the instruction manual, may cause harmful interference to radio communications.
Conventions Used in this Guide Notifications The following notifications are used in this guide: CAUTION: A caution indicates a situation that may result in minor injury. ATTENTION: Attention indicates a situation that may damage or destroy the product or associated equipment. NOTE: A note draws attention to important information.
Contents Introduction........................................................... 1 Stage 2: Mounting the FF 20 Speakers..... 22 About this Guide................................................ 1 About the VoiceLift System................................ 1 Application Diagram........................................... 2 Planning the Installation..................................... 3 Receiver Coverage......................................... 3 Room Considerations.....................................
vi VoiceLift System with PVS 405D Installation Guide • Contents
Introduction This section provides an overview of the VoiceLift System and gives instructions for planning the installation and preparing the site in which the system will operate. It also provides a listing of the available system kits and their contents. Topics include: • About this Guide • About the VoiceLift System • Application Diagram • Planning the Installation • Inventory About this Guide This guide provides steps to install and connect each component of the Extron VoiceLift System.
Application Diagram The application diagram below shows a typical classroom installation incorporating the VoiceLift System. VLP 202 Pendant Microphone Tx S G W P R EGRAHC E r tx no NO /FFO GHC/ETUM IN AUDIO ER Extron FF 120 IN COMPUT IN AUDIO R IN VIDEO 2 AUX VIDEO OFF 3 ON PC 4 CONFIG IMAGE MUTE 104 TCP/IP Network IP Plus MLC Extr on VLC 202 Desktop Charging Station Figure 1.
Planning the Installation Before you begin the installation, consider the major factors discussed in the following sections to ensure that the installation of the VoiceLift System is as smooth and trouble free as possible and that the result meets the needs of the users. Placement of the receiver (sensor location) is very important for optimal performance of the VoiceLift System.
Room Considerations The following room factors are important to consider when you are planning the installation of a VoiceLift system: Interference and noise sources Infrared and radio frequency noise can reduce the performance of the microphone system. To minimize noise in the system, avoid mounting the VoiceLift receiver near the following items: • Lighting, fluorescent or incandescent — Keep the receiver at least 2 feet (61 centimeters) away from a light source.
Line-of-sight obstructions between microphone and receiver A clear line of sight between the microphone and the receiver is critical for best performance.
Reflection Line of sight from the microphone to the receiver is ideal; however, reflection of the IR signal also plays a part in the coverage for most rooms. For example, if the speaker with the microphone is facing a screen, the IR signal may reflect off the screen surface to the receiver in the middle of the room. Ideal conditions for reflection are light colored, smooth surfaces (for example, white drywall).
Receiver Location The best location to mount the receiver is on the ceiling in the center of the classroom. If the receiver is wall-mounted, center it on the wall between 6 feet (1.8 meters) and 12 feet (3.6 meters) from the floor. These locations maximize the coverage and line of sight to the microphone. Avoid the corners of the room, alcoves, bays, or sheltered areas that can restrict coverage. If the ceiling is over 12 feet (3.
PoleVault Switcher Location The PoleVault switcher can be mounted anywhere in the room, because the volume controls are on the microphone. However, placing the switcher near the ceiling makes cabling and upgrading to a full PoleVault system easier. WARNING: Structural ceiling failure could cause serious injury or death. Check the structural ceiling to ensure that it can handle a load four times the weight of the final setup.
Inventory The VoiceLift VLS System kit is available in three packaged configurations: • VLS 1000D: Contains one VLP 102 Pendant Microphone, a VLR 102 Receiver, a wall charger, and two FF 120 Flat Field speakers. • VLS 2000D: Contains two VLP 102 Pendant Microphones, a VLR 102 Receiver, a wall charger, a VLC 102 Charging Station, and two FF 120 speakers.
FF 120 42-120-03 VoiceLift VLS 2000DH System 42-239-22 INPUTS OUTPUT AUDIO OUT L 1/2 POWER 12V 3A MAX SIG 3/4 LINK SIG PAGING SENSOR +V INPUT 5 L PVT IN R HDMI LINK PVS 405D AMPLIFIED AUDIO OUT DO NOT GROUND OR SHORT 4/8 SPEAKER Ω OUTPUTS VOICELIFT AUX OVER PVT R PVT IN L R LAN 1 LAN 2 LAN 3 REMOTE IR RS-232 S G Tx Rx G PVS 405D PoleVault Switcher VLR 102 IR Receiver (2) FF 120 Speakers (1) VLP 202 Pendant Microphone and (1) VLH 102 Handheld Microphone (1) 2-pole Captive Scre
Installation Tools Extron recommends the following equipment (not provided) to ensure that the VoiceLift System is properly installed.
Items Not Included The following items are not included. However, some or all of them may be needed for the installation at your particular site.
Installation Overview This section provides an overview of the five stages of installation for the VoiceLift system and the steps required for each stage. Stage 1 — Install the VLR 102 Receiver Choose one of these installation types: 1a. Drop ceiling c Cut a hole in the ceiling tile (page 17). c Mount the receiver housing to the ceiling tile (page 17). c (Optional) Attach a conduit to the back plate if needed (page 17). 1b. Junction box c Install the junction box (page 18).
Stage 4 — Connect the VLR 102 Receiver to the PoleVault System c Pull the cables to the receiver (page 29). c Connect the cables to the receiver (page 29). c Attach the receiver dome to the housing (page 30). c Pull the cables to the PoleVault switcher (page 31). c Connect the cables to the PoleVault switcher (page 32). Stage 5 — Configure and Test the System c Set up the microphones (page 33). c Set the microphone gain and feedback suppressor (FBS) (page 34).
Stage 1: Mounting the Receiver This stage consists of installing the VLR 102 receiver in a drop ceiling or on a wall. Receiver Housing and Back Plate Back Plate Conduit Knockouts (2) Raceway Knockouts (2) Receiver Housing Figure 9. Receiver Housing and Back Plate Where it goes: The housing attaches to the receiver dome, and the back plate mounts to a ceiling tile or a wall. What it does: Protects the receiver base plate and connectors.
Stage 1a: Installing the VoiceLift Receiver in a Drop Ceiling (page 17) Stage 1b: Installing the VoiceLift Receiver to a Junction Box (page 18) Stage 1c: Installing the VoiceLift Receiver to a Wall (page 19) Stage 1d: Installing the VoiceLift Receiver on a Pole (page 21) Figure 11. Diagrams of Stage 1 Mounting Options NOTE: Observe all local and national building and safety codes to ensure that the installation meets all regulatory standards.
Stage 1a — Installing the Receiver in a Drop Ceiling 1. Cut a hole in the ceiling tile. a. Remove the ceiling tile in which the receiver will be installed. b. Determine the receiver location, then cut a hole in the ceiling tile 2 to 3.5 inches (5 to 9 cm) in diameter, using a circular (shown at right) or other type of saw (saws are not included).
Stage 1b — Installing the Receiver to a Junction Box 1. Install the junction box. • Install the junction or ceiling box (not included) flush with the mounting surface (follow the instructions provided with the junction box). • Use a one-gang plaster ring (Raco 772) if the junction box is larger than one‑gang. WARNING: Risk of electric shock. Improper installation may result in electrical shock or serious injury.
Stage 1c — Installing the Receiver on a Wall or Other Hard Surface 1. Install a raceway if needed. If using a raceway for the cables, install it at the appropriate location on the mounting surface. NOTE: Raceway knockouts on the receiver housing fit common types of raceways such as the Wiremold 500/700 series and the Wiremold 2400 series. Follow the instructions provided by the manufacturer to install the raceway. a Install the raceway (if needed). b Mark mounting screw locations in the surface. 2.
4. Mount the receiver housing to the surface. If not using a raceway: Mount the receiver housing and base to the surface, using the appropriate screws for the type of surface. NOTE: Screws and wall anchors are not included. d Mounting without a raceway If using a raceway: Position the receiver housing with the raceway inserted through the knockout.
Stage 1d — Installing the Receiver on a Pole 1. Attach the pole to the ceiling. Attach the required length of ¾-inch (19 mm) diameter electrical metal tubing (EMT) or downrod to the ceiling. NOTE: You can use ½-inch tubing for the pole. However, the RJ-45 connector on the twisted pair communication cable does not fit through this size pole. To use tubing this size, you must remove the connector from the cable, pull the cable through the pole, then reterminate the cable.
Stage 2: Mounting the FF 20 Speakers This stage consists of installing and connecting the FF 120 speakers (VLS only). NOTE: The installation must conform to national and local electrical codes and UL requirements (see the FF 120 Flat Field Speakers User Guide for details). FF 120 Flat Field Ceiling Speakers FF 120 Speakers (2) Terminal Cover Cable Clamps (2) Seismic Tabs (3 per side) Anchor Rings (2) T-rails (2) Figure 12.
Speaker Mounting Procedure 1. Cut the ceiling tile. See the FF 120 Flat Field Speaker User Guide, available at www.extron.com, for detailed instructions. a. Remove the ceiling tiles where the speakers will be installed. TIP: For ease of working on the speaker when it is replaced on the T-frame, remove the adjacent tiles. Å Mark a line on the ceiling tile. û Cut the ceiling tile on the marked line. b. Mark a line 12 inches (30 cm) from and parallel to one of the short edges of the tile. c.
3. (Optional) Install a seismic safety cable at each speaker location. a. Mark, drill, and install a lag eye bolt for the seismic safety cables (not included) in the ceiling above the speaker location. Cable Clamp Adapter Top Terminal Cover Seismic Anchor Ring b. Pass the seismic cable through the anchor ring down to the nearest seismic tab and twist the end around the cable five times. Anchor this end to a lag eye bolt screwed into the structural ceiling.
FIG_Speaker Wiring Examples AMPLIFIED OUTPUTS AMPLIFIED OUTPUTS 8 Ohms Mono + 8 Ohms Mono + L Stereo L+ R Stereo R+ L Mono – Mono – R Stereo L– 8 Ohm Load Stereo R– 8 Ohm Load Stereo Output Dual Mono Output AMPLIFIED OUTPUTS 4/8 Ohms Mono + or Stereo L+ 8 ohms 8 ohms 8 ohms 4 Ohm Total Load Mono – or Stereo L- Two 8 ohm speakers wired in parallel equal a 4 ohm load.
Stage 3: Installing the PoleVault Switcher This stage consists of installing the PVS 405D PoleVault Switcher (VLS only). See the PoleVault Systems Featuring the PVS 405D Switcher Installation Guide, delivered with your PVS 405D switcher and also available at www.extron.com, for complete switcher installation procedures.
PoleVault Switcher Installation 1. For assistance in selecting a location for the PVS 405D switcher within the room, see Room Considerations on page 4. 2. Install the PVS 405D, following the instructions in the PoleVault Systems Featuring the PVS 405D Switcher Installation Guide and the provided mounting kit user guide. 3. Make sure that the PVS 405D front and rear panels are accessible until installation and testing of the VoiceLift System is complete.
Stage 4: Connecting the Cables This stage consists of connecting the receiver and speakers to the PoleVault switcher. Receiver Dome RJ-45 Connectors Locking Tab (4) DIP Switches Locking Tab with Arrow Captive Screw Connectors Figure 16. Receiver Dome Features Where it goes: Attaches to the receiver housing. What it does: Receives signals from the microphone and sends them to the switcher or amplifier.
Procedure 1. Pull the cables to the receiver. a. Pull the STP cable through the receiver base, along with any other cables that will be attached to the receiver (RS-232, STP cable to a secondary receiver, and so on). Ä Pull the cables through the receiver base. Å Place the cables in the raceway and replace the raceway cover. Ç Connect the STP cable to the Receiver Out RJ-45 port. b. If mounting the receiver to a wall and using a raceway, place the cables in the raceway and replace the raceway cover.
2. Connect the cables to the receiver (continued). OUT O 1 N 2 CTS-2 b. Install any optional devices and connect their cables to the appropriate ports on the receiver base. IN RS-232 Tx Rx TONE MIX AUX IN + CTC IN c. If desired, set the Tone DIP switch on the receiver base: RLY NO C • Up = Enable the microphone volume change alert tone (default). • Down = Disable the microphone volume change alert tone. O 1 N NOTE: The Mix DIP switch should always be set to Down.
3. Attach the receiver dome to the housing (continued). Dot on Housing b. Twist the dome to the right (clockwise) until it locks in place (approximately 1/8 turn). The dot on the rim of the housing should now align with the arrow on the dome locking tab. Arrow on Tab õ The arrow aligns with the dot when the dome is in place. 4. Pull the cables to the PoleVault switcher. a. Remove the bottom covers of the PMK 560 projector mount. b.
5. Connect the cables to the PoleVault switcher. a. Disconnect the power cable from the PoleVault switcher. b. Plug the STP cable into the VoiceLift Receiver RJ-45 port on the switcher. c. Connect cable from the speakers to the Amplified Audio Out connector on the switcher (VLS systems only). d. Reconnect the power cable to the switcher.
Stage 5: Testing the System This stage consists of configuring, setting up, and testing the VoiceLift System. 1. Set up the microphones. Set up each microphone in your VoiceLift system as follows: a. Set the channels using the rotary switch. A and C are at 2.3 MHz, and B and D are at 2.8 MHz.
1. Set up the microphones (continued). e. Attach the lanyard to the VLP 202 (pendant microphone only). i. Press the lanyard into the guides on either side of the lanyard clip. Guides on Lanyard Lock Clip Press lanyard into guides. Top View ii. Press the top of the microphone rear clip to raise it. Lock † iii. Slide the lanyard lock under the clip and release the clip. f. Attach the lanyard to the pendant microphone. Charge the microphone for 5 hours. 2.
2. Set the microphone gain and feedback suppressor (FBS) (continued). Breakaway Clasp b. Instructor: Place the lanyard with the pendant microphone around your neck and adjust the lanyard by sliding it through the lanyard lock until the microphone is approximately 4 inches (10.2 cm) below your chin (see figure É). Student: Hold the pendant or handheld microphone approximately 4 inches (10.2 cm) from your mouth. ~ 4 inches (10.2 mm) Lanyard Lock OFF/MUTE ON PWR Extro n c.
h. Lower the volume on the microphone to an appropriate level: PEAK • The level of your speaking voice should be enhanced, but not loud enough to sound like a paging system. • Check the LEDs on the PVS switcher. The green Normal LED should light when you speak, with the red Peak LED blinking occasionally. NORMAL Level set too high. Lower input gain. Level has been properly adjusted. SIGNAL M Signal threshold -20 dBV (-18 dBu) Check the PVS switcher LEDs while lowering the microphone volume.
Installation Example — Setting Up an Instant Alert This section describes an example of an optional instant alert setup, in which the relay port of the VLR 102 is connected to a Digital I/O port of an Extron MLC 104 IP Plus. This enables you to send out e-mail alerts from the classroom by holding down both Volume buttons for 3 seconds. 1. Connect the receiver to the MLC 104 IP Plus. a.
1. Connect the receiver to the MLC 104 IP Plus (continued). c. Pull the other end of the communication cable to the MLC 104 IP Plus location. d. Connect the other end of the communication cable to one of the direct-insertion Digital I/O ports on the MLC: • Insert the black wire into the Ground port. • Insert the red wire into the first available Digital I/O port. ü Connect the communication cable to the Digital I/O port of the MLC. 2. Configure the MLC 104 IP Plus. a.
Extron Warranty Extron Electronics warrants this product against defects in materials and workmanship for a period of three years from the date of purchase.
Contact information Extron Headquarters +1.800.633.9876 (Inside USA/Canada Only) Extron USA - West Extron USA - East +1.714.491.1500 +1.919.850.1000 +1.714.491.1517 FAX +1.919.850.1001 FAX Extron Europe +800.3987.6673 (Inside Europe Only) +31.33.453.4040 +31.33.453.4050 FAX Extron Asia +65.6383.4400 +65.6383.4664 FAX Extron Japan +81.3.3511.7655 +81.3.3511.7656 FAX Extron China +86.21.3760.1568 +86.21.3760.1566 FAX Extron Middle East +971.4.299.1800 +971.4.299.