
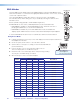
Manual


Ü
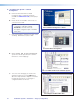
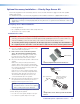
Slide the covers onto the PMK 550.
4.— Final Installation
a. Slide the covers of the PMK 550 onto the base
plate, ensuring the power cable can exit the unit
through the power cable access slot.
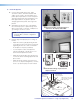
b. Using a 5/32 inch hex wrench, tighten down
the four screws on the PMK 550 to secure the
sides in place.
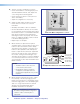
c. Check and tighten the adjuster plate locking
screws on the projector bracket.
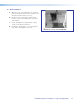
d. Hole plugs can be used to cover any exposed
holes in the slotted pipe if necessary.
PoleVault IP Systems• Installation — Stage 5 (Configuration) 41