
User Guide Manual
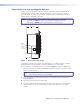

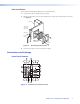

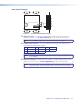
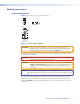
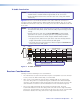
Table Of Contents
MTP U T A D • Installation and Operation 7
Final Installation
After testing and making any adjustments, do the following:
1. At the power outlet, unplug the power supply.
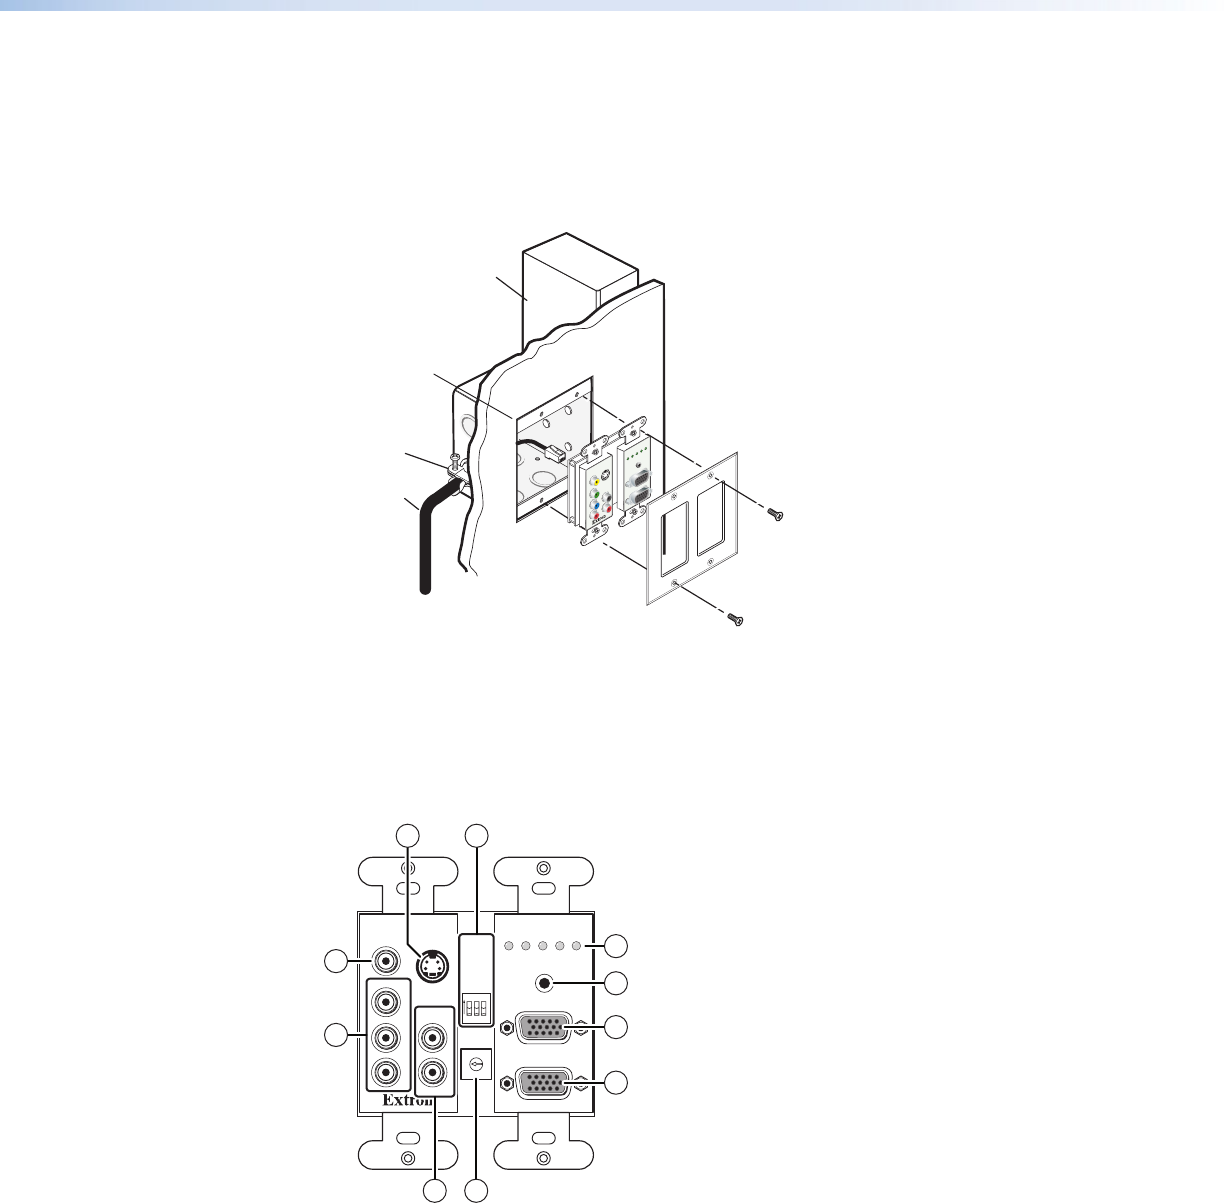
2. Mount the transmitter into the box and attach the supplied Decora faceplate to the unit
(see figure 3).
Decora
Faceplate
Wall opening
is flush with
edge of box.
Installation
Cable
Cable Clamp
Wall Stud
4
5
1
2
0
E
8
7
6
3
9
A
D
B
C
F
DDC
RESOL.
SWITCH MODE
PRE-PEAK
REFRESH 50/60Hz
ON
1
2
3
AUDIO INPUT
COMPUTER INPUT
MONITOR OUT
PWR
VID
Y/C
YUV
RGB
INPUTS
VIDEO S-VIDEO
AUDIO
L
R
Pr
Pb
Y
YUV
MTP U T A D
Transmitter
Figure 3. Mounting the Transmitter
3. At the power outlet, reconnect the power supply.
Connections and Settings
Front Panel Features
4
5
1
2
0
E
8
7
6
3
9
A
D
B
C
F
INPUTS
VIDEO
COMPUTER INPUT
MONITOR OUT
S-VIDEO
PWR
VIDS-VIDYUVPC
AUDIO
L
RPr
Pb
Y
YUV
ON
12
3
EDID
SELECT
CONTACT
PRE-PEAK
50 Hz REFRESH
AUDIO INPUT
3
10
5
9
4
1
2
7
6
YUV
8
Figure 4. Transmitter Front Panel Features