
Setup Guide Instruction Manual
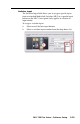
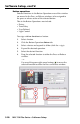
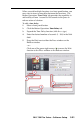
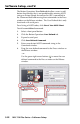
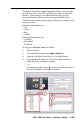
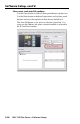
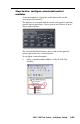
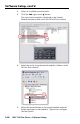
Table Of Contents
- Front cover
- Safety Precautions
- Safety Precautions (Chinese) and FCC Class A Notice
- Table of Contents
- Ch. 1: Introduction
- Ch. 2: Hardware Setup
- Ch. 3: Software Setup
- Creating a Global Configurator Project File
- Configuring a New Device
- Step six: configure e‑mail server (IP models only)
- Step seven: configure e‑mail messages (IP models only)
- Step eight: configure contacts (IP models only)
- Step nine: assign serial device drivers
- Step ten: assign IR drivers
- Step eleven: configure the front panel
- Step twelve: configure associated control modules
- Step thirteen: create a shutdown schedule
- Step fourteen: create a lamp hour notification (IP models only)
- Step fifteen: create a disconnect notification (IP models only)
- Step sixteen: build the Global Configurator file
- Step seventeen: upload the Global Configurator file
- Step eighteen: launch GlobalViewer (IP models only)
- Testing the GlobalViewer pages
- Warranty
- Back cover:checklist and contact information
MLC 104 Plus Series • Software Setup
3-21
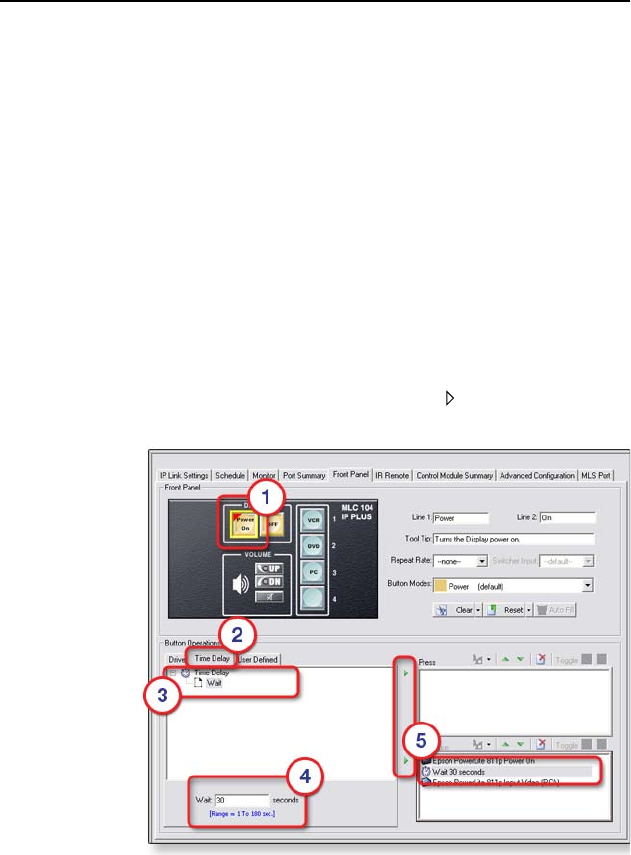
When you add multiple functions to a front panel button, you
may want to insert a time delay between the functions. The
Button Operations Time Delay tab provides the capability to
add a delay of from 1 second to 180 seconds to the press or
release action of a button.
To add a time delay:
1. Select a front panel button.
2. Click the Button Operations Time Delay tab.
3. Expand the Time Delay function (click the + sign).
4. Enter the desired number of seconds (1 - 180) in the Wait
eld.
5. Drag the Wait icon to either the Press window or the
Release window.
- or -
Click one of the green right arrows () to move the Wait
function to the Press window or the Release window.