
User Guide User Manual
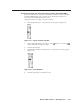

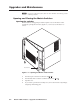
Table Of Contents
- Chapter 1 • Introduction
- Chapter 2 • Installation
- Chapter 3 • Virtualization/Control Software
- Explaining Virtual I/O Switching
- Virtualization/Control Program
- Creating a virtual I/O switching system (map)
- Reassigning virtual I/O connectors
- Creating rooms within the system
- Remote controlling the Matrix 12800 system
- Programming the matrix offline (emulate mode)
- Saving and restoring matrix settings
- Creating program byte strings
- Ethernet operation
- Windows buttons and drop boxes
- Special Characters
- Chapter 4 • Programming Guide
- Chapter 5 • Web Operations
- Chapter 6 • Upgrades and Maintenance
- Opening and Closing the Matrix Switcher
- Removing and Installing the Fan Assembly
- Removing and Installing the Power Supply Module
- Replacing the Fuse
- Removing and Cleaning the Filter
- Setting the DIP Switches
- Removing and Installing the Controller Card and Replacing the Firmware
- Removing and Installing the I/O Card and Setting the Audio Gain
- Troubleshooting
- Appendix A • Ethernet Connection
- Appendix B • Reference Information
- Inside rear cover: warranty
Matrix 12800 Switchers • Upgrades and Maintenance
6-2
Upgrade and Maintenance
PRELIMINARY
N
For proper cooling and air flow, all access doors should be closed during normal
switcher operations.
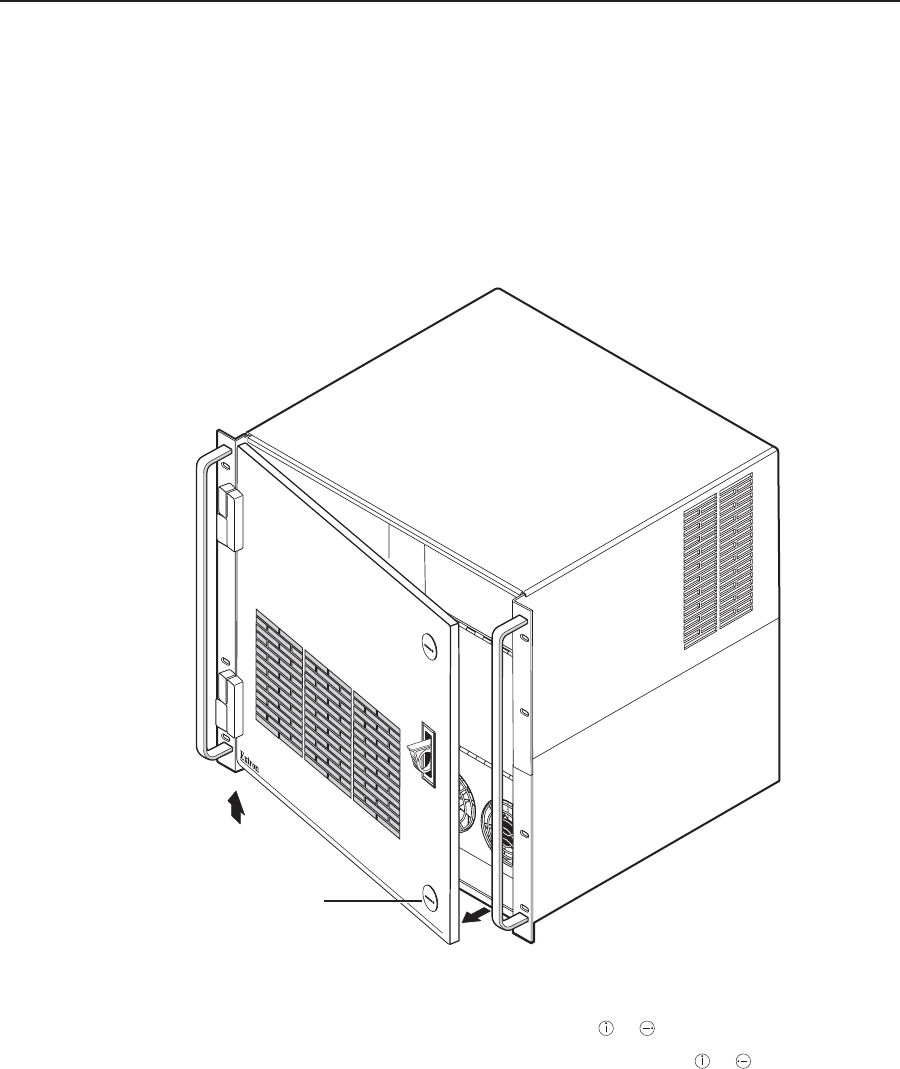
Opening and Cloing the Matrix Switcher
Opening the witcher
All maintenance and upgrade procedures require access to the interior of the
switcher by opening the front door (figure 6-1). Gain access to the interior as
follows:
MATRIX 12800
Door Fastener
Figure 6-1 — Opening the Matrix 12800 switcher.
1. Turn the top door fastener clockwise from to .
2. Turn the bottom door fastener counterclockwise from to
.
3. Open the door.
4. If you need to open the fan assembly door, remove the front door by lifting it
straight up off the hinge pins.