
User Guide User Manual
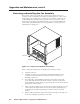
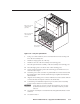
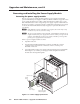
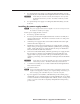
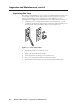
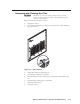
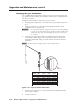
Table Of Contents
- Chapter 1 • Introduction
- Chapter 2 • Installation
- Chapter 3 • Virtualization/Control Software
- Explaining Virtual I/O Switching
- Virtualization/Control Program
- Creating a virtual I/O switching system (map)
- Reassigning virtual I/O connectors
- Creating rooms within the system
- Remote controlling the Matrix 12800 system
- Programming the matrix offline (emulate mode)
- Saving and restoring matrix settings
- Creating program byte strings
- Ethernet operation
- Windows buttons and drop boxes
- Special Characters
- Chapter 4 • Programming Guide
- Chapter 5 • Web Operations
- Chapter 6 • Upgrades and Maintenance
- Opening and Closing the Matrix Switcher
- Removing and Installing the Fan Assembly
- Removing and Installing the Power Supply Module
- Replacing the Fuse
- Removing and Cleaning the Filter
- Setting the DIP Switches
- Removing and Installing the Controller Card and Replacing the Firmware
- Removing and Installing the I/O Card and Setting the Audio Gain
- Troubleshooting
- Appendix A • Ethernet Connection
- Appendix B • Reference Information
- Inside rear cover: warranty
Upgrade and Maintenance, cont’d
Matrix 12800 Switchers • Upgrades and Maintenance
6-8
PRELIMINARY
Replacing the Fue
The primary and redundant AC power circuits are independently fused. The fuses
are accessible on the rear panel of the switcher. If a fuse opens, the associated
primary or redundant power loop shuts down. If this BME does not have
redundant power supplies, the switcher shuts down. Replace the fuse as follows:
1. On the rear panel, insert the flat blade end of an Extron Tweeker or small
screwdriver under the tab on the bottom of the fuse holder and gently pry on
the fuse holder until it protrudes from the rear panel (figure 6-6).
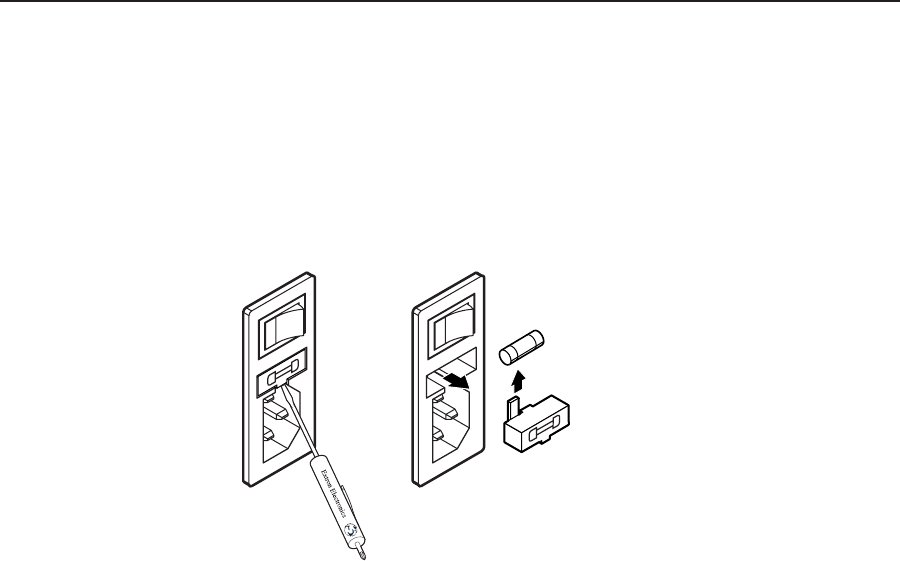
Fuse
Figure 6-6 — Fuse replacement
2. Pull the fuse holder clear of the rear panel.
3. Remove the fuse from the fuse holder.
4. If test equipment is available, you can check the fuse.
5. Place a new 5A/250V time delay fuse in the fuse holder.
6. Slide the fuse holder into the rear panel until it is flush with the panel.