
User Guide Manual


HDXP Plus Series Switchers • Operation 28
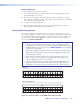
3. Press and release one of the Control buttons to select a group number:
• Press the Enter button to select group 1.
• Press the Preset button to select group 2.
• Press the View
<
button to select group 3.
• Press the Esc
>
button to select group 4.
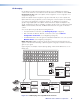
In the figure 39 example, group 1 is being selected.
CONTROL
PRESET
ENTER
ESCVIEW
Press the Enter b
utton to select group 1.
The b
utton lights amber to indicate the selection.
Group# 1 2 3 4
Figure 39. Selecting an I/O Group Number
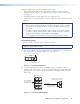
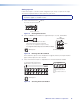
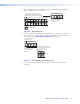
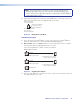
4. Select the desired inputs and outputs to assign to the group by pressing their input
and output buttons. In the example below, inputs and outputs 1 through 4 are being
selected.
1 2 3 4 5 6 7 8
INPUTS
17 18 19 20 21 22 23 24
1 2 3 4 5 6 7 8
OUTPUT
Press and release Input buttons 1 through 4. The selected buttons light.
Press and release Output b
uttons 1 through 4. The selected buttons light.
Figure 40. Assigning Inputs and Outputs to a Group
5. In order for an input group to be functional, you must create more than one group.
Repeat steps 3 and 4 to create a second input group.
6. If you want to create more I/O groups, repeat steps 3 and 4 again.
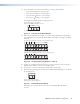
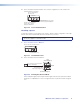
7. When finished grouping, press and release the Matrix and Preview buttons to exit the
I/O grouping mode.
I / O
MATRIX PREVIEW
Press the Matr
ix and Preview button
simultaneously to e
xit I/O grouping mode.
Figure 41. Exiting I/O Grouping Mode
Alternatively, you can allow the mode to time out by waiting approximately 30
seconds.