
User Manual


Table Of Contents
- DMS Configurable Digital Video Matrix Switchers
- Safety Instructions
- FCC Class
- Contents
- Introduction
- Installation
- Operation
- Programming Guide
- Matrix Software
- HTML Operation
- Installation
- Operation
- Programming Guide
- Matrix Software
- HTML Operation
- Maintenance and Modifications
- Ethernet Connection
- Warranty and Contact Info
DMS 1600, DMS 2000, DMS 3200, and DMS 3600 • Operation 36
Selecting the Rear Panel Remote Port Protocol and Baud Rate
The switcher can support either RS-232 or RS-422 serial communication protocol, and can
operate at 9600, 19200, 38400, and 115200 baud rates. The settings of these variables
can be viewed and changed from the front panel.
View and configure the serial communications settings of the switcher as follows:
1. Select Serial Port Selection and Configuration mode: Simultaneously press and
hold the two top rightmost input buttons.
2 seconds
•
•
•
C O N T R O L
PRESET
ENTER
ESCVIEW
15 16
4
15 16
4
910
8
17 186
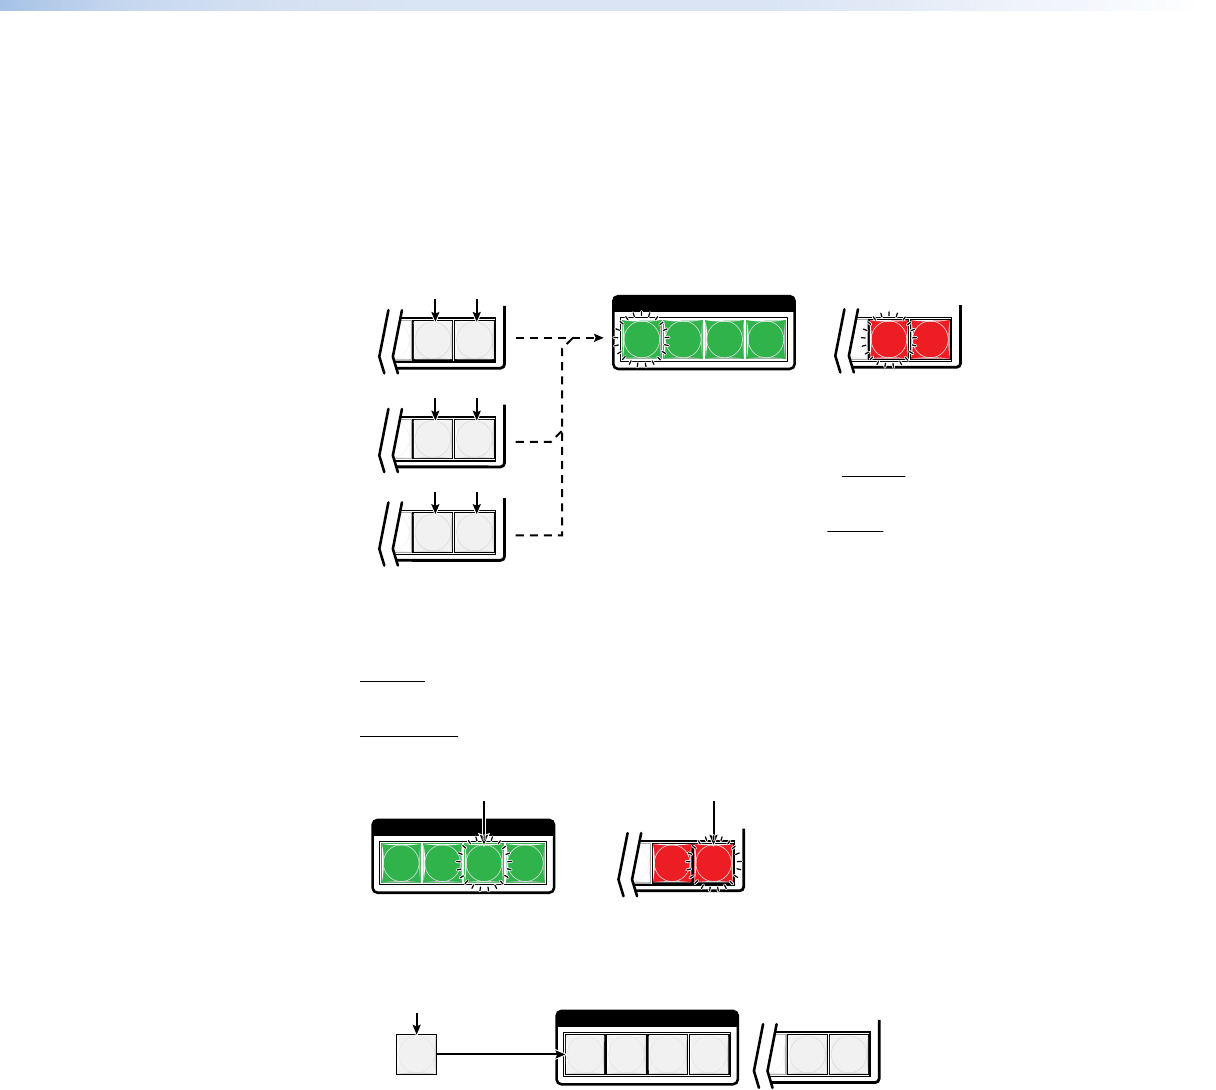
The flashing Control button indicates the baud rate as follows:
Enter — 9600 Preset — 19200
View — 38400 Esc — 115200
The flashing input button indicates the protocol as follows:
Input 15 (9, 17) — RS-232 Input 16 (10, 18) — RS-422
In this example, the port is set to RS-232 at 9600 baud.
Press and hold the buttons.
All Control buttons light with
one flashing.
Release the buttons.
Inputs 15 and 16 (DMS 1600, DMS 3200) or
Inputs 9 and 10 (DMS 2000) or
Inputs 17 and 18 (DMS 3600)
both light with one button flashing.
DMS 1600
DMS 3200
DMS 2000
DMS 3600
2. Release the Input buttons.
3. Change a value: Press and release the button that relates to the desired value.
C O N T R O L
PRESET
ENTER ESCVIEW
15 16
4
Press and release the buttons to configure the port as follows:
Baud rate:
Enter — 9600 Preset — 19200
View — 38400 Esc — 115200
Serial protocol:
Input 15 (9, 17) — RS-232 Input 16 (10, 18) — RS-422
The selected buttons blink and the others remain lit.
In this example, the port is set to RS-422 at 38400 baud.
4. Exit Serial Port Selection and Configuration mode: Press and release any output
button.
C O N T R O L
PRESET
ENTER
ESCVIEW
5
15 16
4
All Control buttons and the Input 15 (9, 17) and Input 16 (10, 18)
buttons return to unlit or background illumination.
Press and release
an output button.
Rear Panel Operations
The rear panel has a Reset button that initiates four levels of resets (identified as modes
1, 3, 4, and 5 for the sake of comparison with an Extron IPL product). The Reset button is
recessed, so use a pointed stylus, ballpoint pen, or small screwdriver to access it.
For different reset levels, press and hold the button while the switcher is running or press
and hold the button while you apply power to the switcher.
See the table on the next page for a summary of the modes.