
Installation Guide
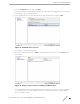
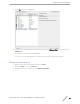
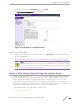
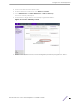
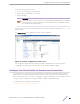
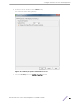
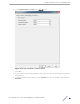
Table Of Contents
- Table of Contents
- Preface
- 1: V2110 Virtual Appliance Overview
- 2: Deploy the Virtual Appliance
- 3: Configure the Virtual Appliance
- 4: Configure vSwitches for the Virtual Appliance
- Index

4 Configure vSwitches for the Virtual
Appliance
Create a New Virtual Switch on the ESXi Server
Configure the Virtual Switch for Promiscuous Connections
Configure the Virtual Switch for Jumbo Frames Support
The Virtual Appliance has some specific requirements on the virtual switches (vSwitches) to which its
data plane ports (esa0, esa1) are connected. This section explains how to create a vSwitch on an ESX or
ESXi 4.1 U1 host that satisfies these requirements.
This section does not replace the vSphere ESX or ESXi documentation. The procedures described in this
section assumes that you have already logged into the vSphere client using credentials that grant full
administrative access to the vSphere ESX or ESXi host server.
Create a New Virtual Switch on the ESXi Server
This is an optional step since it is possible to reconfigure the virtual switch created by default when ESXi
is installed to support VLANs or another acceptable custom vSwitch might be configured on the host.
However, using separate vSwitches for the data plane trac helps isolate that trac from other virtual
devices, and permits the switch to be configured specifically to meet the needs of V2110.
Note
Alternatively, it is also possible to define more than one network (Port Group) on a single
vSwitch. All networks on the same vSwitch share the NICs assigned to the vSwitch.
1 Log into the vSphere client.
2 On the vSphere Client screen, select the vSphere server IP address or host name, then select the
Configuration tab.
3 Select Networking from Hardware.
4 Select Add Networking on the Networking screen.
ExtremeWireless™ V2110 Virtual Appliance Installation Guide 26