
Installation Guide


88 Brocade MLX Series and Brocade NetIron XMR Installation Guide
53-1004195-02
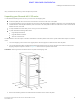
Installing a Brocade MLX-32 router
DRAFT: BROCADE CONFIDENTIAL
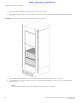
4. Slide the sides, top, and back of the crate backwards as one unit until it clears the pallet.
5. Save the crate (including the shipping panel) in case the router needs to be shipped again.
Installing a Brocade MLX-32 router in a rack
Make sure the rack or cabinet housing the router is adequately secured to prevent it from becoming
unstable or falling over.
Mount the routers you install in a rack or cabinet as low as possible. Place the heaviest router at the
bottom and progressively place lighter routers above.
Because of the weight of a fully loaded Brocade MLX-32 router, it is recommended that you install the router in a rack before installing
any modules and power supplies.
You can install one 32-slot router in a standard 2-post or 4-post 19-inch rack or open frame cabinet, in either a front-mount position or a
mid-mount position. You must provide eight standard #12-24 pan-head screws to secure the router in the rack. You will need a #2
Phillips screwdriver to perform this task.
NOTE
Because of the weight of a fully-populated 32-slot chassis, it is not recommended that you install your 32-slot router in a 2-post
rack or open cabinet. The preferred installation is in a 4-post rack or open cabinet. Refer to “Installing your 32-slot router in a
4-post rack or open cabinet” on page 95 for installation instructions
NOTE
If you are installing your device in a 2-post rack or open cabinet, you will need to purchase the Open Frame EIA 310-D Rack
Mount Kit.
Installation requirements
Allow 1 to 2 hours to complete this procedure. Your installation site must meet the following requirements to ensure correct installation
and operation:
• Provide 35 U of space in a 19 inch rack or open cabinet.
• Verify that the additional weight of the router does not exceed the weight limits for the rack or the floor.
• Ensure that an electrical branch circuit with the following characteristics is available:
- Required voltage and frequency as indicated in the hardware reference manual.
- Protection by a circuit breaker in accordance with local electrical codes.
- Supply circuit, line fusing, and wire size that conform to the electrical rating on the router nameplate.
- Grounded outlet compatible with the power cord and installed by a licensed electrician.
• Ensure that all equipment installed in the rack is grounded through a reliable branch circuit connection. Do not rely on a
secondary connection to a branch circuit, such as a power strip.
• Ensure that the rack is mechanically secured to support the router model.Ensure that the airflow available at the inlet air vents
does not exceed 40
o
Celsius (104
o
Fahrenheit).