
Installation Guide
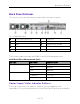
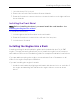
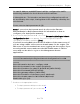
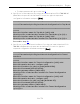
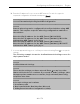
Table Of Contents
- Table of Contents
- About This Guide
- Engine Overview and Setup
- Configuration
- Reinstalling Engine Software
- Product Regulatory and Compliance Information

Installing the Engine into a Rack
13 of 39
1. Unlock the bezel if it is locked.
2. Remove the left end of the front bezel from rack handle.
3. Rotate the front bezel counterclockwise to release the latches on the right end from
the rack handle.
Installing the Front Bezel
Note: Before installing the bezel, you must install the rack handles. See
Installing the Engine into a Rack.
To install the front bezel:
1. Lock the right end of the front bezel to the rack handle.
2. Rotate the front bezel clockwise till the left end clicks into place.
3. Lock the bezel, if needed.
Installing the Engine into a Rack
A rack mounting kit and installation guide are included with the PV-A-305
engine. The rack mounting kit allows you to install the engine into a four-post
rack cabinet. Refer to the installation guide for complete installation instructions.
If you are table mounting the engine, ensure at least 6 cm of clearance on all
sides of the engine for proper ventilation.
If you are installing the engine in a rack:
1. Install the rack handles by aligning a rack handle with the two holes on each side of
the engine and attaching each handle to the engine with two screws as shown
below.