
Extreme API with Python
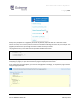
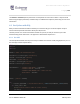

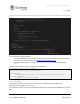
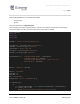
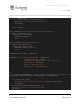
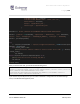

Table Of Contents
- 1 Preface
- 2 Introduction
- 3 EXOS APIs
- 4 VOSS API
- 5 XMC API
- 6 ExtremeCloud IQ API
- 7 Extreme Campus Controller API

Extreme API with Python
Page | 128
Part no.9036931-00 Rev AA February 2021
print(r.json())
Run this script on your test XIQ account. The following information is returned:
C:\Extreme API with Python> xiq2.py
{'data': {'status': 200, 'successMessage': 'Network Policy 382247794480476
applied to devices successfully.'}}
You have now successfully assigned a network policy to your EXOS switch.
6.2.3 Use Webhooks
Webhooks allow you to work in a reverse API, meaning instead of continuously requesting information
from the API, to monitor changes (for example in doing a hash of the answer to quickly locate a change),
you wait for the API to notify you when an event occurs. This approach is far more efficient and saves a
great deal of bandwidth and server processing time.
XIQ offers webhook services for Presence and Location.
To configure a webhook, and receive data, several steps are necessary:
- Presence Analytics must be enabled in the Network Policy for the AP
- The application, that receives the data from XIQ, must have subscribed to it
To test your webhook, you will be using the Webhook.site website. This service provides the URL you
need to configure a webhook. The XIQ webhook must send the data to this URL.
To subscribe to a webhook, you need to send a POST to the endpoint specified by the documentation.
The content of the body is also detailed there.
For example:
import requests
import os
import sys
import json
baseURL = "HTTPS://ie.extremecloudiq.com/"
clientSecret = os.environ.get('clientSecret')
clientId = os.environ.get('clientId')
redirectURI = 'HTTPS://foo.com'
authToken = os.environ.get('authToken')
ownerID = os.environ.get('ownerID')
subscriptionHeaders = { 'X-AH-API-CLIENT-SECRET': clientSecret,