
Deployment Guide
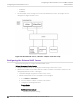

Table Of Contents
- Table of Contents
- Preface
- About Extreme Campus Controller Deployment
- Configuring DHCP, NPS, and DNS Services
- Centralized Site with a Captive Portal
- Centralized Site with AAA Network
- Deploying a Mesh Network
- Configuring an External NAC Server for MBA and AAA Authentication
- Manage RADIUS Servers for User Authentication
- External Captive Portal on a Third-Party Server
- Access Control Rule Admin Portal Access
- Deploying Centralized Web Authentication
- Deploying ExtremeCloud IQ - SE as an External Captive Portal
- Deployment Strategy
- Configuring an External Captive Portal Network
- Editing the Configuration Profile for Network and Roles
- Extreme Campus Controller Default Pass-Through Rule
- Adding Extreme Campus Controller as a Switch to ExtremeCloud IQ - Site Engine
- Editing the Unregistered Policy on ExtremeCloud IQ - Site Engine
- Editing the ExtremeCloud IQ - Site Engine Profile for Policy and Location-Based Services
- Deploying an ExtremeGuest Captive Portal
- Deploying Client Bridge
- Deploying an Availability Pair
- Deploying Universal APs
- Extreme Campus Controller Pair with ExtremeLocation and AirDefense
- ECP Local Authentication
- PHP External Captive Portal, Controller’s Firewall Friendly API
- Index

3. To edit the RADIUS Attribute settings:
• Select Add and provide the Attribute Group name.
• In the Attribute field, enter the following:
◦ Filter-Id=%FILTER_NAME%
◦ Filter-Id=Enterasys:version=1:%MANAGEMENT%policy=%POLICY_NAME%
◦ Login-LAT-Port=%LOGIN_LAT_PORT%
◦ Service-Type=%MGMT_SERV_TYPE%
Note
The Attribute Group is configured to ensure that ExtremeWireless APs function with
the appliance.
4. Save the Attribute Group, then select this group as the option in the RADIUS Attributes to Send
field.
5. Press OK.
NAC Manager
6. Go to Tools > Management
7. Select Configuration > Advanced NAC Configurations > AAA Configurations > Local Password
Repository > Default.
8. Add a new user.
Select Add and configure the following parameters:
• Display Name
• Username
• Password
9. Select Save.
10. In the Advanced Configuration window, navigate to NAC Configurations > Rule Components >
End-System Group.
11. Add a new End-System Group.
Add a new MAC entry for each MAC address of each client that should be successfully
authenticated.
12. Select Save.
13. In the Advanced Configuration window, navigate to NAC Configurations > Default.
14. Add a new rule.
From the End-System Group drop-down list, select the End-System Group that you previously
created.
15. In the Profile drop-down list, select Default NAC Profile.
Note
Assuming no prior configuration changes have been made to the Default NAC Profile, it
will send an Enterprise User Filter-ID.
16. Save the rule and move it up the list, just after the Assessment Warning rule.
17. Close the Advanced Configuration window and Enforce the NAC engine.
18. Once the Enforce is successful, close the window.
Configuring
an External NAC Server for MBA and AAA
Authentication Configuring the External NAC Server
Extreme Campus Controller Deployment Guide for version 5.46.03 79