
Deployment Guide
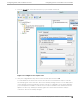
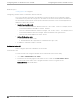
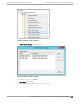
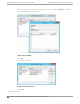
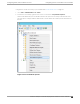
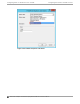
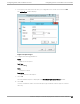
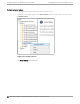
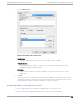
Table Of Contents
- Table of Contents
- Preface
- About Extreme Campus Controller Deployment
- Configuring DHCP, NPS, and DNS Services
- Centralized Site with a Captive Portal
- Centralized Site with AAA Network
- Deploying a Mesh Network
- Configuring an External NAC Server for MBA and AAA Authentication
- Manage RADIUS Servers for User Authentication
- External Captive Portal on a Third-Party Server
- Access Control Rule Admin Portal Access
- Deploying Centralized Web Authentication
- Deploying ExtremeCloud IQ - SE as an External Captive Portal
- Deployment Strategy
- Configuring an External Captive Portal Network
- Editing the Configuration Profile for Network and Roles
- Extreme Campus Controller Default Pass-Through Rule
- Adding Extreme Campus Controller as a Switch to ExtremeCloud IQ - Site Engine
- Editing the Unregistered Policy on ExtremeCloud IQ - Site Engine
- Editing the ExtremeCloud IQ - Site Engine Profile for Policy and Location-Based Services
- Deploying an ExtremeGuest Captive Portal
- Deploying Client Bridge
- Deploying an Availability Pair
- Deploying Universal APs
- Extreme Campus Controller Pair with ExtremeLocation and AirDefense
- ECP Local Authentication
- PHP External Captive Portal, Controller’s Firewall Friendly API
- Index

Configure the vendor class that you just created under Create Vendor Class on page 32.
1. Go to Start > Administrative Tool > DHCP.
2. In the DHCP server utility, right-click the server icon and select Set predefined options.
Here we will add an entry for the WLAN controller sub-option for the newly created vendor class.
The sub-option code type and the data format is used to deliver the vendor specific information to
the APs.
Figure 15: Set Predefined Options
Configuring
DHCP, NPS, and DNS Services Configuring DHCP on Windows Server 2012 R2
Extreme Campus Controller Deployment Guide for version 5.46.03 35