
Deployment Guide

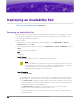
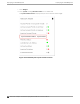
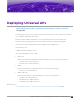
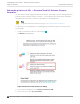

Table Of Contents
- Table of Contents
- Preface
- About Extreme Campus Controller Deployment
- Configuring DHCP, NPS, and DNS Services
- Centralized Site with a Captive Portal
- Centralized Site with AAA Network
- Deploying a Mesh Network
- Configuring an External NAC Server for MBA and AAA Authentication
- Manage RADIUS Servers for User Authentication
- External Captive Portal on a Third-Party Server
- Access Control Rule Admin Portal Access
- Deploying Centralized Web Authentication
- Deploying ExtremeCloud IQ - SE as an External Captive Portal
- Deployment Strategy
- Configuring an External Captive Portal Network
- Editing the Configuration Profile for Network and Roles
- Extreme Campus Controller Default Pass-Through Rule
- Adding Extreme Campus Controller as a Switch to ExtremeCloud IQ - Site Engine
- Editing the Unregistered Policy on ExtremeCloud IQ - Site Engine
- Editing the ExtremeCloud IQ - Site Engine Profile for Policy and Location-Based Services
- Deploying an ExtremeGuest Captive Portal
- Deploying Client Bridge
- Deploying an Availability Pair
- Deploying Universal APs
- Extreme Campus Controller Pair with ExtremeLocation and AirDefense
- ECP Local Authentication
- PHP External Captive Portal, Controller’s Firewall Friendly API
- Index

4. Enter the Universal AP serial numbers:
Serial numbers are available on the back of the AP or on the AP box label. In most cases, the invoice
provided by the distributor includes the serial number of the devices fulfilled with the order. The
ExtremeCloud IQ onboarding logic validates the serial numbers against the model compatibility and
manufacturing date to ensure only compatible devices are onboarded.
See Deploying Universal APs on page 185 for a list of Universal AP serial numbers supported with
Extreme Campus Controller.
• Type in serial numbers of the Universal APs, separated by commas. Or,
• Import from a CSV file.
a. From the Device Make field, select WiNG.
b. Select Choose to navigate to the CSV file. Or, drag the file onto the dialog.
5. Select Onboard Devices.
6. Select Finish.
The APs display on the ExtremeCloud IQ Device List with the status Onboarded. New APs display
the generic HOSTNAME because they are not yet registered with ExtremeCloud IQ. The AP
Hostname automatically updates after the AP is powered on and connected into ExtremeCloud IQ.
7. Connect the AP to the network.
Connect the AP to a switch through (ETH0/POE+). The AP hostname is recognized after the AP
connects. It starts in the WiNG 7 operating system and discovers the Extreme Campus Controller
provided that you have configured the necessary DHCP and DNS options.
The following are Extreme Campus Controller discovery options:
Deploying Universal APs
Onboarding Universal APs — ExtremeCloud IQ, Extreme
Campus Controller
Extreme Campus Controller Deployment Guide for version 5.46.03 187