
Deployment Guide


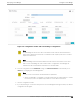
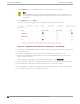
Table Of Contents
- Table of Contents
- Preface
- About Extreme Campus Controller Deployment
- Configuring DHCP, NPS, and DNS Services
- Centralized Site with a Captive Portal
- Centralized Site with AAA Network
- Deploying a Mesh Network
- Configuring an External NAC Server for MBA and AAA Authentication
- Manage RADIUS Servers for User Authentication
- External Captive Portal on a Third-Party Server
- Access Control Rule Admin Portal Access
- Deploying Centralized Web Authentication
- Deploying ExtremeCloud IQ - SE as an External Captive Portal
- Deployment Strategy
- Configuring an External Captive Portal Network
- Editing the Configuration Profile for Network and Roles
- Extreme Campus Controller Default Pass-Through Rule
- Adding Extreme Campus Controller as a Switch to ExtremeCloud IQ - Site Engine
- Editing the Unregistered Policy on ExtremeCloud IQ - Site Engine
- Editing the ExtremeCloud IQ - Site Engine Profile for Policy and Location-Based Services
- Deploying an ExtremeGuest Captive Portal
- Deploying Client Bridge
- Deploying an Availability Pair
- Deploying Universal APs
- Extreme Campus Controller Pair with ExtremeLocation and AirDefense
- ECP Local Authentication
- PHP External Captive Portal, Controller’s Firewall Friendly API
- Index

Configure Client Bridge
Use a Client Bridge to extend a wired LAN using a wireless infrastructure. To configure a Client Bridge to
work with Extreme Campus Controller take the following steps:
1. From Extreme Campus Controller, create a device group for your Client Bridge AP.
2. For RF Management, select Default Smart RF.
3. Edit the default configuration Profile for the AP model, specifying the client bridge settings.
To edit the configuration Profile, select .
4. From the Radios tab, select Client Bridge as the Radio Mode value for either radio.
Note
Consider the following when configuring a radio as a Client Bridge:
• Only one radio can be configured as a Client Bridge. This can be either radio.
Regardless of which radio is configured as the Client Bridge, both radios will continue
to provide service.
◦ Radio 1 enables Client Bridge on the 2.4GHz band only.
◦ Radio 2 enables Client Bridge on the 5GHz band only.
• The Client Bridge radio will connect on the radio channel that is determined by the
infrastructure AP.
• When Client Bridge is configured on a single interface AP, the single interface is used as
the client port, not as an uplink, and you will not see the GE2 Port Function.
• Eight networks can be configured per radio. If one network is configured as a Client
Bridge, seven additional networks can be configured for service on that radio.
5. Select the Client Bridge Network.
The following WLAN parameters are passed to the Client Bridge AP to configure station mode on
the radio:
• Network SSID
• Encryption or Authentication type
• Pre-shared key
The selected network must be configured with one of the following supported authentication types:
• Open
• WPA2-Personal (PSK)
• WPA2-Enterprise 802.1x/EAP
• WPA3-Enterprise 802.1x/EAP
• MAC-base Authentication (MBA)
When using authentication types WPA2-Enterprise 802.1x/EAP and WPA3-Enterprise 802.1x/EAP,
select the icon to configure the user ID and password.
Configure
Client Bridge Deploying Client Bridge
178 Extreme Campus Controller Deployment Guide for version 5.46.03