
User's Guide

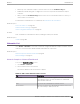
Table Of Contents
- Table of Contents
- Preface
- Welcome to Extreme Campus Controller
- Dashboard
- Monitor
- Sites List
- Device List
- Access Points List
- Smart RF Widgets
- Switches List
- Networks List
- Clients
- Policy
- Configure
- Network Configuration Steps
- Sites
- Add a Site
- Modifying Site Configuration
- Site Location
- Adding Device Groups to a Site
- Add or Edit a Configuration Profile
- Associated Profiles
- Associated Networks
- Mesh Point Profile Configuration
- Configure Client Bridge
- Understand Radio Mode
- Radio as a Sensor
- Advanced AP Radio Settings
- VLAN Profile Settings
- AirDefense Profile Settings
- ExtremeLocation Profile Settings
- IoT Profile Settings
- Positioning Profile Settings
- Analytics Profile Settings
- RTLS Settings
- Advanced Configuration Profile Settings
- Configuring RF Management
- Configuring a Floor Plan
- Advanced Tab
- Devices
- Networks
- Policy
- Automatic Adoption
- ExtremeGuest Integration
- AAA RADIUS Authentication
- Onboard
- Onboard AAA Authentication
- Manage Captive Portal
- Manage Access Control Groups
- Access Control Rules
- Tools
- Administration
- System Configuration
- Manage Administrator Accounts
- Extreme Campus Controller Applications
- Product License
- Glossary
- Index

• Port Speed
• Neighbor
Related Topics
Switch Port Configuration on page 215
LAG Ports
Link Aggregation Group (LAG) Ports organized as a list of master ports and the LAG members that are
associated with the master port. All ports assigned to a LAG must have the same port function. The
configuration of the master port is shared with its LAG members. When a port is added to a LAG, its
previous unique configuration is removed and the port inherits the group configuration.
Related Topics
LAG Configuration on page 215
Traces
Trace information related to the selected switch.
Troubleshoot a Switch Using the CLI
Extreme Campus Controller provides a remote console to enable diagnostic debugging of ExtremeXOS®
switches. To troubleshoot using the EXOS CLI commands, use the remote console to open a live console
session to an EXOS switch.
Note
Extreme Campus Controller remote console to a switch does not support 200 Series switches.
You can initiate remote console to a switch from any Extreme Campus Controller in an availability pair. A
switch deployed in a remote oce behind a firewall or Network Address Translation (NAT) is reachable
from the Extreme Campus Controller remote console.
To access the live console from the switch Troubleshooting tab, the ExtremeXOS switch must be in
GUI-Mode. To set the switch mode, select the settings button and then select Advanced. For more
information on Switch mode, see Access the Switch CLI on page 218.
To access the remote console on the Troubleshooting tab:
1. Go to Monitor > Devices > Switches.
2. Select an EXOS switch (not the check box).
3. Select Troubleshooting > Switch Remote Console > Connect.
The switch console opens. Log in with your Extreme Campus Controller credentials.
4. To terminate the console session, select Disconnect.
Consider the following about a remote console on the Troubleshooting tab:
• One console session is allowed to a switch at a time. Subsequent connection requests to the same
switch are rejected.
• You can open up to 100 simultaneous remote consoles, each to a separate switch.
• It can take up to 60 seconds for the switch to connect.
• Avoid modifying the switch configuration from the Troubleshooting tab.
Switches List
Monitor
98 Extreme Campus Controller User Guide for version 5.46.03