
User's Guide

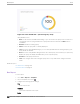

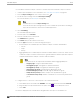
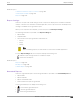
Table Of Contents
- Table of Contents
- Preface
- Welcome to Extreme Campus Controller
- Dashboard
- Monitor
- Sites List
- Device List
- Access Points List
- Smart RF Widgets
- Switches List
- Networks List
- Clients
- Policy
- Configure
- Network Configuration Steps
- Sites
- Add a Site
- Modifying Site Configuration
- Site Location
- Adding Device Groups to a Site
- Add or Edit a Configuration Profile
- Associated Profiles
- Associated Networks
- Mesh Point Profile Configuration
- Configure Client Bridge
- Understand Radio Mode
- Radio as a Sensor
- Advanced AP Radio Settings
- VLAN Profile Settings
- AirDefense Profile Settings
- ExtremeLocation Profile Settings
- IoT Profile Settings
- Positioning Profile Settings
- Analytics Profile Settings
- RTLS Settings
- Advanced Configuration Profile Settings
- Configuring RF Management
- Configuring a Floor Plan
- Advanced Tab
- Devices
- Networks
- Policy
- Automatic Adoption
- ExtremeGuest Integration
- AAA RADIUS Authentication
- Onboard
- Onboard AAA Authentication
- Manage Captive Portal
- Manage Access Control Groups
- Access Control Rules
- Tools
- Administration
- System Configuration
- Manage Administrator Accounts
- Extreme Campus Controller Applications
- Product License
- Glossary
- Index

Use Scheduler for Extreme Campus Controller to schedule reports from Extreme Campus Controller.
1. Create a report template. For more information, see Create Report Template on page 343.
2. From the Report Settings tab, select a report. Then, select .
3. Provide the report settings and select Save Report Settings.
For more information, see Run Report on page 346.
Note
Schedule reports from the Report Settings tab.
You must save the report settings before you can schedule the report. When scheduling a
report, the Period value is set from the Scheduler application.
4. Select Scheduling.
The Scheduler application opens.
5. In the left pane, select Scheduler.
6. From the calendar, select a time period.
The Add Event dialog displays.
7. In the Name field, provide a name for the event.
8. From the Type field, select one of the following report types:
• Historical Report. A scheduled report from Extreme Campus Controller. Valid duration:
◦ 3 Hours
◦ 3 Days
◦ 14 Days
• Aggregated Report. A scheduled report that oers a flexible duration (1-24 hours). Data is stored
on Extreme Campus Controller and the report is generated after the duration period has expired.
(Supported with Extreme Campus Controller v5.26.03 and later.)
Note
Only Venue reports are supported in the flexible duration Aggregated Report:
◦ Usage by Type. Usage for uplink and downlink.
◦ Throughput by Type. Throughput for uplink and downlink.
◦ Throughput by Group. Throughput per defined user group.
◦ Upload Usage by Group. Upload usage by defined user group.
◦ Download Usage by Group. Download usage by defined user group.
◦ Unique Users by Group. Number of unique users by defined user group.
◦ Concurrent Users by Group. Number of simultaneous connections by defined user
group.
9. Configure Action — Select one or more reports to associate with the event.
a. The available reports are listed under Available. The selected reports are listed under Selected.
b. Drag and drop each report between the two panes. Select
to move all reports at once.
c. Select Save.
The event is displayed on the calendar at the designated time. The report is scheduled to run.
Schedule Report
Tools
348 Extreme Campus Controller User Guide for version 5.46.03