
User's Guide
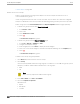


Table Of Contents
- Table of Contents
- Preface
- Welcome to Extreme Campus Controller
- Dashboard
- Monitor
- Sites List
- Device List
- Access Points List
- Smart RF Widgets
- Switches List
- Networks List
- Clients
- Policy
- Configure
- Network Configuration Steps
- Sites
- Add a Site
- Modifying Site Configuration
- Site Location
- Adding Device Groups to a Site
- Add or Edit a Configuration Profile
- Associated Profiles
- Associated Networks
- Mesh Point Profile Configuration
- Configure Client Bridge
- Understand Radio Mode
- Radio as a Sensor
- Advanced AP Radio Settings
- VLAN Profile Settings
- AirDefense Profile Settings
- ExtremeLocation Profile Settings
- IoT Profile Settings
- Positioning Profile Settings
- Analytics Profile Settings
- RTLS Settings
- Advanced Configuration Profile Settings
- Configuring RF Management
- Configuring a Floor Plan
- Advanced Tab
- Devices
- Networks
- Policy
- Automatic Adoption
- ExtremeGuest Integration
- AAA RADIUS Authentication
- Onboard
- Onboard AAA Authentication
- Manage Captive Portal
- Manage Access Control Groups
- Access Control Rules
- Tools
- Administration
- System Configuration
- Manage Administrator Accounts
- Extreme Campus Controller Applications
- Product License
- Glossary
- Index

Figure 87: Venue Dashboard – Upload Usage by Group
Query Builder actions:
• New. Provide a name, and add a blank dialog so you can create a new query. There is a limit of 10
saved queries per user, per grid. After the 10-query limit has been reached, the New button is
unavailable.
• Rename. Rename an existing query.
• Delete. Delete the query that is currently displayed.
• Close. Close the Query Builder dialog. If you close Query Builder without running the query, your
query details are deleted.
• Reset. Close the Query Builder dialog and saves the current query. The next time you open Query
Builder, this query will display. Available after you run a specific query.
• Execute. Run the query and saves it.
• Save. Save changes without executing the query. Save is only visible when changes have been
made.
Related Topics
SP Identification on page 234
Venue Dashboard on page 47
Run Report
To run a report:
1. Go to Tools > Reports > Templates.
2. Select a template, then select
.
3. Configure the following report settings:
Title
Enter a report title.
Template
The report template for the report.
Scope
Run Report
Tools
346 Extreme Campus Controller User Guide for version 5.46.03