
User's Guide


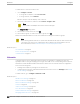
Table Of Contents
- Table of Contents
- Preface
- Welcome to Extreme Campus Controller
- Dashboard
- Monitor
- Sites List
- Device List
- Access Points List
- Smart RF Widgets
- Switches List
- Networks List
- Clients
- Policy
- Configure
- Network Configuration Steps
- Sites
- Add a Site
- Modifying Site Configuration
- Site Location
- Adding Device Groups to a Site
- Add or Edit a Configuration Profile
- Associated Profiles
- Associated Networks
- Mesh Point Profile Configuration
- Configure Client Bridge
- Understand Radio Mode
- Radio as a Sensor
- Advanced AP Radio Settings
- VLAN Profile Settings
- AirDefense Profile Settings
- ExtremeLocation Profile Settings
- IoT Profile Settings
- Positioning Profile Settings
- Analytics Profile Settings
- RTLS Settings
- Advanced Configuration Profile Settings
- Configuring RF Management
- Configuring a Floor Plan
- Advanced Tab
- Devices
- Networks
- Policy
- Automatic Adoption
- ExtremeGuest Integration
- AAA RADIUS Authentication
- Onboard
- Onboard AAA Authentication
- Manage Captive Portal
- Manage Access Control Groups
- Access Control Rules
- Tools
- Administration
- System Configuration
- Manage Administrator Accounts
- Extreme Campus Controller Applications
- Product License
- Glossary
- Index

3. Select Change to CLI-Mode.
4. Select Activate Console.
A console window opens. It can take up to 60 seconds for the switch to connect.
5. When the login prompt displays, log in with your Extreme Campus Controller credentials.
Related Topics
Troubleshoot a Switch Using the CLI on page 98
Advanced Switch Settings on page 217
CLI - Mode Advanced Settings on page 219
Switch Configuration Backup Files on page 219
Switch Configuration Backup Files
When a switch is changed to CLI-mode, Extreme Campus Controller automatically creates a backup file
of the switch configuration. It also provides an option to create additional configuration backup files.
You can create the file, view the file within the user interface, and restore the switch configuration from
a backup file.
To access the switch configuration backup files:
1. Activate CLI-Mode on an ExtremeXOS switch. For more information, see Access the Switch CLI on
page 218.
2. Go to Configure > Devices > Switches.
3. Select an ExtremeXOS switch, then:
• To create a backup file, select Create Backup.
• To view the backup file, select Backups > View.
• To restore a configuration from a backup file, select Backups > Restore.
Related Topics
Access the Switch CLI on page 218
Configure a Switch on page 214
CLI - Mode Advanced Settings
In CLI-Mode, switch advanced settings are limited to changing the switch mode. From here you can
select Change to GUI-Mode.
Related Topics
Configure a Switch on page 214
Access the Switch CLI on page 218
Assign to Site
You can assign access points, switches, and Defender adapters directly from the respective device list,
which simplifies the manual on-boarding process.
Configure
Assign to Site
Extreme Campus Controller User Guide for version 5.46.03 219