
User's Guide
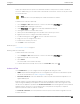
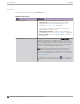
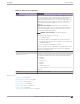
Table Of Contents
- Table of Contents
- Preface
- Welcome to Extreme Campus Controller
- Dashboard
- Monitor
- Sites List
- Device List
- Access Points List
- Smart RF Widgets
- Switches List
- Networks List
- Clients
- Policy
- Configure
- Network Configuration Steps
- Sites
- Add a Site
- Modifying Site Configuration
- Site Location
- Adding Device Groups to a Site
- Add or Edit a Configuration Profile
- Associated Profiles
- Associated Networks
- Mesh Point Profile Configuration
- Configure Client Bridge
- Understand Radio Mode
- Radio as a Sensor
- Advanced AP Radio Settings
- VLAN Profile Settings
- AirDefense Profile Settings
- ExtremeLocation Profile Settings
- IoT Profile Settings
- Positioning Profile Settings
- Analytics Profile Settings
- RTLS Settings
- Advanced Configuration Profile Settings
- Configuring RF Management
- Configuring a Floor Plan
- Advanced Tab
- Devices
- Networks
- Policy
- Automatic Adoption
- ExtremeGuest Integration
- AAA RADIUS Authentication
- Onboard
- Onboard AAA Authentication
- Manage Captive Portal
- Manage Access Control Groups
- Access Control Rules
- Tools
- Administration
- System Configuration
- Manage Administrator Accounts
- Extreme Campus Controller Applications
- Product License
- Glossary
- Index

Define up to 16 specific zones per floor to determine whether a client position is inside or outside of
each zone. Additionally, you can create areas located inside of other areas. A client can only be located
in one area at a time.
Note
You must have a floor plan displayed to enable the Draw Zones feature.
To draw a zone on the floor plan map:
1. Go to Configure > Sites. Add a new site or select a site and select Floor Plans tab.
2. Select Draw Tools to display floor plan tools.
3. Under Draw Zones, select , then click the map and draw the first line.
4. Click again to draw a second line and so forth.
5. When you are finished drawing the zone, double-click to release your cursor.
6. Right-click the zone to configure Zone Name and Zone ID.
7. To edit an existing zone, select
and click one of the lines of the zone.
8. Drag your cursor to change the zone area.
9. Double-click to release your cursor.
10. Click Save to save the floor plan.
Related Topics
User Interface Controls on page 52
Deleting APs from the Map
To delete an AP from a floor map:
1. Go to Configure > Sites. Add a new site or select a site and select Floor Plans tab.
2. Right-click on an AP icon on the map.
3. Select Delete.
The selected AP is removed from the map.
4. To delete all APs from the map at once, next to the Place APs field, select
.
Advanced Tab
On the Advanced tab, you can configure the following advanced settings for a site:
• SNMP. Simple Network Management Protocol configuration for switches associated with a specific
site. For more information, see SNMP Configuration on page 371.
•
Preferred Connection. Control the distribution of APs in a particular site between appliances in a
High Availability Pair.
Extreme Campus Controller supports the ability to specify an appliance adoption preference and to
support a High-Availability pair of appliances located in separate data centers. APs assigned to a site
will discover the appliance specified in the Preferred Connection. The load assignment for the preferred
appliance persists. However, you can re-map the AP-to-site preference at any time, to adjust for
experience, business needs, or network conditions.
For Preferred Connection, select the preferred connection point for APs that are assigned to this site.
Possible values are:
Configure
Advanced Tab
Extreme Campus Controller User Guide for version 5.46.03 183