
User's Guide


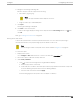
Table Of Contents
- Table of Contents
- Preface
- Welcome to Extreme Campus Controller
- Dashboard
- Monitor
- Sites List
- Device List
- Access Points List
- Smart RF Widgets
- Switches List
- Networks List
- Clients
- Policy
- Configure
- Network Configuration Steps
- Sites
- Add a Site
- Modifying Site Configuration
- Site Location
- Adding Device Groups to a Site
- Add or Edit a Configuration Profile
- Associated Profiles
- Associated Networks
- Mesh Point Profile Configuration
- Configure Client Bridge
- Understand Radio Mode
- Radio as a Sensor
- Advanced AP Radio Settings
- VLAN Profile Settings
- AirDefense Profile Settings
- ExtremeLocation Profile Settings
- IoT Profile Settings
- Positioning Profile Settings
- Analytics Profile Settings
- RTLS Settings
- Advanced Configuration Profile Settings
- Configuring RF Management
- Configuring a Floor Plan
- Advanced Tab
- Devices
- Networks
- Policy
- Automatic Adoption
- ExtremeGuest Integration
- AAA RADIUS Authentication
- Onboard
- Onboard AAA Authentication
- Manage Captive Portal
- Manage Access Control Groups
- Access Control Rules
- Tools
- Administration
- System Configuration
- Manage Administrator Accounts
- Extreme Campus Controller Applications
- Product License
- Glossary
- Index

Importing or Exporting a Floor Plan on page 178
Floor Plan Settings
1. Configure the following parameters for a floor plan.
Table 49: New Floor Plan Settings
Field Description
Floor Name Unique name for the floor plan.
Floor Height Floor height in meters.
2. Select OK.
Related Topics
Add a New Floor Plan on page 177
Importing or Exporting a Floor Plan on page 178
Importing or Exporting a Floor Plan
Extreme Campus Controller supports the following floor plan file formats:
• Zip
• Extreme Campus Controller
• Ekahau
To import or export a floor plan file, take the following steps:
1. Go to Configure > Sites. Add a new site or select a site and select Floor Plans tab.
2. From the Manage Floor Plans pane, do the following:
To import a file:
1. Select Import.
2. Select the file format and navigate to the floor plan file.
3. Select Open. Then, click Save.
To export a file:
1. Select Export.
2. Select the floor plan file.
The floor plan file is downloaded to your local machine.
Setting a Background Image
When creating a new floor plan, the first step is to set the background image.
To set the background image:
1. Go to Configure > Sites. Add a new site or select a site and select Floor Plans tab.
2. Select Draw Tools to display floor plan tools.
3. Under Floor Image, click
to upload an image.
Configuring
a Floor Plan Configure
178 Extreme Campus Controller User Guide for version 5.46.03