
User's Guide


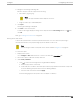
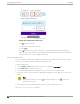
Table Of Contents
- Table of Contents
- Preface
- Welcome to Extreme Campus Controller
- Dashboard
- Monitor
- Sites List
- Device List
- Access Points List
- Smart RF Widgets
- Switches List
- Networks List
- Clients
- Policy
- Configure
- Network Configuration Steps
- Sites
- Add a Site
- Modifying Site Configuration
- Site Location
- Adding Device Groups to a Site
- Add or Edit a Configuration Profile
- Associated Profiles
- Associated Networks
- Mesh Point Profile Configuration
- Configure Client Bridge
- Understand Radio Mode
- Radio as a Sensor
- Advanced AP Radio Settings
- VLAN Profile Settings
- AirDefense Profile Settings
- ExtremeLocation Profile Settings
- IoT Profile Settings
- Positioning Profile Settings
- Analytics Profile Settings
- RTLS Settings
- Advanced Configuration Profile Settings
- Configuring RF Management
- Configuring a Floor Plan
- Advanced Tab
- Devices
- Networks
- Policy
- Automatic Adoption
- ExtremeGuest Integration
- AAA RADIUS Authentication
- Onboard
- Onboard AAA Authentication
- Manage Captive Portal
- Manage Access Control Groups
- Access Control Rules
- Tools
- Administration
- System Configuration
- Manage Administrator Accounts
- Extreme Campus Controller Applications
- Product License
- Glossary
- Index

Use Case: Importing A Floor Plan with Unknown APs
You have the option to create a floor plan map with a third-party tool and import the map to Extreme
Campus Controller. Upon import, the AP place holder icon displays ( ).
You may want to create a floor plan before you have the APs installed. Or you may be reusing a floor
plan that incorporated dierent APs from those that you are using now. In either case, the APs are
unknown to Extreme Campus Controller.
To import an existing floor plan and update the associated APs:
1. From the floor plan Configure page, select Import and select the floor plan file to import.
The map is displayed with unknown AP icons .
2. From the map, right-click each icon and select the serial number for the AP that will be installed in
that location.
Note
The list of available APs is populated from the selected device groups.
3. To edit the AP placement, select the AP selector next to the Place APs field, then select the AP
icon and drag it to a new location.
Related Topics
Add a New Floor Plan on page 177
Placing Devices on page 181
Add a New Floor Plan
A floor plan map begins with a new floor. You can draw a new floor or import a complete floor plan.
Additionally, you can export floors or delete floors. Add floor plans when adding a new site or add a
floor plan to an existing site
Note
Floor plan limits depend on the appliance. See Table 4 on page 26.
.
To add a new floor plan:
1. Go to Configure > Sites. Add a new site or select a site and select Floor Plans tab.
2. In the Manage Floor Plans pane, select
to add a new floor plan.
3. Enter a unique name for the new floor plan and the height of the floor ceiling. Then, select OK.
4. Draw a floor plan or import an existing plan.
a. To import an existing plan, click Import.
b. Navigate to the floor plan file and click Open.
5. Before you can save a floor plan, at a minimum, draw a boundary or set a background image.
The floor plan displays.
Next, go to Setting a Background Image on page 178.
Related Topics
Floor Plan Settings on page 178
Configure
Configuring a Floor Plan
Extreme Campus Controller User Guide for version 5.46.03 177