
User's Guide

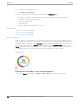

Table Of Contents
- Table of Contents
- Preface
- Welcome to Extreme Campus Controller
- Dashboard
- Monitor
- Sites List
- Device List
- Access Points List
- Smart RF Widgets
- Switches List
- Networks List
- Clients
- Policy
- Configure
- Network Configuration Steps
- Sites
- Add a Site
- Modifying Site Configuration
- Site Location
- Adding Device Groups to a Site
- Add or Edit a Configuration Profile
- Associated Profiles
- Associated Networks
- Mesh Point Profile Configuration
- Configure Client Bridge
- Understand Radio Mode
- Radio as a Sensor
- Advanced AP Radio Settings
- VLAN Profile Settings
- AirDefense Profile Settings
- ExtremeLocation Profile Settings
- IoT Profile Settings
- Positioning Profile Settings
- Analytics Profile Settings
- RTLS Settings
- Advanced Configuration Profile Settings
- Configuring RF Management
- Configuring a Floor Plan
- Advanced Tab
- Devices
- Networks
- Policy
- Automatic Adoption
- ExtremeGuest Integration
- AAA RADIUS Authentication
- Onboard
- Onboard AAA Authentication
- Manage Captive Portal
- Manage Access Control Groups
- Access Control Rules
- Tools
- Administration
- System Configuration
- Manage Administrator Accounts
- Extreme Campus Controller Applications
- Product License
- Glossary
- Index

Client Widgets
The following widget reports are available from the Client dashboard:
• Client Utilization. Provides metrics on client throughput and data usage.
• RF Management. Provides metrics on radio frequency quality.
• Clients. Provides metrics on Transmission Control Protocol (TCP) and Return Trip Time (RTT) per
client.
• Expert: Client metrics for the expert user related to RFQI, RTT, RSS, and RX and TX Rates.
• Application Visibility. Provides details about applications the client is accessing and metrics on
application groups related to throughput and usage.
To view widgets for an individual client:
1. Go to Clients.
2. Select a client from the list and review the widgets on the Dashboard page.
Related Topics
Add a New Dashboard on page 33
Modify a Dashboard on page 34
Policy
You can define policy rules for a role to specify network access. Network policies are a set of rules,
defined in a specific order, that determine how connections are authorized or denied. If you do not
define policy rules for a role, the role's default action is applied to all trac subject to that role. However,
if you require user-specific filter definitions, then the filter ID configuration identifies the specific role
that is applied to the user.
Related Topics
Roles List on page 111
Configuring Roles on page 259
Roles List
A role is a set of network access services that can be applied at various points in a policy-enabled
network. Roles are usually named for a type of user such as Student or Engineering. Often, role names
match the naming conventions that already exist in the organization. The role name should match filter
ID values set up on the RADIUS servers.
The default non-authenticated role is used when the client is not authenticated but able to access the
network. The default authenticated role is assigned to a client when it successfully authenticates but the
authentication process did not explicitly assign a role to the client.
Note
To configure default roles, go to Configure > Networks.
When the default action is sucient, a role does not need additional rules. Rules are used only to
provide unique treatment of packet types when a single role is applied.
Monitor
Policy
Extreme Campus Controller User Guide for version 5.46.03 111