
Specifications


- 86 -
If your site uses inline styles or an internal style sheet, we strongly advise that you consider undertaking the effort to
move it to using a single external style sheet. It will make your site much more consistent and much easier to modify
in this regard in the future.
Assuming you are using a single external style sheet for your website's CSS, here are the steps to take to give the
site a WebINK makeover:
1. Create a Type Drawer in Suitcase Fusion.
2. Add your site to the Type Drawer.
3. Add the fonts you want to use on your website to the Type Drawer.
4. Export the CSS for your Type Drawer.
5. Add the WebINK CSS to your website's style sheet.
6. Modify the CSS tags in your style sheet to use the WebINK fonts.
7. Republish your style sheet.
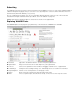
When choosing fonts, the Web Preview feature of Suitcase Fusion can be a big help. You can try out new fonts on
your existing website before you add them to your Type Drawer. Load your existing website into the preview, select
elements, and assign a font to the selected elements.
Integrating WebINK fonts into a new website
WebINK is designed to serve fonts to a site hosted on a web server. While you can use the Web Preview function to
test fonts on local HTML files, in order to use WebINK fonts in website development and testing, you will need to host
and load your sites from a web server running on your computer or accessible on your network.
To integrate WebINK fonts into a website you are planning, you should consider using a single style sheet for the
entire site. (This is a good practice even if you are not using WebINK fonts.) Using a single style sheet guarantees that
every page in the site will use exactly the same styles, and makes it easier to maintain and remodel the site in the
future.
Since you will probably be developing the website on a standalone workstation, you have some leeway of testing and
modifying the look of a site during its development.
Here are the steps involved in creating a new website using WebINK fonts:
1. Create a Type Drawer in Suitcase Fusion.
2. Add the name or IP address of your local web server to the Type Drawer.
3. Add the fonts you want to use on your website to the Type Drawer.
4. Enable the Type Drawer.
5. Export the CSS for your Type Drawer.
6. Create your style sheet using the WebINK fonts at the top of your font stack.
7. Create your website, posting it to your web server and previewing the pages to make sure the WebINK fonts
match your layout.
8. When complete, add the actual site to the Type Drawer and remove your local web server.
9. Publish your website!
An important part of website testing is to test with the fallback fonts in your font stack as well. You can do this by
temporarily using a different style sheet that does not include the WebINK fonts. If your web server is on your desktop
workstation, you can use your existing style sheet and disconnect your computer from the Internet to test your
fallback stack. (You may need to clear your browsers' caches so previously-downloaded WebINK fonts do not
appear.)