
Specifications


- 73 -
Managing Type Drawers
You use Type Drawers in the WebINK service to assign fonts to one or more websites. You can create as many Type
Drawers as you need, and add as many fonts to each Type Drawer as its sites need to access.
Each Type Drawer consists of the following:
• Name - This is used by you to identify the Type Drawer's purpose. You might name it for the client or for the
websites it serves.
• Usage Level - This is a measure of how much bandwidth the drawer uses in a month (how many gigabytes
of font requests the drawer serves).
• Price Tier - This identifies the kinds of fonts that can be added to the Type Drawer.
• Sites - Up to four websites can have access to the fonts in a Type Drawer.
• Fonts - The fonts that will be available to the sites assigned to the Type Drawer.
About Usage Levels and Price Tiers
WebINK offers multiple plans to help you pay for only the fonts and bandwidth that you need. The Usage Level of
your Type Drawer is a measure of how much bandwidth your the drawer uses in a month (basically, how many
gigabytes of font requests). The Price Tier indicates the maximum price level of fonts that you can add to the Type
Drawer. Most fonts are in the Standard price tier.
For details on plans available, please visit http://www.webink.com/pricing.
Creating a Type Drawer
A Type Drawer consists of fonts and the websites you want them to be associated with. Typically, you would create a
separate Type Drawer to use a set of fonts on certain sites. This helps you avoid paying for fonts you aren't using and
allows you to easily monitor font usage for each group of sites.
To create a Type Drawer:
1. Choose File > New Type Drawer to start the Type Drawer Creation Wizard.
2. Enter a name for the Type Drawer, then click Continue.
3. Choose a Price Tier, then click Continue.
4. Choose a Usage Level, then click Continue.
5. Specify up to four sites that will be associated with the Type Drawer, then click Continue.
6. In the Summary, review the information then click Create Type Drawer to finally create the Type Drawer.
The Type Drawer will be created and the Type Drawer Info panel will be displayed.
The Type Drawer is not enabled when you create it. You can enable it in the Type Drawer Info panel. When you
enable a Type Drawer, you will start to be billed for the services you have set up, unless you are still within the 30 day
free trial period.
You can use * as a wildcard in the first or last field in a site name to cover multiple domains or subdomains, such as
adding *.example.com to include www.example.com, blog.example.com, jobs.example.com, and so on. You can
also cover multinational sites using *.example.co.*. You cannot use a wildcard in place of the domain name
(www.*.com) nor to replace a partial string (www.example.c*).
NOTE: Using a wildcard for a website on a hosting service, such as *.blogger.com or *.intuitwebsites.com, can have
unintended consequences; other users of the hosting service could conceivably copy your CSS and have access to
WebINK fonts, causing you to be billed for their bandwidth usage.
Adding Fonts to a Type Drawer
Before you can use a font on your website, you need to add the font to a Type Drawer.
To add fonts to a Type Drawer:
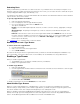
1. Click the WebINK Library.
2. Select one or more fonts in the WebINK Library.
3. Drag the selected fonts to the desired Type Drawer.
If the selected fonts include a font that is not in the Type Drawer's Price Tier, none of the fonts will be added, and you
will be alerted about the problem.