
User Manual


SD200-EU-EN-V1.2-7/10
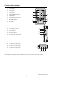
5
2. Press the LOGGER button for >2 seconds to begin logging. “DATALOGGER” will
appear in the display (between T2 and T3 displays) and the meter will beep each time
the data is recorded (if the beeper is enabled).
3. To stop datalogging, press the LOGGER button for >2 seconds. “DATALOGGER” will
change to “DATA” and the meter will count down through the recorded data.
NOTE: To avoid corrupting any data, do not remove the memory card without
properly ending the record function.
Time/Date/Sample Rate Check
Press and Hold the TIME button for >2 seconds and the display will cycle through the date,
time and sample rate information.
SD Card Data Structure
1. When the SD card if first inserted into the datalogger the folder TMC01 is created.
2. The first datalogging session will then create a file TMC01001.XLS. All data will be
saved to this file until the number of columns reaches 30,000.
3. After 30, 000 columns a new file, TMC01002.XLS is created. This is repeated every
30,000 columns until TMC01099.XLS. At this point a new folder, TMC02 is created
and the process is repeated. TMC10 is the final folder.
Transferring Data to a PC
1. Remove the memory card from the datalogger and plug it into the SD card slot on the
PC.
2. Launch Excel and open the data file on the memory card. The file will appear similar
to the figure below.