
User Manual
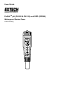


ExStik
TM
(PH100, PH110, & RE300) Version 2.6 02/04
Page 4
ORP/REDOX Overview
ORP stands for Oxidation / Reduction Potential and represents the oxidizing or reducing
nature of a solution. The overall “reactive” tendency of a solution can be determined from
ORP measurements. ORP testing is becoming increasingly more common in waste-water
measurement regimens. The unit of measurement for ORP is mV.
Replacing Electrodes
The ExStik
TM
is shipped with an electrode attached. If the electrode is to be replaced,
follow these steps for removing and connecting electrodes. Note that the PH110 has a
refillable electrode and the PH100 does not.
1. To remove an electrode, unscrew and completely remove the electrode collar (turn the
collar counter-clockwise to remove).
2. Gently rock the electrode from side to side, pulling it downwards, until it disconnects
from the meter.
3. To attach an electrode, carefully plug the electrode into the meter socket (note that the
electrode connector is keyed, ensuring proper connection).
4. Tighten the electrode collar firmly enough to make a good seal (a rubber gasket seals
the electrode with the meter).
Automatic Electrode Recognition
When the ExStik
TM
is turned on, it recognizes the type of electrode that is connected and
displays the appropriate unit of measure. Attach electrode before turning the ExStik
TM
on.
Powering the ExStik
TM
The ExStik
TM
uses four (4) SR-44 batteries (included). The insulating tab located in the
battery compartment must be removed before first use. If the batteries are weak, the ‘BAT’
indicator appears on the LCD. Press the ON/OFF key to turn the ExStik
TM
on or off. The
auto power off feature shuts the ExStik
TM
off automatically after 10 minutes of inactivity to
preserve battery life.
pH Operation
When the electrode is placed in a solution, the main display and bargraph indicate the pH
reading while the lower display reads temperature (readings flash until they have stabilized).
The bargraph is ‘center zero’, i.e. at pH 7 there is no display. As the pH rises, the bar moves
from the center to the right. If the pH drops, the bar moves from the center to the left.
pH Calibration (1, 2, or 3 points)
1. Place the electrode into a buffer solution (4, 7, or 10) and press the CAL key. Typically,
pH 7 is calibrated first then 4 or 10 pH.
2. The ExStik
TM
automatically recognizes the solution and calibrates itself to that value (the
circled number on the LCD will match the solution). Note that if the solution is more than
1pH off from the 4, 7, or 10pH standard, the ExStik
TM
will assume an error and abort the
calibration (CAL and END will be displayed).
3. During calibration, the pH reading flashes on the main display.
4. When calibration is complete, the ExStik
TM
automatically displays ‘END’ and returns to
normal operation mode.
5. The appropriate circled indicator (4, 7, or 10) appears on the LCD when a particular
calibration has been completed. When the ExStik
TM
is turned off, the circled indicator
configuration and the calibration data will be memorized.
6. For a two or three point calibration, repeat steps 1-5.