
User Manual


17 VPC300-en-GB_v1.9 5/18
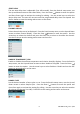
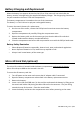
Battery Charging and Replacement
When the battery icon appears drained on the LCD or if the meter will not switch ON, the
battery must be recharged using the supplied AC adaptor/charger. The charger plug connects to
the jack located on the meter’s left side compartment.
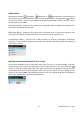
The battery compartment is located on the rear of the instrument.
The battery is a 7.4V Lithium-ion polymer rechargeable battery.
To access the meter’s battery for replacement:
1. On the rear of the meter, remove the Phillips head screw that secures the battery
compartment.
2. Open the compartment by carefully lifting the compartment cover.
3. Replace the battery with one of the same type (note that the Micro-SD card slot is
located underneath the battery as explained below).
4. Close the compartment and secure the compartment cover with the Phillips head screw
Battery Safety Reminders
o Please dispose of batteries responsibly; observe local, state, and national regulations.
o Never dispose of batteries in fire; batteries may explode or leak.
o Always install a new battery of the same type.
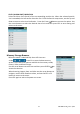
Micro-SD Card Slot (optional)
The micro-SD card slot is located inside the battery compartment underneath the battery.
Micro-SD cards up to 8GB can be inserted in the slot.
To access the SD memory card slot:
1. Turn off power to the meter and remove the AC adapter cable if connected.
2. Open the battery compartment as described in the battery replacement section.
3. Remove the battery.
4. Insert a micro-SD card (8GB max.) in the card slot underneath the battery by lifting up on
the metal card holder and placing the Micro SD card in the connector. The pins facing
towards the top of the meter. Close the metal holder.
5. Insert the battery and secure the compartment cover before powering on the meter.