
User Manual


Extech Instruments
26 TKG250- EN V2.4 11/13
4. To set the Hour, select the HOUR option using up/down arrow keys. Use
left/right arrow keys to decrease/increase the hour value. If time is set in 12 HR
format, the available hour values are from 00 AM to 11 PM. If time is set in 24
HR format, the available hour values are 00 to 23.
5. To set Day, select the DAY option using up/down arrow keys. Use left/right
arrow keys to decrease/increase the day value. You can set the day value from 01
to 31.
6. To set Month, select the MONTH option using up/down arrow keys. Use
left/right arrow keys to select a Month from JAN to DEC.
7. To set Year, select the YEAR option using the up/down arrow keys. Use left/right
arrow keys to select the year value from 2005 to 2025.
Press F1 – EXIT to exit the clock setup and return to the setup screen. The real-time
clock will automatically update the date and time once the clock parameters are selected.
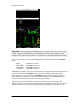
Understanding an LOS Reading
LOS (Loss of Signal) occurs when the gauge is not making a valid reading for a variety
of reasons. This may be because there is not enough couplant, the surface is too rough or
rusty, the transducer is low in sensitivity, the temperature is too high, there is a disbond
between the coating and the steel or for a variety of other reasons. In the event you try to
save a reading in LOS with the datalogger version, the Notes screen will automatically
appear so that a reason is given for saving an LOS. You can scroll to the appropriate note
and press the soft save key.
Using the Hold Option
From the Initial Setup screen, if an LOS occurs, the gauge can continue to display the
last measured thickness by “holding” the measurement. There are two Hold options,
which include:
Hold On: Continues to display the last measured thickness
Hold Off: Does not continue to display the last measured thickness
Using the Fast Option
From the Measurement Screen, the Fast option is available in the Setup mode in both
the Datalogger and Non-datalogger versions of the gauge.
To select the Fast option in Measurements mode, follow these steps: