
User`s guide

DO700 V1.0 8/09
10
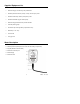
mV Measurement Mode
1. Unscrew the protective cap on the probe jack located on the bottom of the meter
(store the protective cap in the carrying case for later use).
2. Carefully connect the pH probe to the meter’s probe jack. The probe can only be
inserted in one orientation. Once it is firmly connected, screw the probe collar onto
the meter to secure the probe.
3. Turn the meter on using the power key
.
4. Press the MODE key momentarily to switch to the mV mode.
5. Immerse the electrode in the sample solution, slowly stir the solution with the
electrode and then allow it to rest in the solution.
6. When the smile face icon
appears on the LCD, the reading has stabilized.
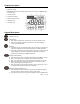
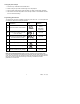
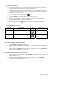
mV Programming Parameters
Prompt Parameters Code Settings
P1 Back light display time
0 -1-3-6 min
P2 Auto power off time
0 -10-20 min
Parameter P1 (Display Backlight Setting)
1. Press MODE to access the P1 Parameter.
2. Use the CAL or the M+/RM keys to select 0, 1, 3, or 6 minute default backlighting
time.
3. Momentarily press MODE to move to the next parameter (P2) or press ENTER to
return to the normal measurement mode.
Parameter P2 (Automatic Power OFF Setting)
1. From the P2 menu, use the CAL or the M+/RM keys to select a 0, 10, or 20 minute
Auto Power OFF time.
2. Momentarily press MODE to move back to Parameter P1, or press ENTER to
return to the normal measurement mode.