
Printer User Manual

Page 25
Appendix A
Serial MSP/MPP Users guide
This Guide summarizes the operating and maintenance feature of Extech MSP or MPP printer
series. Refer to user's and operators manual for additional information.
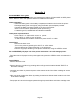
Initial preparation
- Install the battery pack in the battery compartment located on the back of the printer.
- Recharge battery pack overnight by using the Extech power adapter provided.
- Connect the Data Connector located on the front of the printer.
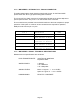
- Set the communication parameters (serial printers only).
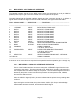
- If interfacing to PC, set MS-DOS and Windows variables.
Initial power up and self-test
- Press <SLCT> or <ON> switch to turn on printer.
- Press <SET> or <OFF> to turn off printer.
- To start self-test Hold <FEED> switch then press <SLCT> or <ON>.
Install Paper
- Remove the back cover
- Turn on the printer by pressing the <SLCT> or <ON> switch.
- Tear and discard any paper remaining in the printer tray.
- Remove any paper remaining in the printer mechanism, using the <FEED> switch.
Do not REVERSE pull paper out of the printer mechanism - this will damage printer.
- Feed the new roll of paper into the printer paper slot, press the <FEED> switch to advance the
paper.
Install Ribbon
- Remove the back cover
- Remove the worn out ribbon by pressing with one finger at the location labeled "EJECT" on
the ribbon cartridge.
- Insert the new ribbon in place and press at the extreme ends of the ribbon cartridge to secure
it in place.
- With your thumb, tighten the ribbon by rotating clockwise the ribbed wheel located on the front
of the ribbon cartridge.
- Feed paper to insure the that paper passes through exposed ribbon and ribbon cartridge case.