
User Manual

DL160 V1.1 01/110
5
Operation
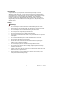
1. Install 4 fresh AAA batteries or connect the AC adaptor.
2. Set-up the datalogger using the software provided.
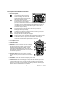
3. Connect the voltage test leads or the current probes to the AC source to
be measured.
4. Press and Hold the START/STOP button for four seconds to start
recording. The “REC” icon will appear in the display indication that
recording has begun.
5. Press and Hold the START/STOP button for four seconds to stop
recording. The “REC” icon will disappear from the display.
6. Remove the probe, connect the datalogger to a PC and use the supplied
software to download the data.
Note: If the clock does not set to the correct time, replace the 3V button battery.
Software Introduction
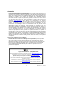
1. Place the CD in the drive and then follow the on-screen installation
instruction.
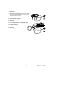
2. After the software is installed, keep the CD in the drive and connect the
datalogger to the PC by the USB cable.
3. A USB Driver installation window will pop-up. Follow the directions to
install the driver.
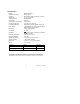
System Required:
Windows 2000 or Windows XP or Vista
Minimum Hardware Required:
PC or NoteBook with Pentium 90MHz or higher 32 MB RAM ;
At least 7 MB byte hard disk space available to install Datalogger USB
software.
Recommended display resolution 1024X768 with High Color(16 bit).
Software Operation
The Software operation is described in the HELP file located on the software
disk.