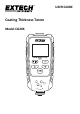
USER GUIDE Coating Thickness Tester Model CG206
Introduction Thank you for selecting the Extech CG206 Coating Thickness Tester. The CG206 is a portable meter designed for non‐invasive coating thickness measurements with automatic recognition of the substrate material under test. The meter uses two measurement methods: magnetic induction (for ferrous metal substrates) and eddy current (for non‐ferrous metal substrates). The CG206 meter can connect to a PC via USB and transmit recorded data for further analysis and for generating report documentation.
Description 5 Meter Description 1. LCD display 2. Power and Select button 3. Up arrow 1 4. Zero Key 5. Micro USB connector 2 3 4 6. Back Key ( ) 7. Down arrow 8. Sensor 6 7 Note: Battery compartment on rear of meter 8 Display Description 1. Data record memory group number 1 2 3 2. Record Number in current memory group 3. Battery status icon 7 6 4. Measurement units: µm or mils 5. DEL (Delete): Press the back ( ) 4 5 button to delete the previous reading 6.
Operation Meter Power Install two ‘AAA’ 1.5 V batteries into the rear battery compartment. Press the power button to switch the meter ON. The display will switch ON. If the display does not switch ON, install or replace the batteries. When powering up, please keep the meter at least 10cm (4”) from metal objects. Replace the batteries when the battery status icon appears low, the meter will give inaccurate readings if the battery voltage falls very low.
Programming Menu The meter can be configured and calibrated through simple button presses in the programming menu. Press the SEL button to access the menu; refer to the menu ‘tree’ below. Use the UP/DOWN buttons to scroll the menu Use the SEL button to select the highlighted mode Use the ( ) button to exit or back out of a mode Other button presses are mode specific, follow on‐screen prompts explained below.
WORKING MODE 1. Press the LEFT button (SEL) to access the menu. 2. Scroll to WORKING MODE (if necessary) using up/down buttons. 3. Press the LEFT button (SELECT) to open WORKING MODE. 4. Use the UP and DOWN buttons to scroll through the groups and to see the number of saved readings in each group. Group 0 does not have memory. 5. Press the LEFT button (SELECT) to select the group and exit Working mode and return to the main menu or press the RIGHT button ( ) twice to return to the normal operating mode.
c. Auto Power OFF Select ENABLE or DISABLE using the arrow buttons. When enabled, the meter automatically switches OFF after 3 minutes of inactivity. When disabled, the meter will only switch OFF with a power button press or when the battery power is weak. Press the LEFT button (SELECT) button to confirm and to return to the SET menu (otherwise press the right button ( ) to abort the edit and return to the SET menu). d. Contrast Use the UP and DOWN arrows to adjust the display contrast up or down.
CALIBRATION The Calibration menu allows the user to perform a Ferrous (Zero FE) or non‐ferrous (Zero NFE) ZERO Calibration. The Calibration menu also allows the user to delete ZERO calibration data for both ferrous (Zero F) and non‐ferrous (Zero N) modes. 1. Press the LEFT button (SEL) to access the main menu. 2. Use the DOWN button to scroll to CALIBRATION. 3. Press LEFT (SELECT) to open the CALIBRATION parameter. 4. To perform a ZERO Calibration, refer to Zero Calibration in the next section. 5.
ZERO Calibration The customer should perform a Zero Calibration before any measurements are taken. Preparing for ZERO Calibration 1. Clean the probe tip and the substrate (grease, oil, metal scraps. The slightest impurity will affect measurement and will distort readings. 2. Switch the meter ON at a 10 cm (4”) minimum distance from any metal. 3. Set the meter to the correct substrate type, FE or NFE. 4. The meter is now ready for calibration.
Record Readings in Memory Groups The CG206 offers 30 memory storage groups, Group ‘0’ through ‘30’. Group ‘0’ does not allow data to be stored; it is simply a group that can be selected if readings are to be taken without being stored. From the Normal measurement mode, Use the UP/DOWN arrow keys to scroll to a particular group. When a reading is taken it is automatically stored in the selected group. Each Group can store up to 50 readings (for a total of 1500 for the 30 groups).
Error Messages The following error messages will appear on the meter’s LCD if a problem arises. Err1 Magnetic induction probe (FE) error Err2 Eddy current probe (NFE) error Err3 Both probes ‐ Eddy current and Magnetic induction errors Err4 Magnetic induction probe (FE) fault Err5 Eddy current probe (NFE) fault Please contact Extech Instruments if a problem exists.
Specifications Ferrous Non‐Ferrous Measurement principle Magnetic induction Eddy current principle Measuring range 0~1350μm 0~1350μm 0~53.1mils 0~53.1mils Accuracy1 0~1000μm: ± (2.5% + 2μm) 0~1000μm: ± (2.5% + 2μm) (% of reading) 1000μm ~1350μm: (±3.5%) 1000μm ~1350μm: (±3.5%) 0~39.3mils: ± (2% + 0.08mils) 0~39.3mils: ± (2% + 0.08mils) 39.3mils ~53.1mils: (±3.5%) 39.3mils ~53.1mils: (±3.5%) 0~100μm: (0.1μm) 0~100μm: (0.