
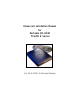
Manual

9
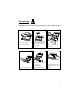
Hardware Installation
USB Model:
1. Connect the 36-pin connector to the
drive until it is seated firlmly.
2. Connect the AC adapter into the DC IN
jack an the rear panel.
3. Plug the AC adapter into a working
outlet.
4. Continue with the Software Installation.
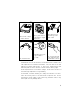
PCMCIA Model:
1. Before you begin power off your PC system
2. Connect the 36-pin connector to the ThinCD drive until it is firmly
seated, then tighten the screws.
3. Locate the PCMCIA slot on your computer and insert the PC card
into it. (Note: The PC card is keyed for proper instertion—the arrow
should be pointing toward the computer,
facing upward.
4. Power on your PC and the ThinCD drive
by either the AC adapter or your
notebook’s batteries.
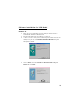
5. Continue with the Software Installation.
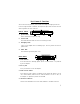
Parallel Cable Model:
1. Before you begin power OFF your PC system.
2. Connect the 36-pin connector to the
ThinCD drive and connect the other
end to your computer’s Parallel port.
3. Plug in the AC adapter and power on
your system and the ThinCD drive.
4. Continue with the Software
Installation.