ADDENDUM This information applies only to the PM-1100 Optical Power Meter user guide. GPIB Commands and Queries ³ The FORM:READ:DATA? query does not exist. ³ The MMEM:ACQ:DATA:RECA:VALUE? query should be defined as follows: MMEMory:ACQuisition:DATA:RECAll:VALUE? Description This query returns the measurement saved in the memory location.
³ The MMEM:ACQ:DATA:RECA:WAV? query should be named and defined as follows: MMEMory:ACQuisition:DATA:RECAll:WAVElength? Description This query returns the wavelength corresponding to the last value fetched with the MMEM:ACQ:DATA:RECA:VALUE? query. Syntax MMEM:ACQ:DATA:RECA:WAVE? Response A wavelength in the “9999 nm” format. Notes ³ Use the MMEM:ACQ:DATA:RECA:UNIT? query to get the corresponding measurement units.
³ The SENS:FREQ:CAT? query should be named and defined as follows: SENSitivity:FREQuency:CATAlog? Description This query returns a list of available sampling rates. Syntax SENS:FREQ:CATA? Response List of available sampling rates in the “40.0;20.0;10.0;5.0;1.0;0.5;0.1” format. Example SENS:FREQ:CATA? ³ The SENS:POW:WAV command should be named and defined as follows: SENSitivity:POWer:WAVElength Description This command selects a new operating wavelength.
³ The UNIT:POW command should be named and defined as follows: UNIT:POWer Description This command changes the measurement display units.
OPTICAL POWER METER PM-1100 R&D AND MANUFACTURING USER GUIDE
Copyright © 1998–2006 EXFO Electro-Optical Engineering Inc. All rights reserved. No part of this publication may be reproduced, stored in a retrieval system or transmitted in any form, be it electronically, mechanically, or by any other means such as photocopying, recording or otherwise, without the prior written permission of EXFO Electro-Optical Engineering Inc. (EXFO). Information provided by EXFO is believed to be accurate and reliable.
Contents Contents Certification Information ........................................................................................................ v 1 Introducing the PM-1100 Optical Power Meter .......................................... 1 Front Panel .............................................................................................................................2 Back Panel ......................................................................................................................
Contents 6 Maintenance ................................................................................................49 Cleaning Detector Ports ........................................................................................................50 Replacing Fuses ....................................................................................................................51 Recalibrating the Unit ....................................................................................................
Certification Information Certification Information F.C.C. Information Electronic test equipment is exempt from Part 15 compliance (FCC) in the United States. However, compliance verification tests are systematically performed on most EXFO equipment. Information Electronic test equipment is subject to the EMC Directive in the European Union. The EN61326 standard prescribes both emission and immunity requirements for laboratory, measurement, and control equipment.
Certification Information DECLARATION OF CONFORMITY Application of Council Directive(s): Manufacturer’s Name: Manufacturer’s Address: Equipment Type/Environment: Trade Name/Model No.: 73/23/EEC - The Low Voltage Directive 89/336/EEC - The EMC Directive EXFO ELECTRO-OPTICAL ENG.
1 Introducing the PM-1100 Optical Power Meter The PM-1100 Optical Power Meter provides accurate power measurements over a wide dynamic range with high resolution and excellent linearity. It is particularly suitable for automated measurements. The built-in memory lets you store up to 20 preselected wavelengths of the sources under test. The wavelength value is used both to correct power readings and tag stored results.
Introducing the PM-1100 Optical Power Meter Front Panel Front Panel Recall menu access Store menu access Display Arrow buttons for menu navigation and parameter setting Measurement units control On/off button Wavelength control Detector port Relative mode access Setup menu access New reference Program menu access Averaging mode Offset nulling Note: Your Optical Power Meter may slightly differ from the illustration.
Introducing the PM-1100 Optical Power Meter Back Panel Back Panel GPIB port Serial port (RS-232 DTE) Fuse holder Power inlet LR 107723-5, -9 NRTL/C Ground Part number Version number PM-1101 +10 to -100 dBm S/N 12345-B P/N Dynamic range Serial number A-1.0 Ver. 450 to 1100 nm Mfg. October 97 date Spectral range Manufacturing date Note: Your PM-1100 may slightly differ from the illustration.
Introducing the PM-1100 Optical Power Meter RS-232 Connector Pinout RS-232 Connector Pinout The RS-232 connector (serial port) at the back of the PM-1100 uses a DTE pinout configuration.
Introducing the PM-1100 Optical Power Meter Conventions Conventions Before using the product described in this manual, you should understand the following conventions: WARNING Indicates a potentially hazardous situation which, if not avoided, could result in death or serious injury. Do not proceed unless you understand and meet the required conditions. CAUTION Indicates a potentially hazardous situation which, if not avoided, may result in minor or moderate injury.
2 Safety Information Laser Safety Information WARNING Do not install or terminate fibers while a light source is active. Never look directly into a live fiber and ensure that your eyes are protected at all times. WARNING Use of controls, adjustments and procedures for operation and maintenance other than those specified herein may result in hazardous radiation exposure.
Safety Information Electrical Safety Information Electrical Safety Information This unit uses an international safety standard three-wire power cable. This cable serves as a ground when connected to an appropriate AC power outlet. Note: If you need to ensure that the unit is completely powered off, disconnect the power cable. WARNING ³ Insert the power cable plug into a power outlet with a protective ground contact. Do not use an extension cord without a protective conductor.
Safety Information Electrical Safety Information WARNING ³ Use this unit indoors only. ³ Position the unit so that the air can circulate freely around it. ³ Operation of any electrical instrument around flammable gases or fumes constitutes a major safety hazard. ³ Do not remove unit covers during operation. ³ To avoid electrical shock, do not operate the unit if any part of the outer surface (covers, panels, etc.) is damaged.
Safety Information Electrical Safety Information Equipment Ratings Temperature ³ Operation 0 °C to 40 °C (32 °F to 104 °F) ³ Storage -40 °C to 70 °C (-40 °F to 158 °F) Relative humidity a 0 % to 80 % non-condensing Maximum operation altitude Pollution degree 2000 m (6562 ft) 2 Installation category b Power supply rating II 100 V to 240 V (50 Hz/60 Hz) maximum input power 2 A a. b. Measured in 0 °C to 31 °C (32 °F to 87.8 °F) range, decreasing linearly to 50 % at 40 °C (104 °F).
3 Getting Started with Your Optical Power Meter Turning On and Off the Optical Power Meter Before turning the Optical Power Meter on, please read Electrical Safety Information on page 8. To turn the unit on and off, use the red button in the lower left corner of the front panel. At power-up, the unit beeps twice and performs a self-test. Before taking any measurements, it is recommended that you null the detector offsets (see scroll (left/right arrows) until EXIT is displayed, then press ENTER.
Getting Started with Your Optical Power Meter Selecting a Menu or a Menu Option Selecting a Menu or a Menu Option The blue buttons to the right of the display give access to single level menus: Store, Recall, Program, and Setup. The following diagram shows the menus and their items. DATA EXIT DATA ACQ CLR DATA CLR ACQ EXIT DELAY DURATION SAMPLES START STOP EXIT RESOL SAMPLING LAMBDA OFFSET REF.
4 Operating the Optical Power Meter Cleaning and Connecting Optical Fibers IMPORTANT To ensure maximum power and to avoid erroneous readings: ³ Always clean fiber ends as explained below before inserting them into the port. EXFO is not responsible for damage or errors caused by bad fiber cleaning or handling. ³ Ensure that your patchcord has appropriate connectors. Joining mismatched connectors will damage the ferrules. To connect the fiber-optic cable to the port: 1.
Operating the Optical Power Meter Nulling Electrical Offsets Nulling Electrical Offsets The offset nulling process provides a zero-power reference measurement, thus eliminating the effects of electronic offsets and dark current due to detectors. EXFO recommends performing a nulling before every test session.
Operating the Optical Power Meter Measuring Absolute Power Measuring Absolute Power Press dBm/Watt to display the absolute power of the signal received at the detector port. dBm/Watt is also used to toggle between dBm and watts measurement units. When using watts measurement units, the Optical Power Meter will automatically use pW, nW, μW, or mW, according to the power of the signal.
Operating the Optical Power Meter Relative Power Relative Power In relative mode, the Optical Power Meter compares the power of the signal received at the detector port to a preset reference value in dBm or watts. The relative power is equal to the absolute power minus the reference value, therefore ³ a negative measurement indicates that the received power is below the reference value, and ³ a positive measurement indicates that the received power is above the reference value.
Operating the Optical Power Meter Relative Power A delta symbol indicates that the PM-1100 is in relative mode and measuring in watts. Unit of measurement for the relative power Relative power nW nW Reference value Unit of measurement for reference value When you access relative mode, the Optical Power Meterdisplays the last reference value entered at the current wavelength.
Operating the Optical Power Meter Relative Power Entering a Specific Reference Value To enter a specfic reference value: 1. Use λ to select the wavelength. 2. Select the measurement unit using dBm/Watt. 3. Press Setup. 4. Scroll (left/right arrows) to REF.VALUE. dBm Current reference value for the selected wavelength and in the selected measurement unit 5. Press ENTER. The first segment of the current reference value will start flashing. 6. Enter a new reference value.
Operating the Optical Power Meter Average Mode Average Mode Choose Avg in order for the displayed power measurement to be averaged or not. When the average mode is enabled, the eight most recent measurement samples are used to compute an unweighted average. This average is displayed as the measured value. Avg is also displayed in the upper right corner, indicating that the average mode is enabled.
Operating the Optical Power Meter Recalling Manually Stored Data Recalling Manually Stored Data The data you stored manually (see Storing Data Manually on page 19) can be recalled one register at a time. To recall the manually stored data: 1. Press Recall. You will see the following display with a register number flashing. 2. Using the up/down arrows, scroll to the register number you want to view.
Operating the Optical Power Meter Recalling Manually Stored Data 3. Press ENTER. The selected register will be displayed. A small “M” indicates you are in Memory Recall mode Measurement Measurement unit nW nm A delta symbol indicates a relative value in watts Wavelength at which the measurement was taken Note: A dashed line with no unit of measurement indicates an empty register. A dashed line with the wavelength and the units of measurement indicates a reading below range.
Operating the Optical Power Meter Erasing Manually Stored Data Erasing Manually Stored Data The manually stored data (up to 512) can only be erased as a group. To erase the manually stored data: 1. Press Recall. 2. Scroll (left/right arrows) to CLR DATA. IMPORTANT After you press ENTER, all the manually stored data in the 512 registers will be deleted without any other warning. 3. Press ENTER. 4. To exit the Recall menu, press Recall.
Operating the Optical Power Meter Programming an Acquisition Programming an Acquisition You can program the PM-1100 to automatically acquire absolute or referenced measurements. The following program parameters may be set: ³ delay: the beginning of the program may be delayed by up to 999 hours, 59 minutes, and 59 seconds; ³ duration: the program can last up to 999 hours, 59 minutes, and 59 seconds; ³ number of samples: up to 1024 samples can be taken (depending on the selected duration).
Operating the Optical Power Meter Programming an Acquisition To program an acquisition: 1. Press Program. You will see the following display: Hours Minutes Seconds 2. Set a delay (if you do not want the acquisition to be delayed, leave the delay value at 000.00.00). 2a. Press ENTER. The first digit will start flashing. Use the up/down arrows to change the flashing digit and the left/right arrows to activate the next digit. 2b. Once the delay is set, press ENTER. 3. Press the right arrow.
Operating the Optical Power Meter Programming an Acquisition 4. Set the duration of the acquisition. 4a. Press ENTER. The first digit will start flashing. Use the up/down arrows to change the flashing digit and the left/right arrows to activate the next digit. 4b. Once the duration is set, press ENTER. 5. Press the right arrow. You will see the following display. 6. Set the number of samples to be taken during the acquisition. 6a. Press ENTER. The digit will start flashing.
Operating the Optical Power Meter Starting the Acquisition Starting the Acquisition When you start an acquisition, data is acquired in the current measurement mode; that is, at the current wavelength, with the current measurement unit, and with or without an offset and a reference. Therefore, before starting an acquisition, you should set these parameters as required. You can choose one of the following procedures.
Operating the Optical Power Meter Stopping the Acquisition Stopping the Acquisition Once the acquisition starts, it continues until the set duration has expired. When the acquisition is over, the unit beeps, PRG STOP is displayed, and the data is stored automatically. You can also terminate the acquisition before the set duration has elapsed. IMPORTANT If you stop the acquisition before it ends, only the samples that were taken before you stopped the acquisition will be saved. To stop the acquisition: 1.
Operating the Optical Power Meter Recalling Acquisition Data Recalling Acquisition Data The data stored during a programmed acquisition (see Programming an Acquisition on page 23) can be recalled one sample at a time. Each sample is stored in a memory register. To recall acquisition data: 1. Press Recall. 2. Scroll (let/right arrows) to ACQ. A register number will flash.
Operating the Optical Power Meter Recalling Acquisition Data 3. Using the up/down arrows, scroll to the register number you want to view. 4. Press ENTER. The selected register will be displayed. A small “M” indicates you are in Memory Recall mode Measurement Measurement unit nW nm A delta symbol indicates a relative value in watts Wavelength at which the measurement was taken Note: A dashed line with no wavelength indicates an empty register.
Operating the Optical Power Meter Erasing Acquisition Data Erasing Acquisition Data The data stored through a programmed acquisition (up to 1024) can only be erased as a group. To erase acquisition data: 1. Press Recall. 2. Scroll (left/right arrows) to CLR ACQ. IMPORTANT After you press ENTER, all the acquisition data in the 1024 registers will be deleted without any other warning. 3. Press ENTER. 4. To exit the Recall menu, press Recall.
Operating the Optical Power Meter Customizing Your Optical Power Meter To change the resolution: 1. Press Setup. You will see the following screen: Current resolution setting 2. Press ENTER. The current resolution setting starts flashing. 3. Scroll (up/down arrows) to select a new resolution setting (0, 1, 2, 3, or Auto). 4. Press ENTER. 5. To exit the Setup menu, press Setup.
Operating the Optical Power Meter Customizing Your Optical Power Meter Changing the Sampling Rate You can set the number of samples taken by the PM-1100 every second: 0.1 (1 every 10 seconds), 0.5 (1 every 2 seconds), 1, 5, 10, 20, or 40. Note: The maximum display refresh rate of the PM-1100 is 5 values every second, no matter what sampling rate is selected. To change the sampling rate: 1. Press Setup. 2. Scroll (left/right arrows) to SAMPLING. Current sampling rate 3. Press ENTER.
Operating the Optical Power Meter Customizing Your Optical Power Meter Customizing the Shortlist of Wavelengths The Optical Power Meter detector port can measure optical power at many wavelengths. The accepted wavelengths (spectral range, see Technical Specifications on page 65) depend on the type of detector with which the Optical Power Meter is equipped. Store the wavelengths you use the most often in a shortlist so you can quickly access them by pressing λ during a test session.
Operating the Optical Power Meter Customizing Your Optical Power Meter To erase one wavelength from the shortlist: 1. Press Setup. 2. Scroll (left/right arrows) to LAMBDA. 3. Scroll (up/down arrows) until the wavelength you want to delete appears in the lower portion of the display. 4. Press ENTER. The wavelength will start flashing. 5. Set all the wavelength digits to zero (use the up/down arrows to change the flashing digit and left/right arrows to activate the next digit).
Operating the Optical Power Meter Customizing Your Optical Power Meter Setting an Offset An offset can be applied to any measurement that is displayed in either dB or dBm. The offset value, which can be positive or negative, is always expressed in dB and is added to the measured power. Offset On appears to the left of the display when an offset is being used. Offsetting the measured power is useful when compensating for known power losses or applying a calibration offset.
Operating the Optical Power Meter Customizing Your Optical Power Meter Setting the Date The date must be entered according to the year-month-day format. To set the date: 1. Press Setup. 2. Scroll (left/right arrows) to DATE YMD. Year Month Day 3. Press ENTER. The first digit will start flashing. 4. Set a new date (use the up/down arrows to change the flashing digit and the left/right arrows to activate the next digit). 5. Press ENTER. 6. To exit the Setup menu, press Setup.
Operating the Optical Power Meter Customizing Your Optical Power Meter Setting the Clock The time must be entered according to the 24-hour format. To set the clock: 1. Press Setup. 2. Scroll (left/right arrows) to TIME. Hour Minutes Seconds 3. Press ENTER. The first digit will start flashing. 4. Set a new time (use the up/down arrows to change the flashing digit and the left/right arrows to activate the next digit). 5. Press ENTER. 6. To exit the Setup menu, press Setup.
Operating the Optical Power Meter Customizing Your Optical Power Meter Setting the Display Intensity Display intensity may be set to high or low. You can also turn off the display without turning off the unit. To set the display intensity: 1. Press Setup. 2. Scroll (left/right arrows) to DIMMER. Current dimmer state 3. Press ENTER. The current dimmer state will start flashing. 4. Use the up/down arrows to modify the dimmer: LO, HI, or OFF. 5. Press ENTER.
Operating the Optical Power Meter Customizing Your Optical Power Meter Saving a Configuration Once the PM-1100 is customized for a specific application or user, it is possible to save the configuration. Saved parameters are: ³ resolution ³ sampling rate ³ current wavelength and corresponding reference ³ offset Up to ten configurations can be saved and recalled as needed. To save a configuration: 1. Customize the PM-1100 as required. 2. Press Setup. 3. Scroll (left/right arrows) to SAVE.
Operating the Optical Power Meter Customizing Your Optical Power Meter Recalling a Configuration Once you have saved a configuration (see Saving a Configuration on page 39), you can recall it any time. To recall a configuration: 1. Press Setup. 2. Scroll (left/right arrows) to RECALL. Configuration number 3. Press ENTER. The configuration number (bottom of the screen) will start flashing. 4. Use the up/down arrows to select the number of the configuration you want to recall. 5. Press ENTER. 6.
5 Controlling Your Optical Power Meter Remotely ³ The Optical Power Meter can be remotely controlled either by ³ a GPIB interface (through a GPIB cable connected to the GPIB port); or ³ an RS-232 interface (through a serial cable connected to the serial port). The commands used in both protocols are the same and are described in the following pages. When the Optical Power Meteris being remotely controlled, Remote appears in the lower left corner of the display.
Controlling Your Optical Power Meter Remotely Setting the Optical Power Meter for Remote Control Setting the Optical Power Meter for Remote Control To remotely control the Optical Power Meter, you need to set a GPIB address or activate the RS-232 port. To set the Optical Power Meter for remote control: 1. Press Setup. 2. Scroll (left/right arrows) to GPIB-RS. Current setting 3. Press ENTER. The current setting will start flashing. 4. Using the up/down arrows, enter a new setting.
Controlling Your Optical Power Meter Remotely Communication Parameters Communication Parameters For GPIB Communication Terminate Read on EOS Yes Set EOI with EOS on Writes Yes Type of compare on EOS 8-bits EOS byte 0Ah Sens EOI at end of Writes Yes GPIB Primary address See Setting the Optical Power Meter for Remote Control on page 42 GPIB Secondary address None For RS-232 Communication EOS bytes 0Ah Baud rate 9600 bps Parity None Data bits 8 bits Stop bits 1 bits Flow Control Non
Controlling Your Optical Power Meter Remotely Standard Status Data Structure Standard Status Data Structure The figure shown hereafter illustrates the four common status and enable registers as defined by IEEE 488.2. This diagram is a useful aid in understanding the general commands and how a service request (SRQ) is generated.
Controlling Your Optical Power Meter Remotely Standard Status Data Structure PON URQ CME EXE DDE QYE RQC OPC 7 & 6 & 5 & OR 7 6 5 4 & 4 3 & 3 2 & 2 1 & 1 0 Standard Event Status Register (ESR) & 0 PON URQ CME EXE DDE QYE RQC OPC Standard Event Status Enable Register (ESE) Output Queue not Empty read by serial poll RQS { Service Request Generation ESB MAV 7 6 5 4 EB 3 2 1 0 MSS Status Byte Register (STB) read by *STB? & & OR { Optical Power Meter 7 5 & 4 ES
Controlling Your Optical Power Meter Remotely Command Structure An SRQ is forced when a bit is set in the STB and at the same time the corresponding SRE bit is set. When the SRQ is generated, the RQS bit is set to 1 and remains set until read by a serial poll. Once the RQS is read, it returns to 0. Command Structure The GPIB and RS-232 commands follow the guidelines determined by the Standard Commands for Programmable Interface (SCPI) consortium.
Controlling Your Optical Power Meter Remotely Error Messages Error Messages The Optical Power Meter can manage both system and device-specific errors. The generic format for error messages is illustrated below. , “ ; “ As shown in the above figure, the message contains three parts: the error number, error description, and device dependent information. All error messages are stacked in a FIFO buffer.
6 Maintenance To help ensure long, trouble-free operation: ³ Keep the unit free of dust. ³ Store unit at room temperature in a clean and dry area. Keep the unit out of direct sunlight. ³ Avoid high humidity or significant temperature fluctuations. ³ Avoid unnecessary shocks and vibrations. ³ If any liquids are spilled on or into the unit, turn off the power immediately and let the unit dry completely.
Maintenance Cleaning Detector Ports Cleaning Detector Ports Regular cleaning of detectors will help maintain measurement accuracy. IMPORTANT Always cover detectors with protective caps when unit is not in use. To clean detector ports: 1. Remove the protective cap and adapter (FOA) from the detector. 2. If the detector is dusty, blow dry with compressed air. 3. Being careful not to touch the soft end of the swab, moisten a cleaning tip with only one drop of isopropyl alcohol.
Maintenance Replacing Fuses Replacing Fuses The PM-1100 Optical Power Meter contains two F2.0L250V-type fuses (IEC, 5 mm x 20 mm (0.197 in x 0.787 in), fast-acting, low breaking capacity, 250 V). The fuse holder is located at the back of the Optical Power Meter, just beside the power inlet. To replace a fuse: 1. Turn off the unit and unplug the power cord. 2. Using a flat-head screwdriver as a lever, pull out the fuse holder. Fuse holder 3. Check and replace the fuses, as necessary. 4.
Maintenance Recalibrating the Unit Recalibrating the Unit Manufacturing and service center calibrations are based on the ISO/IEC 17025 Standard, which states that calibration documents must not contain a recommended calibration interval, unless this has been previously agreed upon with the customer. Validity of specifications depends on operating conditions.
Maintenance Upgrading the Embedded Software 5. If the software upgrade is performed in Windows 98, you must restart your computer in DOS mode before launching the upgrade program. In other cases, simply exit to DOS. 6. Go to the “C:\Test” folder and launch the upgrade program by typing the following line (spaces are required between parameters): Lo0006.exe /C:2 /F:c:\test\filename.
Maintenance Upgrading the Embedded Software 8. If the software upgrade was performed in Windows 2000, an error message is displayed: “LO0006 NTVDM has encountered a System Error. The parameter is incorrect. Choose ’Close’ to terminate the application.”. Click on Close to hide the dialog box. 9. Turn the Optical Power Meter off, and then on again. Some units will display the new version number at start-up, otherwise press the up and right arrow keys together while the unit is turned on.
Maintenance Recycling and Disposal (Applies to European Union Only) Recycling and Disposal (Applies to European Union Only) Recycle or dispose of your product (including electric and electronic accessories) properly, in accordance with local regulations. Do not dispose of it in ordinary garbage receptacles. This equipment was sold after August 13, 2005 (as identified by the black rectangle).
7 Troubleshooting Finding Information on the EXFO Web Site The EXFO Web site provides answers to frequently asked questions (FAQs) regarding the use of your PM-1100 Optical Power Meter. To access FAQs: 1. Type http://www.exfo.com in your Internet browser. 2. Click on the Support tab. 3. Click on FAQs and follow the on-screen instructions. You will be given a list of questions pertaining to your subject. The EXFO Web site also provides the product’s most recent technical specifications.
Troubleshooting Contacting the Technical Support Group Contacting the Technical Support Group To obtain after-sales service or technical support for this product, contact EXFO at one of the following numbers. The Technical Support Group is available to take your calls from Monday to Friday, 7:30 a.m. to 8:00 p.m. (Eastern Time in North America). Technical Support Group 400 Godin Avenue Quebec (Quebec) G1M 2K2 CANADA 1 866 683-0155 (USA and Canada) Tel.: 1 418 683-5498 Fax: 1 418 683-9224 support@exfo.
Troubleshooting Transportation Transportation Maintain a temperature range within specifications when transporting the unit. Transportation damage can occur from improper handling. The following steps are recommended to minimize the possibility of damage: ³ Pack the unit in its original packing material when shipping. ³ Avoid high humidity or large temperature fluctuations. ³ Keep the unit out of direct sunlight. ³ Avoid unnecessary shock and vibration.
8 Warranty General Information EXFO Electro-Optical Engineering Inc. (EXFO) warrants this equipment against defects in material and workmanship for a period oftwo years from the date of original shipment. EXFO also warrants that this equipment will meet applicable specifications under normal use.
Warranty Liability Liability EXFO shall not be liable for damages resulting from the use of the product, nor shall be responsible for any failure in the performance of other items to which the product is connected or the operation of any system of which the product may be a part. EXFO shall not be liable for damages resulting from improper usage or unauthorized modification of the product, its accompanying accessories and software.
Warranty Service and Repairs Service and Repairs EXFO commits to providing product service and repair for five years following the date of purchase. To send any equipment for service or repair: 1. Call one of EXFO’s authorized service centers (see EXFO Service Centers Worldwide on page 64). Support personnel will determine if the equipment requires service, repair, or calibration. 2.
Warranty EXFO Service Centers Worldwide EXFO Service Centers Worldwide If your product requires servicing, contact your nearest authorized service center. EXFO Headquarters Service Center 400 Godin Avenue Quebec (Quebec) G1M 2K2 CANADA EXFO Europe Service Center Omega Enterprise Park, Electron Way Chandlers Ford, Hampshire S053 4SE ENGLAND EXFO China Service Center/ Beijing OSIC Beijing New Century Hotel Office Tower, Room 1754-1755 No. 6 Southern Capital Gym Road Beijing 100044 P. R.
A Technical Specifications IMPORTANT The following technical specifications can change without notice. The information presented in this section is provided as a reference only. To obtain this product’s most recent technical specifications, visit the EXFO Web site at www.exfo.com.
B Remote Control Commands This section presents detailed information about the commands and queries supplied with your PM-1100 Optical Power Meter. IEEE 488.2 Commands—Quick Reference The Optical Power Meter recognizes the main commands identified in IEEE-488.2. The table below summarizes these commands. The commands are fully explained on the following pages.
Remote Control Commands IEEE 488.2 Commands—Quick Reference *CLS Description This command sets the contents of the Standard Event Register (ESR), the Status Byte Register (STB), and the Error Queue (ERR) to zero. This command is commonly used to clear the status registers before enabling SRQ. Note that the output queue, Standard Event Status Enable Register (ESE), and Service Request Enable Register (SRE) are not affected.
Remote Control Commands IEEE 488.2 Commands—Quick Reference *ESR? Description This query reads the contents of the Standard Event Status Register (ESR). Syntax *ESR? Response A binary integer between 0 and 255. *IDN? Description This query reads the IQ system identification string. Syntax *IDN? Response “EXFO E.-O. Eng PM-1100 Vxx.xx”, where xx.xx is the current product version. *LOK Description This command is used to set the Remote Lockout programming state.
Remote Control Commands IEEE 488.2 Commands—Quick Reference *OPC Description This command will cause the PM-1100 to generate the “Operation complete” message in the Standard Event Status Register (ESR) when all pending selected PM-1100 operations have been completed. Syntax *OPC Example *OPC;*IDN? *OPC? Description This query puts an ASCII 1 in the output queue when the content of the input queue has been processed.
Remote Control Commands IEEE 488.2 Commands—Quick Reference *RST Description This command empties the step response list. It is only seen when it is part of another multiple command. In the example below, by adding this command after *IDN?, you will not be able to access the answer. The *RST, in this instance, erases the identification string. In addition, this command performs the following operations: 1. Return to initial state before command was sent, and not necessarily to previous settings. 2.
Remote Control Commands IEEE 488.2 Commands—Quick Reference *SRE Description This command sets bits in the Service Request Enable Register (SRE; initial value is 255), and enables the matching bit in the Status Byte Register (STB). The command can be used to select which events can initiate a service request. Syntax *SRE Parameter The parameter must be between 0 and 255. *SRE? Description This query returns the contents of the Service Request Enable Register (SRE).
Remote Control Commands IEEE 488.2 Commands—Quick Reference *TST? Description This query initiates an internal self-test and returns a binary value indicating the results of the test.
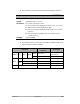
Remote Control Commands Product-Specific Commands—Quick Reference Product-Specific Commands—Quick Reference The table below contains a summary of th ePM-1100 Optical Power Meter specific commands. Thes commands are fully explained on the following pages. Parameter/ Response Command ABOR DISP — Stop continuous measurements DIMM Set display intensity DIMM? (LO|HI|OFF) Get display intensity (±999.
Remote Control Commands Product-Specific Commands—Quick Reference Parameter/ Response Command MMEM ACQ? ACQ DATA? Description (0|1) Acquisition in progress? (0 to 1025) Get number of acquired measurement DATA UNIT? (0|1|2|3) Get measurement units VALU? (0 to 1025) Get acquired measurement WAV? (9999 nm) Get wavelength DEL — Clear memory locations DELA Set delay DURA Set duration SAMP <0 to 1025> Set number of samples SAMP? (0 to 1025) Get number of samp
Remote Control Commands Product-Specific Commands—Quick Reference Parameter/ Response Command SENS CORR COLL OFFS ZERO * [MAGN] FREQ * FREQ? <99.999> [DB] Set offset value [HZ] Set sampling rate (99.9) Get sampling rate CAT? (99.9;99.9;...) List sampling rates POW REF? (+99.
Remote Control Commands Product-Specific Commands—Description Product-Specific Commands—Description ABORt Description This command stops any measurement in progress. Syntax ABOR(0..26) Example ABOR3 DISPlay:DIMMer Description This command is used to adjust the intensity of the PM-1100 display (high or low) or to turn off the display without turning off the unit. Syntax DISP:DIMM Parameters The parameter can be “HI”, “LO”, or “OFF”.
Remote Control Commands Product-Specific Commands—Description DISPlay:DIMMer? Description This query returns the intensity of the PM-1100 display (high, low, or off) Syntax DISP:DIMM? Response “HI” if the intensity is high “LO” if the intensity is low “OFF” if the display is off Example DISP:DIMM? FETCh[:SCALar]:POWer:DC? Description This query returns the last stored value. 78 Syntax FETC(0..26)[:SCAL]:POW:DC? Response A power measurement in the “±999.
Remote Control Commands Product-Specific Commands—Description FORMat:READings[:DATA] Description This command changes the resolution of the displayed power value, when dB or dBm is selected. Syntax FORM(0..
Remote Control Commands Product-Specific Commands—Description INITiate:CONTinuous Description This command starts or stops continuous mode. When continuous mode is activated, the latest value is continuously stored in the initialized memory location so it can be fetched at any time with the FETC[:SCAL]:POW:DC? query. Values can be power or loss measurements, depending on the current measurement mode of the PM-1100.
Remote Control Commands Product-Specific Commands—Description INITiate[:IMMediate] Description This command stores a value in the initialized memory location so it can be fetched at any time with the FETC[:SCAL]:POW:DC? query. Values can be power or loss measurements, depending on the current measurement mode of the PM-1100. Syntax INIT[:IMM] Parameters N/A Example INIT:IMM Note Use the command INIT:STOR to initialize a memory location.
Remote Control Commands Product-Specific Commands—Description MMEMory:ACQuisition Description This command initiates a data acquisition with the currently set parameters (delay, duration, number of samples). The acquisition will continue until the duration elapses or until an acquisition stop (MMEM:ACQ 0) command is sent.
Remote Control Commands Product-Specific Commands—Description MMEMory:ACQuisition:DATA? Description This command returns the number of data saved by the last acquisition. Syntax MMEM:ACQ:DATA? Response Number of acquired data saved in memory locations in the “600” format. Example MMEM:ACQ:DATA? MMEMory:ACQuisition:DATA:RECAll:UNIT? Description This query returns the measurement units corresponding to the last value fetched with the MMEM:ACQ:DATA:RECA:VALUE? query.
Remote Control Commands Product-Specific Commands—Description MMEMory:ACQuisition:DATA:RECAll:VALUE? Description This command returns the measurement saved in the memory location. Syntax MMEM:ACQ:DATA:RECA:VALUE? Parameters The parameter represents the memory location from which to recall the measurement data (out of the 1024 available). Response Measurement data saved in the specified memory location in the “±999.999E±99” format.
Remote Control Commands Product-Specific Commands—Description MMEMory:ACQuisition:DELete Description This command clears the 1024 memory locations reserved for the acquisition data. Syntax MMEM:ACQ:DEL MMEMory:ACQuisition:DELAy Description This command changes the delay parameter for the acquisition setup. Syntax MMEM:ACQ:DELA Parameters The parameter is the delay before the acquisition starts in the “HHH,MM,SS” format (the maximum delay is 999 hours, 59 minutes, 59 seconds).
Remote Control Commands Product-Specific Commands—Description MMEMory:ACQuisition:SAMPles Description This command changes the samples parameter for the acquisition setup. Syntax MMEM:ACQ:SAMP Parameters The parameter is the number of samples to be set for the acquisition setup. If an invalid parameter is entered, the closest valid parameter will be entered instead.
Remote Control Commands Product-Specific Commands—Description READ[:SCALar]:POWer:DC? Description This query returns the measurement currently read by the PM-1100 (whether the unit is in absolute power or relative mode). Syntax READ[:SCAL]:POW:DC? Response A measurement in the “±999.999E±99” format. To know the current measurement units, use the SENS:POW:UNIT? query.
Remote Control Commands Product-Specific Commands—Description SENSitivity:AVERage[:STATe] Description This command activates or deactivates data averaging. Syntax SENS:AVER[:STAT] Parameters The < boolean > parameter can be “0” averaging is disabled “1” averaging is enabled Example SENS:AVER:STAT 1 SENSitivity:AVERage:STATe? Description This query returns a value indicating whether data averaging is enabled or disabled.
Remote Control Commands Product-Specific Commands—Description SENSitivity:CORRection:OFFSet[:MAGNitude] Description This command sets an offset value that is applied when dB or dBm units are selected. Syntax SENS:CORR:OFFS[:MAGN] [DB] Parameters The is an offset with dB units in the ±99.999 format. Example SENS:CORR:OFFS:MAGN 22.105 SENSitivity:FREQuency Description This command selects a data sampling rate.
Remote Control Commands Product-Specific Commands—Description SENSitivity:FREQuency:CATalog? Description This query returns a list of available sampling rates. Syntax SENS:FREQ:CAT? Response List of available sampling rates in the “40.0;20.0;10.0;5.0;1.0;0.5;0.1” format Example SENS:FREQ:CAT? SENSitivity:POWer:REFerence? Description This query returns the reference power for the current wavelength.
Remote Control Commands Product-Specific Commands—Description SENSitivity:POWer:REFerence:STATe Description This command selects whether absolute (dBm) or relative power measurements are performed.
Remote Control Commands Product-Specific Commands—Description SENSitivity:POWer:UNIT Description This command changes the measurement units. Syntax SENS:POW:UNIT Parameters The can be “0” or “DBM” “1” or “W” “2” or “DB” “3” or “DW” Example SENS:POW:UNIT DBM SENSitivity:POWer:UNIT? Description This query returns the current measurement units.
Remote Control Commands Product-Specific Commands—Description SENSitivity:POWer:WAVelength Description This command selects a new operating wavelength. Syntax SENS:POW:WAV [NM] Parameters The is an operating wavelength expressed in nanometers (nm). Any wavelength within the spectral range of the optical detector (at 1 nm resolution) may be selected. See Technical Specifications on page 65 for the exact spectral range of each detector type.
Remote Control Commands Product-Specific Commands—Description SYSTem:VERSion? Description This query returns the current system software version. Syntax SYST:VERS? Response “EXFO E.O. Engineering PM-1100 Vxx.xx”, where xx.xx is the current product version. Note The *IDN? and SYST:VERS? queries are equivalent. They give the same result. UNIT:POWer Description This command changes the measurement display units.
C SCPI-Based Errors Error Number Description Probable Cause -100 “Command error.” An error occurred while validating a command. -101 “Undefined header.” Unknown command. -102 “Missing parameter.” A command parameter is missing. -103 “Parameter not allowed.” An extra parameter is present. -104 “Data type error.” Invalid parameter format. -200 “Execution error.” An error occurred while executing a command. -300 “Device dependent error.
SCPI-Based Errors Error Number 96 Description Probable Cause -300 “Invalid state.” The state of the PM-1100 is not compatible with the command sent. -300 “Invalid sampling rate.” The requested sampling rate is invalid. -300 “Invalid storage location.” The specified storage location is invalid. -300 “Invalid delay value.” The entered delay value is invalid. -300 “Invalid duration value.” The entered duration value is invalid. -400 “Query error.
Index Index A absolute power measurements ................... 15 AC requirements ......................................... 10 acquisition delay...................................................... 23 duration................................................. 23 erasing data........................................... 30 number of samples ................................ 23 programming ........................................ 23 recalling data......................................... 28 starting ............
Index error messages in remote control................ 47 EXFO service centers.................................... 64 EXFO Web site............................................. 57 F FAQs............................................................ 57 fiber ends, cleaning..................................... 13 fuse replacement....................................... 9, 51 type ....................................................... 51 G GPIB addresses ............................................
Index programming an acquisition ....................... 23 protective cap ............................................. 50 R recalibration ................................................ 52 Recall button............................................... 12 recalling a configuration ...................................... 40 acquisition data ..................................... 28 manually stored data............................. 20 reference value entering a specific .................................
Index T technical specifications ......................... 57, 65 technical support ........................................ 58 temperature for storage.............................. 49 transportation requirements ................. 49, 59 type of fuses ................................................. 9 U unit covers ...................................................... 9 disconnecting .......................................... 8 installing.................................................. 9 repairing ...
P/N: 1048634 www.EXFO.com · info@exfo.com CORPORATE HEADQUARTERS 400 Godin Avenue Quebec (Quebec) G1M 2K2 CANADA Tel.: 1 418 683-0211 · Fax: 1 418 683-2170 EXFO AMERICA 3701 Plano Parkway, Suite 160 Plano TX, 75075 USA Tel.: 1 972 907-1505 · Fax: 1 972 836-0164 EXFO EUROPE Omega Enterprise Park, Electron Way Chandlers Ford, Hampshire S053 4SE ENGLAND Tel.: +44 2380 246810 · Fax: +44 2380 246801 EXFO ASIA-PACIFIC 151 Chin Swee Road #03-29, Manhattan House SINGAPORE 169876 Tel.