Operation Manual Version 11.
OPERATION MANUAL Nano 11.02 Copyright EVS Broadcast Equipment S.A.– Copyright © 2010-2013. All rights reserved. Disclaimer The information in this manual is furnished for informational use only and subject to change without notice. While every effort has been made to ensure that the information contained in this user manual is accurate, up-to-date and reliable, EVS Broadcast Equipment cannot be held responsible for inaccuracies or errors that may appear in this publication.
EVS Broadcast Equipment S.A. Issue 11.02.A July 2013 Table of Contents TABLE OF CONTENTS II WHAT'S NEW? V 1. OVERVIEW 1 2. WORKING INTERFACES 2 2.1. Overview 2 2.2. Remote Panel Controls 4 2.2.1. General Layout 4 2.2.2. LED Colors 6 2.2.3. Function Keys & Small Keys 7 2.2.4. Soft Keys and LCD Display 8 2.2.5. Jog Dial 9 2.2.6. Lever 9 2.2.7. Keyboard Locking 10 2.3. Remote Panel Operations 11 3. 2.3.1. Main Menu 11 2.3.2. Function of the Small Keys 12 2.3.3.
OPERATION MANUAL Nano 11.02 4. CLIP MANAGEMENT 4.1. Introduction 31 4.1.1. Clip Structure 31 4.1.2. Clip Numbering Hierarchy 32 4.1.3. Clip Availability on Disks 34 4.2. Clip Functions on the Remote Panel 34 4.2.1. Remote Panel Interface 34 4.2.2. Remote Panel Functions 35 4.3. Clip Functions on the VGA 5. 37 4.3.1. VGA Interface - Clip Screen 37 4.3.2. VGA Functions - Clip Screen 39 4.3.3. VGA Interface - VDR Panel 42 4.3.4. VGA Functions - VDR Panel 43 4.4.
EVS Broadcast Equipment S.A. 5.6.2. Deleting and Moving Playlist Elements 79 5.6.3. Browsing Within a Playlist 80 5.6.4. Changing the Camera Angle of a Playlist Element 81 5.6.5. Adding Cuts in Playlist Elements 82 5.6.6. Trimming Clips into a Playlist 83 5.6.7. Sorting the Playlist Elements by TC IN 83 5.7. Transition and Audio Operations IV Issue 11.02.A July 2013 84 5.7.1. Overview on Transition Effects 84 5.7.2. Adding Transition Effects in a Playlist 87 5.7.3.
OPERATION MANUAL Nano 11.02 What's New? This manual has not been subject to changes associated to new features in release 11.02. The whole operational manual has been restructured, and some topics have been reviewed in respect of their structure or content. Such changes are however not related to new features, and therefore not highlighted with the New logo.
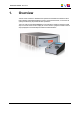
OPERATION MANUAL Nano 11.02 1. Overview The aim of this manual is to familiarize the operator with the Multicam software for EVS High Definition and Standard Definition servers, and its Remote Panel, so as to learn as quickly and efficiently as possible the basic operations. The CLIP & PLAYLIST MANAGEMENT functions allow the operator to keep up to 5400 clips on a server and of course to replay all or some of them.
EVS Broadcast Equipment S.A. 2. Working Interfaces 2.1. Overview Issue 11.02.A July 2013 Several User Interfaces The EVS server can be operated from several user interfaces that can work complementarily: • VGA interface • Remote Panel interface • LSM.Connect application • Xscreen application Initial Configuration Warning Before you start using Multicam with the Nano Remote Panel, you need to ensure that the parameters are properly set for the configuration line you want to run.
OPERATION MANUAL Nano 11.02 VGA Interface When turning on the EVS mainframe, the first step is the PC boot sequence, then the Multicam Setup window is displayed: • If a default application has been previously selected, this application will start automatically after a few seconds if no key is hit. • If a default application hasn't been defined or if the space bar is hit, the system will remain in the Multicam Setup window and wait for the operator's next command.
EVS Broadcast Equipment S.A. 2.2. Remote Panel Controls 2.2.1. General Layout Issue 11.02.A July 2013 The following diagram shows the Remote Panel along with a brief description of each area. Note The operational buttons have primary and secondary functions and are divided into upper and lower sections. By pressing the SHIFT button, you gain access to the secondary functions. 4 2.
OPERATION MANUAL Nano 11.02 Ref. Command Function 1. F-keys & small buttons Multi-purpose keys 2. Soft keys With LCD display, allows the operator to enter the Multicam MENU system 3. Lever Initiates slow motion and playlist replay 4. Jog dial Used to accurately cue disk recorder 5. Operational block 1 2. Working Interfaces PLST Initiates active playlist LOOP Records the main output (PGM1) to the first input (CAM A) of Multicam.
EVS Broadcast Equipment S.A. Ref. Command 6. Operational Block 2 7. 2.2.2. Issue 11.02.A July 2013 Function PLAY Initiates playback NETWORK Not used on XTnano LAST CUE Re-cues EVS server to previous cue point GOTO TC Allows timecode entry, with «F» keys FAST JOG Used with jog dial for rapid, manual re-cue. This mode is automatically reset after PLAY/LIVE commands. MARK Used to enter re-usable cue points (256 cycling cues).
OPERATION MANUAL Nano 11.02 2.2.3. Function Keys & Small Keys Key Function Provides access to the secondary menu. Also used as CANCEL in some messages when confirmation is required. Note: SHIFT+MENU returns to Main menu Enables use of the secondary key functions. Note: This key remains active even if released, until another key has been hit. Stores or recalls clips, recalls playlists, and enters timecode information. Is a multi-purpose key that clears clips or playlists, and clears IN and OUT points.
EVS Broadcast Equipment S.A. 2.2.4. Issue 11.02.A July 2013 Soft Keys and LCD Display The soft keys have primary and secondary functions and are divided into upper and lower sections. The LCD display is divided into two menus. 8 • To access the secondary functions in the operational menu (A’ to D’), press the SHIFT button. • To access the secondary menu, press MENU from the remote controller.
OPERATION MANUAL Nano 11.02 2.2.5. Jog Dial The jog dial allows the operator to pass into Search mode and thus to choose exactly the Short OUT or Short IN image. Move the jog dial clockwise to search forward and move it counter-clockwise to search backwards. One revolution of the jog dial will produce a jump of approximately 35 frames. When using the Fast mode, this number is multiplied by a factor defined in the Setup menu. Note The jog dial is also used to: • Set parameters in the Setup menu.
EVS Broadcast Equipment S.A. 2.2.7. Issue 11.02.A July 2013 Keyboard Locking You can lock a remote keyboard at any time to protect it against accidental changes, for example to prevent interruption of a play operation on an unattended device. Only the locked device is affected, other remotes will stay fully operational. How to Lock a Remote Panel To lock a remote, press the CLEAR key. Then, within 2 seconds, press the MENU key on the keyboard.
OPERATION MANUAL Nano 11.02 2.3. Remote Panel Operations 2.3.1. Main Menu Introduction After the boot sequence of the Multicam system, the LCD screen of the Remote Panel will display the Main menu: 2Rec 2Play Server F1: 1 Remote F6: F2: 2 Remotes F7: F3: F8: F4: F9: F5: Char. On/Off F0: 1PGM+PRV Ver:11.00.
EVS Broadcast Equipment S.A. Issue 11.02.A July 2013 Function Key Use F3 Not used. F4 Not used. F5: Char. On/Off Enables or disables the on-screen display (Timecode, Clip ID…) on the output monitors. F6: Exit Exits the Multicam software and returns to the EVS Menu. F7: Clear all clips Clears all clips. All clips will be lost. A confirmation of this command is required. For more information to this action. "Deleting Clips" on page 51.
OPERATION MANUAL Nano 11.02 CLEAR This function clears the IN / OUT/ playlist / CLIPS / CUE points. Note • To clear one CUE point, recall the desired cue point and press CLEAR+MARK key. • To clear all cues: when current picture is not a CUE point, press CLEAR+MARK key. A message appears to confirm the command. ENTER This function appends clip(s) at the end of the current playlist. This is also used to confirm saving of clips, and validate various options and messages. 2.3.3.
EVS Broadcast Equipment S.A. Issue 11.02.A July 2013 PLST This function is not active if the current playlist is empty. If the current playlist is not empty, pressing PLST once enters the Playlist Edit mode. • Pressing PLST from the Playlist Edit mode enters the Playlist Playout mode. • Pressing PLST from the Playlist Playout mode re-cues the playlist to its beginning. • Pressing 3 times PLST will always cue up the playlist ready to roll.
OPERATION MANUAL Nano 11.02 Goto OUT When you are in CLIP mode, this key combination enables the operator to go to IN / OUT points of clips, instantly. OUT This function defines the OUT point of a clip. This operates similarly to the IN button. Modification of Clip IN / OUT Points Select the clip that you wish to modify, use the jog dial to position the material at the new IN or OUT point, and re-mark the IN or OUT point(s) as required.
EVS Broadcast Equipment S.A. Issue 11.02.A July 2013 TAKE 2.3.4. • In PGM+PRV mode, pressing this button swaps cameras on PGM and PRV monitors • In Multi-PGM mode, pressing this button toggles between CAM selection and PGM selection modes. • In 2 PGM mode, when both PGMs are selected on the Remote Panel, pressing this button swaps the content loaded on PGM1 with the one loaded on PGM2 and viceversa.
OPERATION MANUAL Nano 11.02 Goto TC This function allows you to jump to a given timecode in the loaded train or clip. How to Go to a Given Timecode To go to a given timecode, proceed as follows: 1. Press SHIFT+GOTO TC key on the Remote. The GOTO TC window is displayed on the Remote Panel : Go to TC xx:xx:xx:xx [Menu] : Cancel [Enter] : Go to TC Reset Return FromDate LTC To Date 2.
EVS Broadcast Equipment S.A. Issue 11.02.A July 2013 Last Cue This function re-cues the EVS server to previous cue point relative to the current timecode position. Each time the Last Cue button is pressed, the EVS server re-cues to the previous cue, etc. When recalling a cue point, the cue number appears in the upper left corner of the OSD if this option is enabled with the Cue number on OSD parameter in the Operational Setup menu (p.1.
OPERATION MANUAL Nano 11.02 PRV CTL This function enables/disables the Preview Control mode. 2.3.5. Rebooting the System from the Remote Panel «Hard Reboot» In the event that the system needs to be rebooted, the process can be accomplished from the Remote Panel. Keep in mind that doing this while Multicam is running will of course force the Multicam application to close abruptly, and up to 1 minute of the material being recorded and not clipped could be lost.
EVS Broadcast Equipment S.A. Issue 11.02.A July 2013 3. Control Modes 3.1. Live, Search or Playback Mode Multicam can be set in three different basic modes, depending on commands used: Live (E2E) Mode This mode selected at start-up can also be selected by pushing the RECORD key. Multicam records the input signal and plays it at the same time on the program output. Search Mode This mode is selected by moving the jog dial.
OPERATION MANUAL Nano 11.02 3.2. 1PGM+PRV Mode 3.2.1. 1PGM+PRV Mode Introduction Multicam has two modes for its basic operation, 1PRV+PGM and Multi PGM: • The 1PGM+PRV mode is more powerful as it allows interaction between all outputs. Synchronized replays can be rolled and chained between the cameras with either a mix, a wipe, or a cut between them. • The Multi PGM mode is more basic but gives the operator independent control of all outputs.
EVS Broadcast Equipment S.A. 3.2.2. Issue 11.02.A July 2013 1PGM+PRV Primary Menu Controls Introduction The primary menu in 1PGM+PRV mode, illustrated below, gives access to the functions detailed in the following paragraphs: Rst Cam Cam A Sync Prv Cam B CAM A / B / C / D Rst Cam Cam A Sync Prv Cam B If PRV CTL is 'OFF', select the camera to assign to the PGM output. This camera key will be highlighted in the menu. If PRV CTL is 'ON', select the camera to assign to the PRV output.
OPERATION MANUAL Nano 11.02 3.2.3. 1PGM+PRV Secondary Menu Controls Introduction The secondary menu in 1PGM+PRV mode, illustrated below, gives access to the functions detailed in the following paragraphs: Aud.Met. PgmSpd PostRoll Mix. Sw to IN Pref Mix / Wipe L>R / Wipe R>L / Wipe U>D / Wipe D>U / Cut Aud.Met. PgmSpd PostRoll Mix. Sw to IN Pref These options determine the transition effect that will occur between the PGM and PRV pictures. The mix, wipe and cut are on the same location.
EVS Broadcast Equipment S.A. Issue 11.02.A July 2013 Pref Aud.Met. PgmSpd PostRoll Mix. Sw to IN Pref Selecting this function enables the Preference mode. See section "Preference Mode (PREF)" on page 29 for more inforamtion on this option. Aud.Met. Aud.Met. PgmSpd PostRoll Mix. Sw to IN Pref This option enables/disables the display of audio meters for all channels using the OSD of the output monitors. Post-Roll Aud.Met. PgmSpd PostRoll Mix.
OPERATION MANUAL Nano 11.02 Let's say an IN point has been marked, and you activate the PRV CTL and sets to ON the SW to IN option: The slow motion of one camera can be started from this IN point. The operator selects another camera in the PRV output and, via the TAKE button, can autochain cameras from the same IN point on the PGM output. 3.3. Multi PGM Mode 3.3.1. Multi PGM Overview Introduction Multicam has two modes for its basic operation, 1PRV+PGM and Multi PGM: 3.
EVS Broadcast Equipment S.A. Issue 11.02.A July 2013 How to Enter the Multi-PGM Mode To enter the Multi PGM mode, press B from the Main menu. This button is labeled '1 PGM', or '2 PGM' according to your system configuration. The Remote Panel will then display the following screen: PGM1 CAM A *PGM2* CAM B Aud.Met. PgmSpd Sw to IN P.1 B.1 PL 11: < Msg: Rst Cam Sync To PGM 1 PGM 2 PostRoll Pref The LCD display is divided in two menus controlled by soft keys (A, B, C, D).
OPERATION MANUAL Nano 11.02 Sync To Rst Cam PGM 1 Sync To PGM 2 This button allows you to synchronize the selected PGM in use with another one. Press this button and then select the PGM to be used as a reference. How to Assign a Camera to a Channel In Multi PGM mode, to change the current camera on each PGM, proceed as follows: 1. In the primary menu, select the PGM to which you want to change the current camera. The TAKE key at the bottom of the remote is then lighting red. 2. Press the TAKE key.
EVS Broadcast Equipment S.A. Issue 11.02.A July 2013 Practical example The operator builds a playlist with Fills and another playlist with Keys. He sets the Playlist Load parameter to Conditional in the setup menu, then enters the 2 PGM mode, selects the Fills playlist as current playlist, presses A to gain control on PGM1, presses PLST two or three times to enter the PLST DIFF mode and cue up the Fills playlist to its 1st clip.
OPERATION MANUAL Nano 11.02 3.4. Synchronization Mode (Switch To In) The Synchronization mode allows users to define how they jump from one camera to the other. The Synchronization mode is available in the secondary menu from the main LCD display, using the B soft key. If the Synchronization mode is OFF (SW to IN is not highlighted in the secondary menu), a request for camera change will produce a jump at the same timecode on the requested camera. This mode allows synchronous change of camera angle.
EVS Broadcast Equipment S.A. 3.6. Issue 11.02.A July 2013 Controlled and Primary Channels Controlled Channel A channel is "controlled" when the operator can control it with the jog dial. In this case, the words "FULL CTRL" are present on the top of the OSD of the output monitor of that channel. Primary Channel The primary channel is the first controlled channel. It is identified by stars around its name on the OSD of the output monitor and on the LCD display of the Remote Panel (ex: *PGM1*).
OPERATION MANUAL Nano 11.02 4. Clip Management 4.1. Introduction 4.1.1. Clip Structure Concepts A clip is defined by Short IN and Short OUT points. When referring to Short IN and Short OUT points, the operators usually use the terms IN point and OUT point. When Short IN and Short OUT points are set, the system automatically write protects a user definable length of material before and after the Short IN/OUT points respectively, these are referred to as the guardbands.
EVS Broadcast Equipment S.A. Issue 11.02.A July 2013 General Principles Protect IN & Protect OUT points of a clip cannot be replaced by new ones. Short IN & Short OUT points of a clip can be replaced by new ones. Short OUT point is excluded. The clip freezes on previous field when playing back (with post-roll mode disabled). (Short) IN & OUT are always on even fields. This is automatic.
OPERATION MANUAL Nano 11.02 Clip Hierarchy Diagram The following diagram represents the hierarchy of the Multicam clip numbering system. As an example, clip number “112” is used: Clip LSM ID The clip numbering system is as follows: In the above example, the • “5” refers to the clip page number (1 to 10). • “4” refers to the clip bank (1 to 9) • “7” refers to the clip number (1 to 10) inside the bank • "B" refers to the camera name. 4.
EVS Broadcast Equipment S.A. 4.1.3. Issue 11.02.A July 2013 Clip Availability on Disks Various clip types can be distinguished depending on whether they are available on the disks or not. Depending on the clip availability on disks, you can perform specific actions on the given clip or not. Clip Available Actions Clip on disk Clips which are protected on disks, and which have Short IN and Short OUT points present on disks. All the material is available on the disk.
OPERATION MANUAL Nano 11.02 Secondary Menu Without Keyword File Defined 1 2 3 111A Push >Archive Aux Clip Search PostRoll Cam In this mode of the secondary menu, clips can still be directly recalled using the F1-F10 keys of the Remote Panel. 4.2.2. Remote Panel Functions Secondary Menu in Clip Mode Push Push >Archive Aux Clip PostRoll Cam The Push function allows you to easily send a copy of a clip to another machine on the network, via the GigE network.
EVS Broadcast Equipment S.A. Issue 11.02.A July 2013 >Archive Push Aux Clip >Archive PostRoll Cam The Archive function allows the operator to flag a clip to place it in the archive queue of the Xtract This function is blinking when the clip is flagged for archiving, but has not yet been archived. It is permanently highlighted when the archiving of the clip is completed.
OPERATION MANUAL Nano 11.02 4.3. Clip Functions on the VGA 4.3.1. VGA Interface - Clip Screen Standard View The navigation through the Clip screen, and the various functions available on this screen, can be performed using the tablet and stylus, or the keyboard shortcuts. 4.
EVS Broadcast Equipment S.A. Issue 11.02.A July 2013 Extended View The extended view shows cameras A to F instead of A to D. Only 1 bank can be viewed at a time. The switch between standard and extended view is done by pressing F5 on the keyboard or by clicking on the “F5:VIEW” area on the screen. Title Bar The Title bar contains the status information: • Name of the EVS server. • Total number of clips (1 camera angle counting for 1 clip in this count). • Total duration of all clips.
OPERATION MANUAL Nano 11.02 For each clip and camera angle, the following information is available: Field Description Clip ID Unique identifier of the clip on the server. Ex: 111A The clip ID is followed by the “Creating” message when the clip is in the process of being created, copied or moved to this location.
EVS Broadcast Equipment S.A. Issue 11.02.A July 2013 Clip Management Area Name Capture Field This is the only capture area of the screen. It is used to enter the name to assign to a clip/playlist, or to enter the ID of a clip to recall. Mode Field It indicates if the clip screen is currently in CLIP or CAM mode. In CLIP mode, actions on a clip will use all available cameras for this clip. In CAM mode, actions on a clip will only use the selected camera for this clip. Default value is CAM mode.
OPERATION MANUAL Nano 11.02 Command Description ALT+Z:>ARCHIVE Allows the operator to flag a clip to place it in the archive queue of the Xtract defined in the Operational Setup menu (p.7.1 F1) or in the Setup screen. When a clip is flagged for archiving, but has not yet been archived, its ID will be blinking green in the Clip screen. It is permanently highlighted green when the archiving of the clip is completed.
EVS Broadcast Equipment S.A. 4.3.3. Issue 11.02.A July 2013 VGA Interface - VDR Panel VDR Panel The VGA VDR Panel is accessed from any VGA screen by pressing SHIFT+F9 on the keyboard. The lower section of the VDR Panel is similar to the clip screen, with the same functions. The upper section of the VDR Panel features two windows that can each take control of one channel of the server. Pressing SHIFT+F9 in the VDR Panel returns the VGA to the Clip screen mode.
OPERATION MANUAL Nano 11.02 The name of the channel currently assigned to each window is displayed on the top of each of them. To assign a new channel to this window, press ALT+H. A new window appears on the other side to allow the selection of a new channel. Use the UP ARROW and DOWN ARROW keys to select the channel and press ENTER, or directly press ALT+the number of the channel as highlighted in green. The Play channels already assigned appear in grey and cannot be selected.
EVS Broadcast Equipment S.A. Issue 11.02.A July 2013 The following functions are available to play and browse the current element: Command Description ALT+P Play from / Pause on the current picture ALT+Y Play the current clip in endless loop mode. The play will start from the current picture until the Short OUT point of the clip, then will automatically loop back to the Short IN point and keep playing, and so on… ALT+V PlayVar at the speed specified in the adjacent field.
OPERATION MANUAL Nano 11.02 The VDR Panel Recorder can be used to start/stop the record, and to create clips from the local record trains. For example, it allows the creation of clips on a server that has no Play channel. Press ALT+R to start or stop the record on the record channel assigned to the window. No confirmation is required. Warning In Sportlight mode, all recorders will be stopped at once to keep the synchronization between all record channels. 4.4. Operations on Clips 4.4.1.
EVS Broadcast Equipment S.A. Issue 11.02.A July 2013 4. Press SHIFT+Page+F_ key to select the page where the clip will be stored (page 1 contains clips 110 to 199, page 2 contains clip 210 to 299, and so on). 5. Press SHIFT+F_ key to select the bank where the clip will be stored (use F1 to F9 keys as F10 is reserved for the playlist bank available on each page). 6. Press F_ key to select the location of the clip. The clip is created in the specified location.
OPERATION MANUAL Nano 11.02 9. Press ALT+S to open the 'Save as' window. If needed, you can name or rename the clip. Press ENTER to save the clip to the current cursor location in the lower section of the VDR Panel or ALT+U to save it in the first available clip location in the current server (that is the first available location where no camera angle is already present).
EVS Broadcast Equipment S.A. Issue 11.02.A July 2013 Playback Speed Options • • To play back a selected clip, with the lever, at a speed varying from 0% to a given maximum speed, you need to do the following: ◦ Define the requested maximum speed in the PGM Speed/Var max parameter (p.9.1 F3) in the Operational Setup menu. ◦ Select (highlight) the VarMax option in the secondary menu in PGM/PRV mode.
OPERATION MANUAL Nano 11.02 In the VGA Interface Introduction In the Clip window, use the keyboard keys to move through pages/banks, as well as select and recall clips. The main commands are detailed in the table below: Moving Around Pages and Banks In order to ... Proceed as follows: Highlight clips in the displayed banks Press the Up, Down, Left or Right Arrow keys. The highlighted clip or clip position is surrounded by green arrows.
EVS Broadcast Equipment S.A. Issue 11.02.A July 2013 How to Load a Record Train in the VDR Panel 1. Press ALT+L to go in LIVE mode (or click on the LIVE function). 2. Press ALT+the letter of the desired record train (A/B/C/D/E/F), or click on it. 3. The letters corresponding to the available record trains are highlighted in green, and the letter of the current record train in red. How to Load a Clip in the VDR Panel 1.
OPERATION MANUAL Nano 11.02 4.4.3. Deleting Clips Introduction You can delete any clip available on disks as well as growing clips, but: • Loaded clips cannot be deleted. • Clip that are on air cannot be deleted. In these cases, a warning message is displayed. Additionally, the deletion must be confirmed in the warning message box that appears: • When the clip is protected. • When the Confirm del clp/plst parameter is set in the Operational Setup menu (p.5.1 F3).
EVS Broadcast Equipment S.A. Issue 11.02.A July 2013 Deleting All Unprotected Clips in a Bank To delete all unprotected clips stored on a given bank, proceed as follows: 1. Select the page where the bank that you wish to clear of all unprotected clips is stored. 2. Press CLEAR, SHIFT , then the F_ key corresponding to the bank. The following confirmation message is displayed: Caution: This will delete all unprotected clips stored on bank X [Menu] : Cancel [Enter] : Confirm 3.
OPERATION MANUAL Nano 11.02 In the VGA Interface To delete a clip, proceed as follows: 1. Move the cursor to the clip to delete. 2. Press CTRL+DEL or click on the corresponding area in the Clip Management area. 4.4.4. ◦ In 'CAM' mode, only the camera selected is deleted. ◦ In 'CLIP' mode, all cameras of the clip are deleted. Copying and Moving Clips Principles • Copying a clip gives a new clip which is totally independent from the original. It can therefore be trimmed, named, deleted, etc.
EVS Broadcast Equipment S.A. Issue 11.02.A July 2013 3. Select the COPY or MOVE function by pressing the A or B key. The selected function will be highlighted on the Remote Panel and the message will be updated accordingly on the OSD. 4. Press the D key in the Copy/Move menu to select: ◦ 'CLIP' mode: all camera angles of the clips will be copied or moved. ◦ 'CAM' mode: only the camera angles of the clip loaded on the controlled channels will be copied or moved. 5.
OPERATION MANUAL Nano 11.02 How to Copy a Clip in the VDR Panel Player To copy a clip from the VDR Panel Player, proceed as follows: 1. Load the original clip 2. Press ALT+S to save the current clip to another location. This creates a copy of the clip. 3. Save the clip to the current cursor location by pressing ENTER, or to the first available clip location on the current server by pressing ALT+U. 4. You can also rename the clip during this operation.
EVS Broadcast Equipment S.A. Issue 11.02.A July 2013 In the Remote Panel Interface To restripe the timecode of a clip, proceed as follows: 1. Recall the clip by pressing the corresponding F_ key. 2. Move the jog dial to reach the picture where you want to define a new timecode. 3. Press the MENU key to access the secondary menu. 4. Press SHIFT+C to call the Set TC function. 5. Enter the new timecode for the current picture. 6. In 59.
OPERATION MANUAL Nano 11.02 3. To modify one of the following timecodes: ◦ The LTC timecode and date: Type in the new timecode for the Short IN point and date of the clip in the Set TC field following the LTC field. ◦ The user-defined timecode and date: Type in the new timecode for the Short IN point and date of the clip in the Set TC field following the USER field. ◦ The primary TC for this clip: Press the A or B key corresponding to the requested primary TC. 4. In 59.
EVS Broadcast Equipment S.A. 4.4.8. Issue 11.02.A July 2013 Changing the Primary Camera of a Clip You can change the primary camera of a clip in the VGA interface. To change the primary camera of a clip, proceed as follows: 1. In the Clip screen, move the cursor to the desired camera. 2. Press F4 on the keyboard or click with the stylus on the corresponding area in the Function bar. 58 ◦ This camera becomes the new primary camera.
OPERATION MANUAL Nano 11.02 5. Playlist Management 5.1. Introduction Playlist Creation Playlists can be created on the server via the Nano Remote Panel and/or the Multicam user interface. Limitation on Playlist and Timeline Elements • A playlist can include up to 1000 elements. • Up to 16000 playlist elements can be saved on a server. • The temporary playlist elements, available for undo and redo actions, are stored on the server and are purged each time the Multicam application is closed.
EVS Broadcast Equipment S.A. 5.2. Issue 11.02.A July 2013 Selecting Playlists Playlist LSM ID The playlist numbering system is as follows: In the above example, the • “5” refers to the clip page number (1 to 10). • The bank page is not specified as the playlists are always stored on bank 10 of a page. • “7” refers to the playlist position (1 to 10) inside bank 10.
OPERATION MANUAL Nano 11.02 5.3. Playlist Functions on the Remote Panel 5.3.1. Edit and Playout Modes Introduction Two modes are available on the Remote Panel to access and manipulate the playlists: The Playlist Edit mode and the Playlist Playout mode: • The Playlist Edit mode is used to modify the playlist. • The Playlist Playout mode is used to roll the playlist on air. Editing the playlist in Playlist Playout mode is not possible.
EVS Broadcast Equipment S.A. Issue 11.02.A July 2013 Accessing the Playlist Playout Mode When you load a playlist pressing the PLST key on the Remote Panel, you need to press PLST a second time to enter the Playlist Playout mode. The first frame of the playlist element following the one on the PGM will be displayed on the PRV side. This allows the operator to play only parts of the playlist, starting from the current position.
OPERATION MANUAL Nano 11.02 FX Dur The FX Dur function (C key) sets the duration of the transition effect. The default value that initially appears is determined by the value set in the Setup menu. The effect duration will affect the transition at the beginning of the selected clip. Use the lever to to adjust the value, then press ENTER to confirm. Effect The Effect function (SHIFT+C key) is used to select the type of transition effect (Mix/Wipe/Cut/Fade).
EVS Broadcast Equipment S.A. Issue 11.02.A July 2013 Add cut The Add cut function (SHIFT+D key) allows the operator to split an existing clip into two independent clips at a selected point. Both resulting clips are duplicates of the original one with additional short-in and short-out points added at the split point. 5.3.3. Functions in Playlist Playout Mode Once the playlist is cued and ready to roll, the menu below is displayed on the Remote LCD.
OPERATION MANUAL Nano 11.02 5.4. Playlist Functions on the VGA 5.4.1. VGA Playlist Screen Introduction Pressing F10 on the keyboard calls the VGA Playlist screen. The Playlist screen displays information on the clips included in the current or loaded playlist. Several transport functions are available from this screen. "Clip Functions on the VGA" on page 37 for more information.
EVS Broadcast Equipment S.A. Issue 11.02.A July 2013 If no playlist is loaded on the PGM1: 5.4.2. • The information displayed on the Playlist screen refers to the current playlist, except the remaining time, which is not displayed. • The PLAY, SKIP, NEXT and RECUE commands are NOT displayed on the bluehighlighted section at the bottom of the page.
OPERATION MANUAL Nano 11.02 The following operations can be performed from the VGA playlist screen: Criteria Description Naming a playlist or the current clip For more information, see section "Naming a Playlist or Playlist Element" on page 74. PLAY/pause Press ALT+P to start the playback / pause of the playlist from the current position. RECUE Press ALT+R to recue to the beginning of the playlist and pause.
EVS Broadcast Equipment S.A. Issue 11.02.A July 2013 How to Set the Current Playlist In the Remote Panel Interface To set the current playlist, proceed as follows: 1. Press SHIFT+Page+F_ key to select the page in which the desired playlist is located. 2. Press SHIFT+F10 to select the playlist bank. 3. Press F_ key to select the desired playlist. 4. Press ENTER to confirm. To load the current playlist, continue as follows: 5. Press PLST to load the current playlist on a player channel (it cannot be empty).
OPERATION MANUAL Nano 11.02 How to Recall and Load a Playlist You can only recall and load a playlist if this is not empty. To load a playlist on a player channel, proceed as follows: 1. Access the desired playlist bank by pressing F10 from the requested page. 2. Select the playlist to load with the F1-F10 keys. The selected playlist becomes current and is displayed on the LCD display. 3. Press PLST key on the Remote Panel to load the current playlist.
EVS Broadcast Equipment S.A. 5.5.3. Issue 11.02.A July 2013 Deleting Playlists Note Deleting a playlist deletes all the playlist elements from the playlist as well as the playlist definition in the database. In the Remote Panel Interface To delete a playlist, proceed as follows: 1. Press SHIFT+Page+F_ key to select the page in which the playlist to delete is located. 2. Press SHIFT+F10 to select the playlist bank. 3. Press CLEAR+F_ key to delete the corresponding playlist. 4.
OPERATION MANUAL Nano 11.02 5.5.4. Copying Playlists Introduction From the VGA Clip screen, you can copy or move playlists, through cut, copy and paste commands, in the same way as you do with clips. From the Remote Panel, you can only copy playlists. The copy process is seamless to the user as long or short copies of a playlist are performed as a background process.
EVS Broadcast Equipment S.A. Issue 11.02.A July 2013 Available Copy Actions The following table provides an overview on the copy actions available from the Remote Panel and from the VGA interface.
OPERATION MANUAL Nano 11.02 6. Specify whether to copy the EDL with or without the clips: ◦ Press ENTER to copy only the EDL without copying the elements contained in the original playlist. The copy is done instantly since there is no material to transfer. ◦ Press PLST+CLP (B key) to copy the EDL together with the playlist elements. The display becomes: Copy Playlist and all net. clips to Playlist 13 ? [Menu]: Cancel [Enter]: Confirm COPY PLST+CLP SHORT NEW PLST 7.
EVS Broadcast Equipment S.A. 5.5.5. Issue 11.02.A July 2013 Naming a Playlist or Playlist Element Introduction You can name or rename a playlist or one of its elements only from the VGA interface. Note When entering a name, use BACKSPACE to delete the last character or ESC to clear the entire field. How to Name a Playlist From the Playlist Bank Window To name a playlist from the VGA Playlist Bank window, proceed as follows: 1.
OPERATION MANUAL Nano 11.02 How to Name a Playlist Element To name the current element in the loaded playlist from the VGA Playlist window, proceed as follows: Note This function is only available when the playlist is the current one in Playlist Edit mode (PLST EDIT) or Playlist Playout mode (PLST DIFF) on the Remote Panel. 1. Press F10 to open the VGA Playlist screen. The loaded playlist is displayed and the current playlist element on the Remote Panel is selected. 2.
EVS Broadcast Equipment S.A. Issue 11.02.A July 2013 How to Loop Back a Playlist into the Server To consolidate a playlist using the internal Loop mode, proceed as follows: 1. Add the requested effects to the playlist. 2. Recue the playlist. 3. Activate the Loop mode via the SHIFT+Loop key. 4. Roll the playlist. The playlist will be recorded onto the disks (Channel 1 – CAM A) as a continuous video/audio stream.
OPERATION MANUAL Nano 11.02 How to Activate the Continuous Timecode Regeneration To activate the continuous timecode regeneration, proceed as follows: 1. In the Playlist page (F10), press TAB several times until the ON/OFF field after ‘Regeneration of TC’ is green highlighted. 2. Press the right arrow key to toggle the function to ON. 3.
EVS Broadcast Equipment S.A. Issue 11.02.A July 2013 How to Add Clips at the End of the Current Playlist You can create a playlist very quickly. The experienced operator can include a clip at the end of the playlist containing an action that happened seconds before the playlist is played on air. To add clips quickly at the end of the current playlist, you do not have to enter the Edit mode. To add clips to the current playlist, proceed as follows: 1. Activate a playlist as the current playlist. 2.
OPERATION MANUAL Nano 11.02 Inserting Growing Clips into Playlists Growing clips can be inserted in playlists in the same way as other clips. However, their display has the following characteristics: Display: • They will be displayed with the ‘Creating’ message in the playlist on the VGA. • The growing clips ID will be blinking on the mini playlist display and on the playlist screen on the Remote Panel, as well as on the OSD. Remaining time: • 5.6.2.
EVS Broadcast Equipment S.A. Issue 11.02.A July 2013 How to Move an Element within a Playlist Note You can only move elements within a playlist if you are in PGM/PRV mode. To move a playlist element within a playlist using the Remote Panel, proceed as follows: 1. While you are in Playlist Edit mode, scroll within the playlist to the clip that needs to be moved. 2. Select Delete from the Playlist Edit menu. The clip is sent to the clipboard and loaded on the PRV channel. 3.
OPERATION MANUAL Nano 11.02 Browsing Quickly Through a Playlist When you are neither in Playlist nor in Clip mode, press the Browse key on the Remote Panel to enter the current playlist in Browse mode. In this mode, you can quickly jump to the first field of each clip inside the playlist by moving the jog dial. To return to the normal Playlist Edit mode, press the Browse key again. When you are in Playlist Edit mode, you can of course also activate the Browse mode by pressing the Browse key.
EVS Broadcast Equipment S.A. 5.6.5. Issue 11.02.A July 2013 Adding Cuts in Playlist Elements Description The Add Cut command is only available from the Remote Panel. This command duplicates a playlist or timeline element (clip, record train...) and adjusts the SHORT IN and SHORT OUT points of these new duplicated elements: • On both these elements, the guardbands and other effects are kept unchanged as in the original one.
OPERATION MANUAL Nano 11.02 The adding cut is not possible in the following cases: 5.6.6. • Within a video effect. • Within an audio effect beginning or finishing the original element. Trimming Clips into a Playlist Introduction Every playlist element can be trimmed independently of all other instances of the same clip number. Trim actions are only available in the Remote Panel. How to Trim Clips in a Playlist To trim clips in a playlist, proceed as follows: 1.
EVS Broadcast Equipment S.A. Issue 11.02.A July 2013 How to Sort Playlist Elements by TC IN To reorder the playlists elements by TC IN in a playlist, proceed as follows: 1. Open the playlist in the VGA Playlist screen. 2. Press the TAB key until you highlight the Sort by TC IN field in the Playlist management area at the bottom of the screen. 3. Press ENTER to validate. 4. Press ENTER again to confirm the operation. The playlist elements are reordered by TC IN.
OPERATION MANUAL Nano 11.02 Playlist with 1:00 sec Effect Duration Illustration In an LSM playlist, the video and audio effects end at the OUT point of a clip, so the duration of clips is shortened by the length of the effect. Available Video Transition Effects The following video transition effects can be defined. By default, the audio transition is always a mix when the split audio mode is disabled. Effect Type Description Cut No transition effect is applied between both elements.
EVS Broadcast Equipment S.A. Issue 11.02.A July 2013 Effect Type Description Fade to color (>) A fade in effect to a defined color is applied on the previous clip up to the transition in cut mode to the next clip (on which the effect is defined).
OPERATION MANUAL Nano 11.02 Default Values Default Duration for Video and Audio Transition It is possible to set a default value for the duration of the video and audio transitions in the Setup Menu. Once this is defined, each time a clip is entered or inserted into a playlist, transitions are applied with the default values. The Video effect duration parameter is available in the Operational Setup menu (p.3.1 F1), and ranges up to 20:00 secs.
EVS Broadcast Equipment S.A. Issue 11.02.A July 2013 How to Add a Transition Effect You can add transitions on one or all elements of a playlist as follows, or more precisely modify the default effect applied (mix): 1. Select the playlist location and press PLST to open it in Playlist Edit mode. The main menu appears: Insert Speed Effect Edit All FX Dur Delete 2.
OPERATION MANUAL Nano 11.02 5.7.3. Using the Replace Function Introduction The purpose of the Replace function is to consolidate the effects defined on a playlist as follows: The operator loops a section or an entire playlist back to themselves and, during the playback, add some effects externally (graphic insertion for instance) or internally (changing the speed).
EVS Broadcast Equipment S.A. Issue 11.02.A July 2013 Replace Playback Mode In this mode, you play the playlist back and insert the new section between the defined IN and OUT points. After you have selected the required settings for the Replace function, the Replace Playback mode is automatically activated: the playlist is cued before the IN point (to create guardbands), ready to be initiated.
OPERATION MANUAL Nano 11.02 6. If you want to specify the OUT point for the Replace section at this stage, jog to the requested point and press the OUT key. Otherwise, you can define the OUT point while you perform the Replace. 7. Press the B or C key to select whether you will use the internal loop or external loop to perform the Replace. ◦ The playlist is cued before the IN point (to create guardbands), ready to be initiated. ◦ A message appears on Remote: “Start Replace: lever or play button”. 8.
EVS Broadcast Equipment S.A. • Issue 11.02.A July 2013 The External Loop allows you to select on which channel you will physically re-record the output of your PGM. The link is physical: it is necessary to make the video link manually with a router or video/audio cables; it is not done inside the server. Additional parameters are available for the external loop: • With the Cam A function (SHIFT+C), you can select the camera the PGM will be recorded to for the external LOOP process.
OPERATION MANUAL Nano 11.02 How to Add and Remove an Auxiliary Audio Clip To add/remove an auxiliary audio clip to a playlist on the Remote Panel, proceed as follows: 1. Activate the Aux.Clip button by selecting a clip from the clip bank. ◦ This can be done outside of the PLST EDIT mode, or in PLST EDIT mode with PRV CTRL ON. ◦ The Aux Clip option appears in the secondary menu on the Remote Panel. 2. Press MENU to call the secondary menu. 3. Press Aux.Clip button (SHIFT+B).
Corporate +32 4 361 7000 North & Latin America +1 973 575 7811 EVS Headquarters Liège Science Park 16, rue Bois St Jean B-4102 Seraing Belgium To learn more about EVS go to www.evs.com Asia & Pacific +852 2914 2501 Other regional offices www.evs.com/contact EVS Broadcast Equipment is continuously adapting and improving its products in accordance with the ever changing requirements of the Broadcast Industry. The data contained herein is therefore subject to change without prior notice.