
User Manual Owner's manual
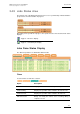

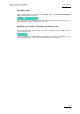

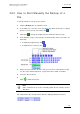
Table Of Contents
- Table of Contents
- What’s New in Version 2.19?
- 1. Introduction
- 2. Software Installation
- 3. XFile Module
- 3.1 System Configuration
- 3.2 Startup
- 3.3 Session Configuration
- 3.3.1 Tab 1 - Autobackup
- 3.3.2 Tab 2 – MXF Metadata
- 3.3.3 Tab 3 – Manual Backup
- 3.3.4 Tab 4 – Scan Folder
- 3.3.5 Tab 5 – Grab
- 3.3.6 Tab 6 – Export
- 3.3.7 Tab 7 – XML
- 3.3.8 Tab 8 – User Parameters
- Autostart
- Autobackup at Startup
- Confirm Manual Backup
- Confirm Manual Restore
- Confirm Manual Update
- Cancel Backups Scheduled when Stopping Autobackup
- Use Fixed Size Font for Clipnames and Keywords
- Publish Clips with Original UmID (Warning publish will failed if UmID already present on XNet)
- Publish Clips with Original VarID (Warning publish will failed if VarID already published on XFile)
- Import: Use Filename to fill Clipname Metadata
- Dual Path Editing
- 3.4 User Interface
- 3.4.1 Overview of the main Window
- 3.4.2 XFile List
- 3.4.3 Network status
- 3.4.4 Disk Usage and Disk Mode
- 3.4.5 Jobs Status Area
- 3.5 Autobackup Mode
- 3.6 Backup Mode
- 3.7 Restore Mode
- 3.8 Publish Mode
- 3.9 Maintenance Mode
- 3.10 Clip Maintenance
- 3.11 Disks-Folders Maintenance
- 3.12 Playlist Maintenance
- 3.13 Job Status
- 3.14 Re-Scan Disks
- 3.15 Statistics
- 4. XStream
- 4.1 Scheduler and QuickStart Modes
- 4.2 Information & Menu Area
- 4.3 Time Grid
- 4.4 Channels Area
- 4.5 Status Area
- 4.6 System Configuration
- 4.7 Record Grid Menu
- 4.8 Contextual Menu in the Scheduler
- 4.9 Creating and Editing Jobs in Scheduler Mode
- 4.10 Creating Jobs in QuickStart Mode
- 5. External modules
- Appendix 1: XF2 Hardware
- Notes
XFile Version 2.19 – User Manual
EVS Broadcast Equipment – November 2012
Issue 2.19.A
69
3.6.2 How to Start Manually the Backup of a
File
To start the backup of a file, proceed as follows:
1. Click the Backup button to activate the mode.
2.
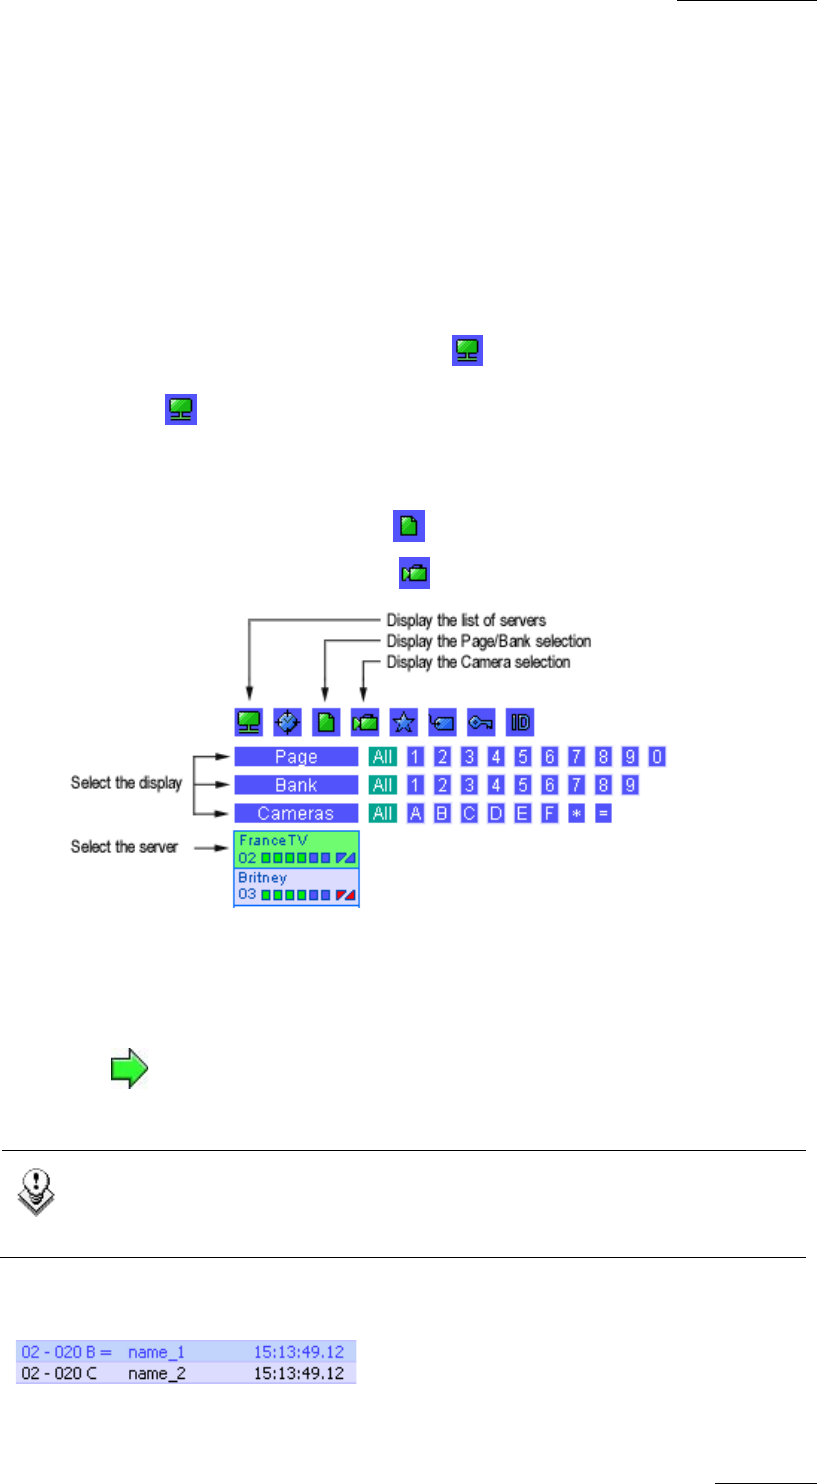
In the XNet area, select the server from which clips will be backed up. To display
the list of servers present on the XNet, click .
3.
Click again to change the display of the list and find the clip to back up.
4.
In the XNet list of clips, select the page, the bank and the camera of the clip to be
backed up:
• To display the page/bank list, click
• To display the list of cameras, click
5.
Define any other available criteria to refine your selection on the XNet list of clips.
See the section ‘Autobackup Mode’, on page 66 for more details on the filters.
6.
Select the clip from the list.
7.
Click to initiate the transfer.
Note
Same command can be used to manually update the files already saved to
XFile disks.
In the XNet list the clips already saved to XFile are displayed with blue characters: