User Manual Version 1.
IPNotes - Version 1.0 - User Manual Copyright EVS Broadcast Equipment S.A.– Copyright © 2003-2012. All rights reserved. Disclaimer The information in this manual is furnished for informational use only and subject to change without notice. While every effort has been made to ensure that the information contained in this user manual is accurate, up-to-date and reliable, EVS Broadcast Equipment cannot be held responsible for inaccuracies or errors that may appear in this publication.
EVS Broadcast Equipment S.A. - November 2012 Issue 1.0.D Table of Contents 1. 2. 3. INTRODUCTION 1 1.1. Purpose 1 1.2. Workflow 1 CONFIGURING IPNOTES 2 2.1. Accessing the Settings 2 2.2. Overview of the Settings 3 2.2.1. Info 3 2.2.2. General Settings 3 2.2.3. Color 3 2.2.4. IPNotes Users 4 2.2.5. Define Log Sheet and Keyword Grid File Prefix 5 GETTING STARTED 6 3.1. Opening IPNotes 6 3.1.1. By Tapping the IPNotes Icon 6 3.1.2. From Other iPad Applications 7 3.2.
IPNotes - Version 1.0 - User Manual 4.2. Customizing the Main Screen Layout 5. 4.2.1. Introduction 23 4.2.2. Locked vs. Unlocked Mode 23 4.2.3. Rearranging and Resizing Panes 23 4.2.4. Hiding and Revealing Panes 24 4.2.5. Adding New Panes 27 MANAGING KEYWORDS AND KEYWORD GRIDS 28 5.1. About Keywords and Keyword Grids 28 5.2. Creating Keyword Grids 28 5.2.1. Introduction 28 5.2.2. Creating a Keyword Grid Step by Step 28 5.2.3.
EVS Broadcast Equipment S.A.
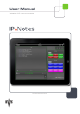
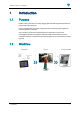
IPNotes - Version 1.0 - User Manual 1. Introduction 1.1. Purpose IPNotes running on iPad is an on-the-go logging application that integrates with IPDirector through XML import and export. Users can prepare their work before leaving the facility by importing keyword grids and prepared logsheets to their iPad. They can then go on the field to log anything from an interview to a sports event. Once logging is finished, the logsheet is exported in XML from the iPad and can be reimported to IPDirector.
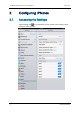
EVS Broadcast Equipment S.A. - November 2012 2. Configuring IPNotes 2.1. Accessing the Settings Issue 1.0.D Tap the Settings icon on your iPad Home screen, and then, in the Settings column under Apps, select IPNotes. 2 2.
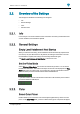
IPNotes - Version 1.0 - User Manual 2.2. Overview of the Settings The settings are divided into the following four categories: 2.2.1. • Info • General Settings • Color • IPNotes Users Info In this field you can see the software version of IPNotes. Each time you download a new version of IPNotes, this field will be updated. 2.2.2. General Settings Empty Local Database at Next Startup When you switch on this setting, the local database will be automatically emptied at the next start-up.
EVS Broadcast Equipment S.A. - November 2012 Issue 1.0.D by default. The simple color picker (16 Swatches) only consists of a set of 16 predefined colors. The full color picker also has a color wheel, a luminance slider and a field for previewing the selected color. 2.2.4. IPNotes Users Choosing Predefined Users IPNotes offers you six predefined users. Users you switch on here become automatically available in the Select a User screen for each new project. By default, all the users are switched on.
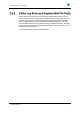
IPNotes - Version 1.0 - User Manual 2.2.5. Define Log Sheet and Keyword Grid File Prefix IPNotes allows you to import log sheets and keyword grids prepared in IPDirector and export the log sheets again. The log sheets and keyword grids are imported and exported in the form of an XML file. To make a clear distinction between the imported log sheets and keyword grids and also between the imported and exported log sheets, a file prefix has to be added.
EVS Broadcast Equipment S.A. - November 2012 Issue 1.0.D 3. Getting Started 3.1. Opening IPNotes 3.1.1. By Tapping the IPNotes Icon To open IPNotes, tap its icon on the iPad Home screen. If IPNotes is opened for the first time, the IPNotes splash screen appears. Shortly after, the Select a User screen is shown. If IPNotes is already running in the background, then the last screen you visited will be shown.
IPNotes - Version 1.0 - User Manual 3.1.2. From Other iPad Applications IPNotes can also be opened from within iPad applications that have access to the log sheet and keyword grid XML files exported from IPDirector and that have not yet been imported into IPNotes. IPNotes can be opened from log sheets and keyword grids that were sent as attachment in an e-mail message. Open the log sheet or keyword grid, tap 3. Getting Started and select Open in IPNotes.
EVS Broadcast Equipment S.A. - November 2012 Issue 1.0.D IPNotes can also be opened from within a file-handling application like DropBox. Open the log sheet or keyword grid, tap and select Open in IPNotes. If you select the option Open in IPNotes, the current application will move to the background and IPNotes will open. IPNotes will copy the log sheet or keyword grid XML file to its Documents directory. This directory can be consulted in iTunes under Apps > File Sharing. 8 3.
IPNotes - Version 1.0 - User Manual If IPNotes is opened for the first time, the IPNotes splash screen appears and then the Select a User screen is shown. If IPNotes is already running in the background, and you have selected the option Open in IPNotes for a log sheet XML file, the Select a Log Sheet screen is shown and the new log sheet is highlighted in gray indicating that it hasn’t been imported in the IPNotes database yet.
EVS Broadcast Equipment S.A. - November 2012 3.2. Selecting a User 3.2.1. About Users Issue 1.0.D Multiple journalists and/or assistant producers can be present at an Electronic News Gathering (ENG) shooting. Each of them can contribute to the same log sheet. IPNotes offers 6 predefined users, but it also allows to create custom users. Each user has its own colored locator. The locator is associated to the logs entered by this user. The layout of the main screen is linked to a particular user. 3.2.2.
IPNotes - Version 1.0 - User Manual 3.2.4. How to Add a New User To add a new user to the Select a User screen, proceed as follows: 1. Tap Edit in the Title bar. The Select a User screen enters into Edit Mode. You can now add a new user. 2. In the Title bar, tap +. A pop-up and the onscreen keyboard appear. 3. Enter a name for the user. Note that the name can be maximally 24 characters long. 3.
EVS Broadcast Equipment S.A. - November 2012 Issue 1.0.D 4. Tap the colored locator and select a new color from the color picker. The following colors are available: red, green, yellow, grey, blue, orange. 5. Tap OK. The new user is added to the Select a User screen. If it already contains users, the new user is added below the existing users. 6. In the Title bar, tap Done to close the Edit Mode again. 3.2.5.
IPNotes - Version 1.0 - User Manual 3. Do one of the following: ◦ Use the onscreen keyboard to edit the user name. Tap it entirely. in the text field to delete ◦ Tap the colored locator and select a new color from the color picker. The following colors are available: red, green, yellow, gray, blue, orange. 4. Tap OK. 5. In the Title bar, tap Done to close the Edit Mode again. 3.
EVS Broadcast Equipment S.A. - November 2012 Issue 1.0.D Note If you change the locator color of a particular user, the locator color of all logs already made by that user will also change. 3.2.6. How to Delete a User To delete a user from the Select a User screen, proceed as follows: 1. In the Title bar, tap Edit. The Select a User screen enters into Edit Mode. You can now delete users. 2. Tap next to the user you want to delete. 3. Tap Delete. 4.
IPNotes - Version 1.0 - User Manual 3.3. Selecting a Log Sheet 3.3.1. About Log Sheets IPNotes is used to create log entries which relate events with time codes,log rating and metadata. These log entries are kept in a log sheet XML file. Log sheets can be imported from IPDirector, but IPNotes also allows to create log sheets locally.These log sheets can be exported as XML files and imported into IPDirector. 3.3.2.
EVS Broadcast Equipment S.A. - November 2012 Issue 1.0.D In the Title bar, a button is provided to return to the Select a User screen. 3.3.3. How To Add a Log Sheet To add a new log sheet to the Select a Log Sheet screen, proceed as follows: 1. In the Title bar, tap Edit. The Select a Log Sheet screen enters into Edit Mode. You can now add a new log sheet. 2. In the Title bar, tap +. 16 3.
IPNotes - Version 1.0 - User Manual A pop-up and the onscreen keyboard appear. 3. Enter a name for the log sheet, and then tap OK. Note that the log sheet name can be maximally 64 characters long. The new log sheet is added to the Select a Log Sheet screen. If it already contains log sheets, the new log sheet is added below the existing log sheets. 4. In the Title bar, tap Done to close the Edit Mode again. 3.3.4.
EVS Broadcast Equipment S.A. - November 2012 3.3.6. Issue 1.0.D How to Edit a Log Sheet To edit the name of a log sheet that is displayed in the Select a Log Sheet screen, proceed as follows: 1. In the Title bar, tap Edit. The Select a Log Sheet screen enters into Edit Mode. You can now edit the name of the log sheets that are displayed. 2. Tap the name of a log sheet to select it. A pop-up appears. 18 3.
IPNotes - Version 1.0 - User Manual 3. Use the onscreen keyboard to edit the log sheet name. Tap it entirely. in the text field to delete 4. Tap OK. 5. In the Title bar, tap Done to close the Edit Mode again. In case you change the name of a gray log sheet entry, IPNotes will first import the new log sheet into its local database. 3.3.7. How to Delete a Log Sheet To delete a log sheet, proceed as follows: 1. In the Title bar, tap Edit. The Select a Log Sheet screen enters into Edit Mode.
EVS Broadcast Equipment S.A. - November 2012 Issue 1.0.D 4. Selecting a Screen Layout 4.1. Overview of the Main Screen The IPNotes main screen allows you to manage keyword grids and keywords, make logs and assign an interest level to them and export log sheets. 4.1.1. Title Bar The Title bar displays the name of the log sheet you selected. In the left corner, a button is provided to return to the Select a Log Sheet screen. In the right corner, you also find buttons.
IPNotes - Version 1.0 - User Manual 4.1.2. Available Panes The following panes are always displayed in the main screen: • Logs • Log Creation The following panes can be hidden or revealed: 4.1.3. • Log Rating pane • Keyword grids Pane Description Logs Pane This pane contains a list with logs. The logs are displayed together with their log rating and time code. The stars have the same color as the colored locator associated to the user who created the logs.
EVS Broadcast Equipment S.A. - November 2012 Issue 1.0.D Log Creation Pane This pane is used to add new and edit existing logs. In Stand Alone Mode, the Time Code field can display the device time code or a custom time code. A button is provided to make a log private or public. If you select a log in the Logs pane, the Log Creation pane will display this log. Log Rating Pane The Log Rating pane allows you to assign an interest rating to a log. Four levels of log rating can be used to define a log.
IPNotes - Version 1.0 - User Manual 4.2. Customizing the Main Screen Layout 4.2.1. Introduction The layout of the IPNotes main screen can be customized to fit the needs of various users. Existing panes can be resized, rearranged, hidden and revealed again, and keyword grids can be added or deleted. The customized screen layout is associated to the user you use to log in. So, this layout will be displayed next time you log in with this user. 4.2.2. Locked vs.
EVS Broadcast Equipment S.A. - November 2012 Issue 1.0.D 3. In the Title bar, tap to lock the layout of the main screen again. How to Resize Panes To resize a pane in the main screen, proceed as follows: 1. In the Title bar, tap to unlock the layout of the main screen. A small, downward pointing arrow appears at the bottom right corner of each pane. 2. Adjust the size of the appropriate pane by dragging the small arrow. While resizing, the pane border is red. 3. In the Title bar, tap 4.2.4.
IPNotes - Version 1.0 - User Manual • Tap in the top left corner of a keyword grid or the Log Rating pane to hide it. • Pinch your fingers apart. A popover appears that displays the name of keyword grids that you have created and also the Log Rating pane. Those that are switched on are visible in the main screen. Go to step 3. 3. Switch off the Log Rating pane and/or the appropriate keyword grid(s) by tapping the corresponding switch. 4. Tap outside the popover to close it again. 5.
EVS Broadcast Equipment S.A. - November 2012 Issue 1.0.D How to Reveal Panes To make the Log Rating pane and/or a keyword grid visible in the main screen, proceed as follows: 1. In the Title bar, tap to unlock the layout of the main screen. 2. Pinch your fingers apart. A popover appears that displays the name of keyword grids that you have created and the Log Rating pane. Those that are switched off are not visible in the main screen. Go to step 3. 3.
IPNotes - Version 1.0 - User Manual 4. Tap outside the popover to close it again. 5. In the Title bar, tap 4.2.5. to lock the layout of the main screen again. Adding New Panes You can create one or more new keyword grids and add them to the main screen. See section "Creating Keyword Grids" on page 28. 4.
EVS Broadcast Equipment S.A. - November 2012 Issue 1.0.D 5. Managing Keywords and Keyword Grids 5.1. About Keywords and Keyword Grids A keyword grid is a pane in the main screen that consists of one or more tabs. Each tab groups a number of related keywords in keyword buttons. You can create a keyword grid step by step, or you can base your new keyword grid on an existing keyword grid. This existing keyword grid can be created by you locally or can be imported from IPDirector. 5.2.
IPNotes - Version 1.0 - User Manual 3. Tap New Grid. A window appears that allows you to create a new, empty keyword grid or base your new keyword grid on an existing keyword grid. It also allows you to determine the dimensions of your new grid. By default, 3 rows and 3 columns are selected. 4. Determine the number of rows and columns for your keyword grid, and then tap Create. A new, empty keyword grid is added to the main screen taking into account the pinch gesture boundaries and the stepper values.
EVS Broadcast Equipment S.A. - November 2012 Issue 1.0.D 5. Resize and position the new keyword grid. See section "Rearranging and Resizing Panes" on page 23. Step 2: Adding Tabs When you create a new, empty keyword grid, IPNotes automatically adds a first tab and a first, empty keyword button. A default value (New Keyword) is used as tab name and keyword. The keyword button gets a default blue color. To add additional tabs, tap + in the keyword grid.
IPNotes - Version 1.0 - User Manual ◦ Double-tap the grid or tab title. The Keyword List opens. 2. Tap Name. The Keyword List appears. It contains the keywords created by you and by other users and the keywords contained in the log sheets and keyword grids imported from IPDirector. 5.
EVS Broadcast Equipment S.A. - November 2012 Issue 1.0.D Note If you haven’t imported any log sheets or keyword grids yet, or if you or another user hasn’t added any keywords yet, the Keyword List will be empty. 3. Do one of the following: ◦ 32 To add a new keyword as name, type the keyword in the Search field and tap the + button. 5.
IPNotes - Version 1.0 - User Manual A window appears that allows you to edit the keyword name and indicate if the keyword is of the type Participant. See section "Managing Keywords" on page 39 for more information. Tap the Keywords button to return to the Keyword List. The keyword will be added to the list. ◦ To choose an existing keyword as name, type the keyword in the Search field. The Keyword List will browse for the entered keyword. Select the keyword to add it as name. 5.
EVS Broadcast Equipment S.A. - November 2012 Issue 1.0.D 4. Tap outside the popover to close it again. See section "Managing Keywords" on page 39 for more information about creating keywords. Step 4: Adding Keyword Buttons To add additional keyword buttons to a tab, tap the empty grid cells. Step 5: Assigning Keywords Once you have named a tab, you can assign a keyword to each button. You can choose an existing keyword, or you can create a new keyword and assign it.
IPNotes - Version 1.0 - User Manual The Keyword List appears. 3. Do one of the following: ◦ To assign a new keyword, type the keyword in the Search field and tap the + button. A window appears that allows you to edit the keyword name and indicate if the keyword is of the type Participant. See section "Managing Keywords" on page 39 for more information. Tap the Keywords button to return to the Keyword List. The keyword will be added to the list.
EVS Broadcast Equipment S.A. - November 2012 Issue 1.0.D 1. In the appropriate tab of the new keyword grid, tap a keyword button. A popover appears. 2. Tap Color. A color picker appears. Depending on your settings, either the simple or full color picker will appear. See section "Color" on page 3 for more information. The simple color picker only allows you to select one of the 16 predefined colors. The full color picker also allows you to pick a color from the color wheel.
IPNotes - Version 1.0 - User Manual If you use the full color picker, first adjust the brightness, and then select the desired color. 4. Tap outside the color picker to close it again. 5.2.3. Creating a Keyword Grid Based on an Imported Keyword Grid To create a new keyword grid based on a keyword grid imported from IPDirector, proceed as follows: 1. In the Title bar, tap to unlock the layout of the main screen. 2. Pinch your fingers apart.
EVS Broadcast Equipment S.A. - November 2012 Issue 1.0.D 4. Select the keyword grid you want to base your new keyword grid on. 5. Tap Create. The keyword grid is added to the main screen. The tabs, keyword buttons and keywords are automatically added to the grid and the grid and tabs are named automatically. IPNotes applies the color defined in the imported keyword grid XML file to the various keyword buttons. 6. Resize and position the keyword grid.
IPNotes - Version 1.0 - User Manual 5.3. Managing Keywords 5.3.1. About The Keyword List The IPNotes Keyword List is an alphabetically ordered list of keywords created by you and by other users. It also contains the keywords of the log sheets and keyword grids imported from IPDirector. New keywords can be added and existing keywords can be edited and deleted. Certain keywords can be marked as being of the type Participant, i.e. the name of a person that participates in an even.
EVS Broadcast Equipment S.A. - November 2012 ◦ Issue 1.0.D Double-tap the grid name, a tab name or a keyword button. The Keyword List appears. 3. Tap Name to open the Keyword List. 5.3.3. Managing the Keyword List How to Add a Keyword to the Keyword List To add a new keyword to the Keyword List, proceed as follows: 1. Open the Keyword List. See section "Opening the Keyword List" on page 39. 2. Type the new keyword in the Search field. The Keyword List browses for and suggests similar keywords. 3.
IPNotes - Version 1.0 - User Manual 4. (Optional) Tap Edit . 5. (Optional) Tap the Is Participant switch to mark or unmark a keyword as being of the type Participant. 6. (Optional) Tap Done. 7. Tap Keywords to return to the Keyword List. The new keyword is added to the Keyword List. How to Edit an Existing Keyword To edit a keyword in the Keyword List, proceed as follows: 1. Open the Keyword List. See section "Opening the Keyword List" on page 39. 2. In the Keyword List, tap Edit.
EVS Broadcast Equipment S.A. - November 2012 Issue 1.0.D 3. Select the keyword you want to edit. A window and the onscreen keyboard appear that allows you to edit the name of the selected keyword and to mark or unmark the keyword as being of the type Participant. 42 5.
IPNotes - Version 1.0 - User Manual 4. Tap Edit. 5. In the Name field, edit the keyword. 6. (Optional) Tap the Is Participantswitch to mark or unmark the keyword as being of the type Participant. 7. Tap Done. The Keyword List is no longer in Edit Mode. How to Delete an Existing Keyword To delete an existing keyword, proceed as follows: 1. Open the Keyword List. See section "Opening the Keyword List" on page 39. 2. In the Keyword List, tap Edit. The Keyword List enters into Edit Mode. 5.
EVS Broadcast Equipment S.A. - November 2012 Issue 1.0.D 3. Select the keyword you want to delete. 4. Tap the Delete button. 44 5.
IPNotes - Version 1.0 - User Manual The keyword is removed from the Keyword List. Note If you delete a keyword that has already been added to the Logs pane, the keyword will be replaced by the text -Deleted Keyword-. 5.
EVS Broadcast Equipment S.A. - November 2012 5.4. Issue 1.0.D Editing Existing Keyword grids IPNotes allows you to edit your existing keyword grids. You can choose another name for your grid, change its dimensions and choose another grid color. You can also add extra tabs and keyword buttons and delete those that are no longer relevant. Finally, you can choose another color for each keyword button and change its keyword. 5.4.1.
IPNotes - Version 1.0 - User Manual 6. In the Title bar, tap to lock the layout of the main screen again. How to Change the Grid Dimensions To add one or more rows and columns to an existing keyword grid, proceed as follows: 1. In the Title bar, tap to unlock the layout of the main screen. 2. Tap the title of the desired keyword grid. A popover appears. 3. Tap Change Grid Size. A popover appears that allows you to determine the number of grid rows and columns.
EVS Broadcast Equipment S.A. - November 2012 Issue 1.0.D When you expand the dimensions of a grid, IPNotes will automatically add extra empty rows and columns. 5. In the Title bar, tap 5.4.2. to lock the layout of the main screen again. Editing the Tabs How to Change the Name of a Tab To change the name of a tab, proceed as follows: 1. In the Title bar, tap to unlock the layout of the main screen. 2. Do one of the following: ◦ Tap the name of the desired tab. A popover appears. Go to step 3.
IPNotes - Version 1.0 - User Manual An extra tab is added to the grid. IPNotes automatically adds a first, empty keyword button to the new tab. 3. In the Title bar, tap to lock the layout of the main screen again. How to Delete a Tab To delete a tab, proceed as follows: 1. In the Title bar, tap to unlock the layout of the main screen. 2. Tap the name of the tab you want to delete. A popover appears. 5.
EVS Broadcast Equipment S.A. - November 2012 Issue 1.0.D 3. Tap Delete. Note that if your grid only contains one tab, the Delete button will not be available. The tab is removed from the grid. 4. In the Title bar, tap to lock the layout of the main screen again. How to Change the Color Gradient of a Grid When you create a new keyword grid that is based on an existing keyword grid, see section 5.2.3, IPNotes assigns the color defined in the XML file to the keyword buttons of the grid.
IPNotes - Version 1.0 - User Manual Note that the tab temporarily takes on the color that you selected. 5. Tap outside the color picker to close it. 6. In the Title bar, tap 5.4.3. to lock the layout of the main screen again. Editing the Keyword Buttons How to Delete a Keyword Button 1. In the Title bar, tap to unlock the layout of the main screen. 2. In the desired keyword grid, tap the keyword button you want to delete. A popover appears. 3. Tap Delete. The button is removed from the grid. 4.
EVS Broadcast Equipment S.A. - November 2012 Issue 1.0.D How to Change the Color of a Keyword Button To pick another color for a keyword button, proceed as follows: 1. In the Title bar, tap to unlock the layout of the main screen. 2. Tap the button whose color you want to change. A popover appears. 3. Tap Color. A color picker appears. Depending on your settings, either the simple or full color picker will appear.See section "Color" on page 3.
IPNotes - Version 1.0 - User Manual 4. Select the desired color. If you use the full color picker, first adjust the brightness, and then select the desired color. 5. Tap outside the color picker to close it. The button color has changed. 6. In the Title bar, tap to lock the layout of the main screen again. How To Change the Keyword of a Button To assign a different keyword to a keyword button, proceed as follows: 1. In the Title bar, tap to unlock the layout of the main screen. 2.
EVS Broadcast Equipment S.A. - November 2012 Issue 1.0.D ◦ Search another keyword and select it. ◦ Edit the existing keyword. ◦ Create a new keyword. 5. In the Title bar, tap to lock the layout of the main screen again. How to Move Keyword Buttons To move a button in a keyword grid, proceed as follows: 1. In the Title bar, tap to unlock the layout of the main screen. 2. Keep the keyword button pressed for 1 second. 3. Drag the button to another location and drop it at the desired spot.
IPNotes - Version 1.0 - User Manual 4. Tap next to the grid you want to delete. A Delete button appears. 5. Tap Delete. The keyword grid is deleted from the main screen. Note The Log Rating pane cannot be deleted. 5.
EVS Broadcast Equipment S.A. - November 2012 56 Issue 1.0.D 5.
IPNotes - Version 1.0 - User Manual 6. Making and Reviewing Logs 6.1. About Logs 6.1.1. Public vs. Private A log can be created as “Public” or “Private”. Public logs can be read by everyone, private logs can only be read by the creator. By default, logs are public. In the Log Creation pane, a button is provided to make a log public 6.1.2. or private . Free Text vs.
EVS Broadcast Equipment S.A. - November 2012 6.2.2. Issue 1.0.D Synchronizing with an External Time Code Source You can synchronize the time code of your iPad with the time code of an external time code source using a time code cable. The time code that is displayed in the Time Code field will briefly change color until the syncing has been completed. Warning Make sure you have unplugged the Dock Connector to USB cable, otherwise the synching won’t succeed. 6.2.3.
IPNotes - Version 1.0 - User Manual 1. As soon as you see something for which you want to create a log, do one of the following: ◦ Tap the Add Log button or tap in the New Log field to enter free text. The onscreen keyboard appears and the time code freezes. Use the onscreen keyboard to enter the free text. Note You can only enter one free text entry per log. ◦ Tap a keyword button to enter a keyword.
EVS Broadcast Equipment S.A. - November 2012 Issue 1.0.D Tip To remove a keyword you’ve just entered in the New Log field, tap the keyword button again. To remove a free text entry, tap it and click . 2. If necessary, double-tap the Time Code field and enter a custom time code. 3. Tap the Public/Private button once to make the log private, tap it again to make it public again. 4. Assign a log rating to the log. 5. Tap Save Log to save the log. Tap Cancel Log to cancel it. 60 6.
IPNotes - Version 1.0 - User Manual The log is displayed in the Logs pane with its log rating, associated time code.The log rating has the same color as the color marker linked to its user. 6.3.2. Assign a Log Rating Select a log in the Logs pane and select an interest level in the Log Rating pane. The selected interest level appears next to the log in the Logs pane. By default, each new log has No Rating as interest level. The log rating has the same color as the color marker linked to its user. 6.4.
EVS Broadcast Equipment S.A. - November 2012 6.4.2. Issue 1.0.D How to Delete Logs To delete a log, proceed as follows: 1. In the Logs pane, select the log you want to delete. A Delete button appears at the bottom left corner of the Logs pane. 2. Tap the Delete button. A pop-up appears asking you to confirm your action. 3. Tap Yes to continue. The log is removed from the Logs pane. 6.4.3.
IPNotes - Version 1.0 - User Manual A popover appears that allows you to filter the logs by user. By default, the user you are logged in with is selected. The other users are deselected. 2. Do one of the following: ◦ Tap Select All if you want to select or deselect all users. Note that you cannot deselect the user with which you are logged in. ◦ Select or deselect the desired users one by one. 3. Tap outside the popover to close it.
EVS Broadcast Equipment S.A. - November 2012 6.5.2. Issue 1.0.D How to Export a Log Sheet To mail a log sheet or open it in a PDF reading app on your iPad, proceed as follows: 1. In the Title bar, tap . A popover with two action buttons appears. 2. Tap: 64 • Send via Mail, if you want to mail your log sheet. • Export, if you want to open your log sheet in a file-handling app on your iPad. 6.
EVS Broadcast Equipment Liège Science Park 16, rue Bois St Jean B-4102 Ougrée Belgium Corporate Headquarters North & Latin America Headquarters Asia & Pacific Headquarters Other regional offices available on +32 4 361 7000 +1 973 575 7811 +852 2914 2501 www.evs.tv/contact To learn more about EVS go to www.evs.