
User Manual Owner manual

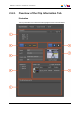


Table Of Contents
- Table of Contents
- What's New?
- 1. Introduction
- 2. User Interface
- 3. Managing Channels
- 4. Loading Media
- 4.1. Introduction
- 4.2. Possible Loading Actions
- 4.3. Loading a Train or a Recording Ingest
- 4.3.1. How to Load a Train from the Channel Explorer
- 4.3.2. How to Load a Train or a Recording Ingest from the Database Explorer
- 4.3.3. How to Select a Train or a Recording Ingest from the Panel
- 4.3.4. How to Reload the Last Loaded Train or Recording Ingest
- 4.3.5. How to Load the Source Media of a Clip
- 4.3.6. How to Load the Train from the Previous or Next Recorder Channel
- 4.3.7. How to Select a Train with the ShuttlePRO
- 4.3.8. How to Snap back to the Last Loaded Train or Recording Ingest
- 4.4. Loading a Clip
- 4.5. Loading a Playlist
- 4.6. Loading a Timeline
- 4.7. Loading a Media with the Take Function in PGM/PRV Mode
- 5. Moving through Media
- 6. Creating Media
- 7. Editing Media
- 8. Publishing a Clip
- 9. Transferring Media
- 10. Exporting and Importing Playlists
- 11. Settings
- 12. Control Panel Shortcuts
The Keyword area allows you to assign up to five keywords to a clip to qualify its content.
The list of keywords associated to the clip at creation from the Save Clip window are
displayed in the Clip Information tab as well and can be updated from this area.
You can proceed in three different ways.
• You can start to type the keyword directly in the Keyword field of the Save/Edit
window and select a keyword proposed in the Autocomplete list.
• You can select keywords in an open keyword grid or an open dictionary.
• You can type the number associated to a keyword in an open keyword grid.
See the General Functions user manual for a detailed procedure on how to assign
keywords to a clip and how to un-assign keywords.
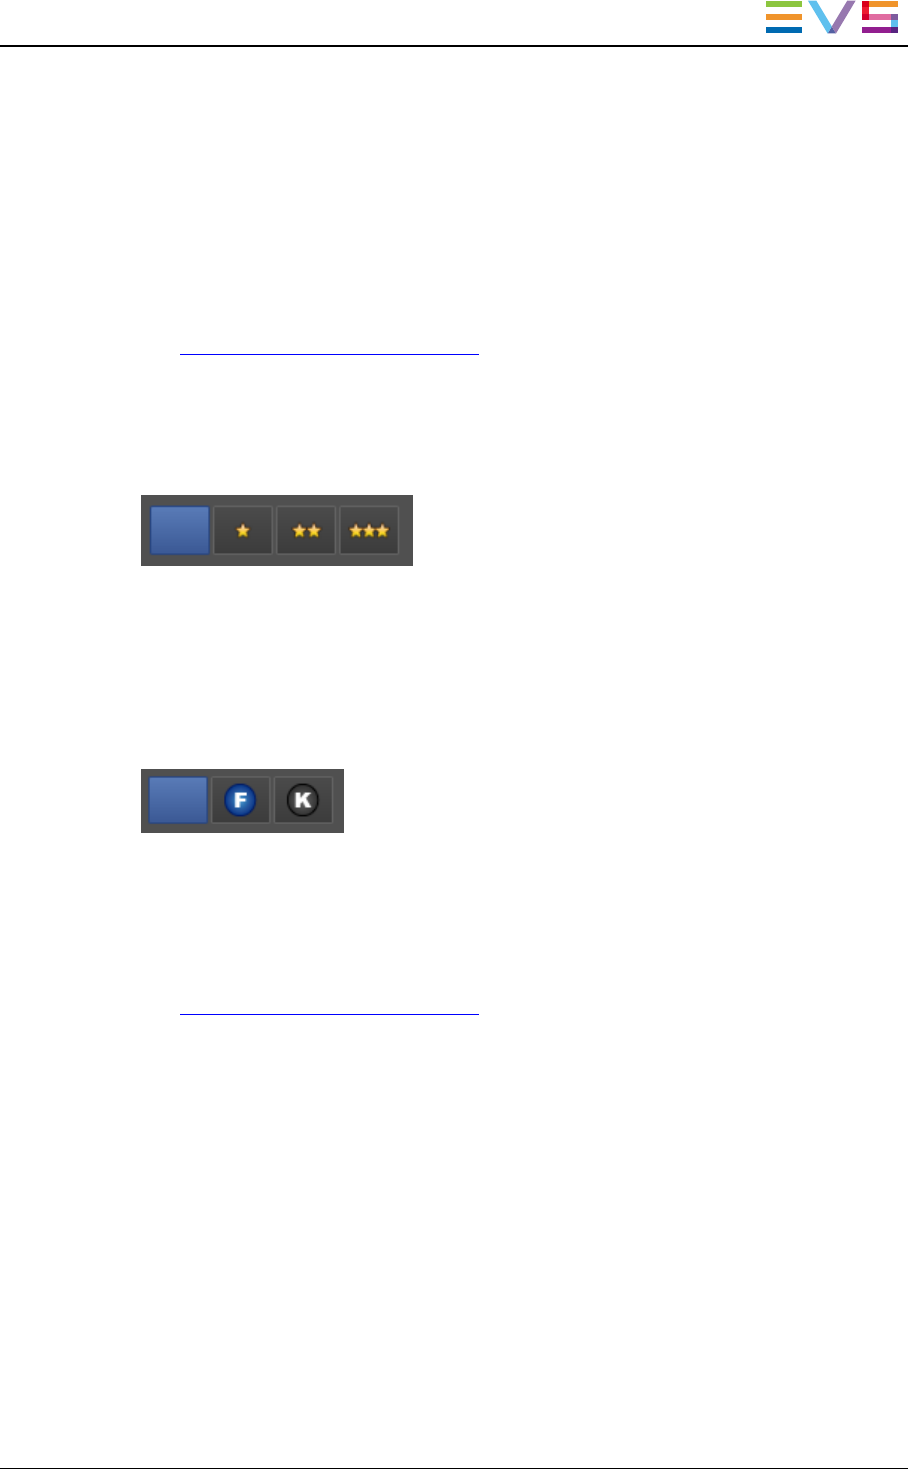
2.6.4. Interest Level Buttons
The Interest Level buttons allow users to assign an interest rating to a clip. Four interest
levels can be defined, from no star to 3 stars. The background of the button corresponding
to the selected interest level is blue. The default value is the no star level.
2.6.5. Clip Type Buttons
The Clip Type buttons allow you to assign a clip type for use with Key and Fill operations.
• The left button is used for normal clips. This is the default value.
• The middle button is used for fill clips.
• The right button is used for key clips.
See the General Functions user manual for more information.
2.6.6. Clip Creation Information Fields
Source field
It specifies the name of the recorder channel used to create the clip, as defined in the
Channels tab of the Setup Configuration window for the EVS server.
On XT field
It specifies the name of the EVS video server where the clip has been saved.
IPDirector- Version 6.2- User Manual- Control Panel
2. User Interface 27