USER MANUAL PART 5 - PLAYOUT - CONTROL PANEL Version 6.
IPDirector - Version 6.00 - User Manual - Control Panel Copyright EVS Broadcast Equipment S.A.– Copyright © 2005-2012. All rights reserved. Disclaimer The information in this manual is furnished for informational use only and subject to change without notice. While every effort has been made to ensure that the information contained in this user manual is accurate, up-to-date and reliable, EVS Broadcast Equipment cannot be held responsible for inaccuracies or errors that may appear in this publication.
EVS Broadcast Equipment S.A.
IPDirector - Version 6.00 - User Manual - Control Panel Table of Contents TABLE OF CONTENTS WHAT'S NEW? 1. VII CONTROL PANEL 1 1.1. Introduction 1 1.1.1. Product Overview 1 1.1.2. Opening of Control Panel 1 1.2. User Interface 2 1.2.1. Overview of the Control Panel 2 1.2.2. Displays of the Control Panel 7 1.2.3. Loaded Media Pane 11 1.2.4. Transport Functions Pane 17 1.2.5. Clip Creation Pane 23 1.2.6. Clip Information Tab 25 1.2.7. Metadata Tab 30 1.2.8.
EVS Broadcast Equipment S.A. - November 2012 1.6.1. Introduction 69 1.6.2. Clip Settings 69 1.6.3. Clip Creation Buttons and Shortcuts 70 1.6.4. How to Create a Clip 72 1.6.5. Save Clip Window 73 1.6.6. How to Create a Playlist in the Control Panel 76 1.7. Editing Media 77 1.7.2. How to Trim a Clip 77 1.7.3. Modifying Clip Metadata 78 1.7.4. How to Trim a Playlist Element 78 1.7.5. Moving Elements Within a Playlist 78 1.7.6. Adding Elements to a Playlist 79 1.7.7.
IPDirector - Version 6.00 - User Manual - Control Panel 3.3.1. Introduction 93 3.3.2. Opening the Video Display 93 3.4. Video Display Options 94 3.4.2. Video Display Linked to the Software Player 95 3.5. Audio Configuration and Monitoring Table of Contents 94 3.4.1. Video Display Linked to the Player Channel 95 3.5.1. Audio Configuration 95 3.5.2.
EVS Broadcast Equipment S.A.
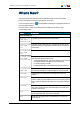
IPDirector - Version 6.00 - User Manual - Control Panel What's New? The following table describes the sections updated to reflect the new and modified features on IPDirector version 6.0 (compared to version 5.9). In the user manual, the icon new and updated features. has been added on left margin to highlight information on Click the section number (or the description) in the table to jump directly to the corresponding section. Section Description New Functionalities 1.5.2 - 1.1.1 - 1.2.
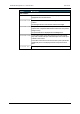
EVS Broadcast Equipment S.A. - November 2012 Section Issue 6.00.B Description User Interface 1.2.1 The "Mix on one channel" functionality of a player channel is highlighted in the window title bar. 1.6.2 - 1.6.5 - 1.2.1 A prefix name can be defined in the Settings and used at clip creation. The background color of the window outline has changed. 1.2.6 - 1.6.5 - 1.5.
IPDirector - Version 6.00 - User Manual - Control Panel 1. Control Panel 1.1. Introduction 1.1.1.
EVS Broadcast Equipment S.A. - November 2012 1.2. User Interface 1.2.1. Overview of the Control Panel Issue 6.00.B Control Panel Outline The Control Panel has been designed with various panes allowing its size to be changed depending on the features in use. You can use the Pane Display buttons to display or hide different window areas. See section "Displays of the Control Panel" on page 7 for an overview of the possible displays of the Control Panel.
IPDirector - Version 6.00 - User Manual - Control Panel You can use the Pane Display buttons to display or hide different window areas. See section "Displays of the Control Panel" on page 7 for an overview of the possible displays of the Control Panel. When fully expanded, the Control Panel window contains the main panes highlighted on the following screenshot and shortly described in the table below. Area Description 1.
EVS Broadcast Equipment S.A. - November 2012 Issue 6.00.B Area Description 4. Clip Creation Pane This pane provides the functions to create new clips and to get the timecode information of a loaded item. Tabs Pane This pane, displayed on the right of the Control Panel window, contains four tabs which provide various information on the loaded item. 5. See section "Clip Creation Pane" on page 23.
IPDirector - Version 6.
EVS Broadcast Equipment S.A. - November 2012 Display Issue 6.00.B Meaning Channel not supporting "Mix on one channel" and involved in no association (previously called 1PGM) PGM or PRV Channels associated in PGM/PRV mode. Fill or Key Channels associated in Fill&Key mode. Number icon indicating the position of the channel in the group. Channels associated in Gang mode. This is valid for up to 16 ganged channels. With more than 16 ganged channels, no icon is displayed.
IPDirector - Version 6.00 - User Manual - Control Panel 1.2.2. Displays of the Control Panel Introduction It is possible to work with different displays of the Control Panel depending on the actions you need to perform. Each view may or may not include the Video Display. The selection of the screen display is done with the Pane Display button . This button makes it possible to display or hide the various window panes. The hidden panes are grey-colored and the displayed panes are blue-colored.
EVS Broadcast Equipment S.A. - November 2012 Issue 6.00.B The first screenshot shows the Transport Functions view without Video Display, the second one is the Transport Functions view with Video Display: Note By default, the Control Panel opens with this view if no specific layout is applied. 8 1.
IPDirector - Version 6.00 - User Manual - Control Panel Clip Creation View The Clip Creation view is shown by clicking the button. It displays the Loaded Media pane, the Transport Functions pane and the Clip Creation pane. The first screenshot shows the Clip Creation view without Video Display, the second one is the Clip Creation view with Video Display: Full View The full view displays the Loaded Media pane, the Transport Functions pane, the Clip Creation pane, as well as the Tabs pane on the right. 1.
EVS Broadcast Equipment S.A. - November 2012 Issue 6.00.B There are two possible Full views without Video Display. • The short Full view is shown by clicking the button: With this view, the clip information is truncated in the Clip Information tab. The scroll bars can be used in the other tabs when all the information cannot be displayed in the rectangle. • 10 The long Full view is shown by clicking the button: 1.
IPDirector - Version 6.00 - User Manual - Control Panel With this view, all the clip information is displayed and more information can be displayed in the other tabs without having to use the scroll bars. The next screenshot shows the Full view with Video Display: 1.2.3. Loaded Media Pane Introduction The Loaded Media pane provides the basic functions to load and view clip elements, playlists, timelines and record trains.
EVS Broadcast Equipment S.A. - November 2012 Issue 6.00.B Overview of the Loaded Media Pane The Loaded Media pane contains the main areas highlighted on the following screenshot and shortly described in the table below. Area Description / See also… 1. This button makes it possible to lock the player channel to prevent any operation from any IPDirector user interface. Lock button The button can be displayed in two ways: • : the channel is unlocked • : the channel is locked.
IPDirector - Version 6.00 - User Manual - Control Panel Player Field Player Name The Channel field displays the name of the selected player: Player Field Player Name The Channel field displays the name of the selected player: or See section "Assigning a Player Channel or the Software Player" on page 39 for more information on how to assign a player. If a name has been assigned to the channel on the EVS server, this name will be displayed in the Channel field.
EVS Broadcast Equipment S.A. - November 2012 Issue 6.00.B Loaded Playlist Element When a playlist element is loaded on the Control Panel for editing, the background color of the Player field turned turquoise both in the Control Panel and in the Playlist Panel. See section "How to Trim a Playlist Element" on page 78 for more information.
IPDirector - Version 6.00 - User Manual - Control Panel Menu Item Description ON AIR Sets the player channel to ON AIR Status. See section "Enabling the On-Air Feature" on page 41. Set Channel to IDLE Sets the channel to IDLE (Black). None Removes the association between the Control Panel and the player. Workstation Channel Links the Control Panel to the player channel set as default channel. See the General Functions user manual.
EVS Broadcast Equipment S.A. - November 2012 Icon Displayed Issue 6.00.B Corresponding Element Loaded lo-res growing clip hi-res record train lo-res record train playlist element Control Panel Contextual Menu A contextual menu is available from any pane in the Control Panel via a right-click on the mouse. Available menu items will depend on the element loaded on the control panel. If no element is loaded, no menu item is available.
IPDirector - Version 6.00 - User Manual - Control Panel Option Description Rename Opens the Update Clip Name window from which the clip name can be modified. Modify TC IN or Date Opens the Modify TC In or Date window from which you can modify the timecode or date of the IN point of the loaded clip. Protect Protects the loaded clip, which means that users will receive a warning when they try to delete a protected clip in IPDirector or in Multicam.
EVS Broadcast Equipment S.A. - November 2012 Issue 6.00.B Overview of the Transport Functions Pane The Transport Functions pane contains the main areas highlighted on the following screenshots and shortly described in the table below. Area Description / See also… 1. This field provides the current timecode of the loaded media. Current Timecode field See section "Current Timecode Display" on page 19. It allows to jump to a specific timecode.
IPDirector - Version 6.00 - User Manual - Control Panel Area Description / See also… 4. The jog bar allows you to move within the media at a variable speed. Jog Bar See section "Jog Bar" on page 22. 5. Transport Those commands are used to browse in and play the loaded media. Commands See section "General Transport Buttons and Shortcuts" on page 62 for the list of transport buttons, shortcuts and ShuttlePRO keys.
EVS Broadcast Equipment S.A. - November 2012 Play Mode Issue 6.00.B Description Plays the loaded item forward from the IN point to the OUT point, or from the current timecode. Normal This mode is available for all the types of loaded items. Plays the loaded item in a continuous loop. Loop This mode is only available for clips and playlists. Bounce Plays the loaded item from the IN point to the OUT point, then from OUT to IN and so on. This mode is only available for clips.
IPDirector - Version 6.
EVS Broadcast Equipment S.A. - November 2012 Issue 6.00.B Jog Bar Jog Bar Display When a clip or a playlist element is loaded, the jog bar shows the clip duration and its guardbands. • The grey section represents the clip length, between the IN point and the OUT point. • The blue sections represent the guardbands before the IN point and after the OUT point.
IPDirector - Version 6.00 - User Manual - Control Panel Each tag is represented by a numbered bullet if the different timecodes are not too close to each other. If tags have the same timecode or if timecodes are too closed to be distinguished on the Panel, a single bullet will be displayed with the highest number of the tag: When the operator clicks a tag bullet in the Control Panel, the Tag Information window is displayed.
EVS Broadcast Equipment S.A. - November 2012 Area 1. Issue 6.00.B Description / See also… Time Those fields provide information on the duration and IN and OUT Information points of the loaded item. fields See section "Time Information Fields" on page 24. They can be used to create a clip. See section "How to Create a Clip" on page 72. 2. Clip Those commands are used to create a clip from the loaded media.
IPDirector - Version 6.00 - User Manual - Control Panel When a train is loaded, no time information is displayed. As soon as an IN point is marked, the IN field is filled in; as soon as an OUT point is marked, the Duration and the OUT information are displayed. Timecode Fields Display Information displayed in the Time Information fields can be changed as follows: 1. Right-click the Timecode field. The following contextual menu is displayed: ◦ Timecode ◦ Timecode and date 2. Select one of the options.
EVS Broadcast Equipment S.A. - November 2012 Issue 6.00.B Overview of the Clip Information Tab The Clip Information tab contains the main areas highlighted on the following screenshot and shortly described in the table below. 26 1.
IPDirector - Version 6.00 - User Manual - Control Panel Area Description / See also… 1. This area displays the keywords assigned to the loaded clip and can be used to add or delete keywords to that clip. Keywords list See section "Keywords List" on page 27. 2. 3. Interest Level buttons The Interest Level buttons allow you to assign an interest rating to a clip. Clip Type buttons The Clip Type buttons allow you to assign a clip type for use with Key and Fill operations.
EVS Broadcast Equipment S.A. - November 2012 Issue 6.00.B You can proceed in three different ways. • You can start to type the keyword directly in the Keyword field of the Save/Edit window and select a keyword proposed in the Autocomplete list. • You can select keywords in an open keyword grid or an open dictionary. • You can type the number associated to a keyword in an open keyword grid.
IPDirector - Version 6.00 - User Manual - Control Panel Owner field It specifies the login, first name and last name (if defined in the database) of the person who created the clip. Grab Thumbnails Button OR + A thumbnail is created automatically by the XML Unit defined for the Thumbnails for Clips option in the Remote Installer. Please see the Technical Reference manual for further details. A thumbnail can also be created manually by clicking the Grab Thumbnails button.
EVS Broadcast Equipment S.A. - November 2012 Issue 6.00.B The Display Thumbnails option can be selected to display a thumbnail for each linked clip: Right-clicking the linked clip displays a contextual menu that is related to the linked clip (not to the loaded clip). See section "Control Panel Contextual Menu" on page 16 for the meaning of the available options. 1.2.7.
IPDirector - Version 6.00 - User Manual - Control Panel 1.2.8. Ganged Channels Tab The Ganged Channels tab lists all player channels that have been ganged with the player channel currently associated to the Control Panel and provides information on the item currently loaded on each of them.
EVS Broadcast Equipment S.A. - November 2012 Issue 6.00.B Overview of the Clip-List Tab The Clip-List tab contains the main areas highlighted on the following screenshot and shortly described in the table below. 32 1.
IPDirector - Version 6.00 - User Manual - Control Panel Area Description / See also… 1. Those fields give the name and the LSM ID of the playlist loaded on the player. Playlist Name and LSM ID fields See section "Playlist Contextual Menu" on page 33 for the options available from this field. They can be used to load a playlist. See section "Loading a Playlist" on page 60. 2. Playlist Transport functions This area provides transport buttons specific to a playlist.
EVS Broadcast Equipment S.A. - November 2012 Issue 6.00.B Menu Item Description New playlist Opens the Create New Playlist window to create a new playlist. Copy clips locally Only available if the playlist is on-line on an EVS server. Copies the distant clips of the selected playlist to the local EVS server, i.e. the server of the controlled player channel.
IPDirector - Version 6.00 - User Manual - Control Panel Menu Item Description Import Allows importing the playlist structure and playlist related information from an XML file into IPDirector. Export Allows exporting the loaded playlist structure and playlist related information from IPDirector to an XML file or CSV file. See the Playlist Panel user manual. Publish Opens the Publish Playlist window in which the operators can specify the user groups the loaded playlist should be published to.
EVS Broadcast Equipment S.A. - November 2012 Issue 6.00.B Menu Item Description Create an Off-line Copy Creates an off-line copy of the selected playlist. This new off-line playlist has the same content as the playlist selected. It also has the same name. It has no LSM ID. Copy/Move Playlist This allows the users to: • create an off-line or on-line copy of the open playlist • move the playlist to another EVS server • make the playlist off-line.
IPDirector - Version 6.00 - User Manual - Control Panel The right field gives indication on the clip transition duration and allows the users to specify the duration of the effect type defined in the Transition Type field. The user can specify the duration, in seconds and frames, up to 20 seconds.
EVS Broadcast Equipment S.A. - November 2012 Issue 6.00.B Menu Item Description Copy Used in a Copy and Paste operation to copy the selected element(s). Paste Used in a Cut and Paste or Copy/Paste operation to paste the cut or copied element(s) The elements are inserted in the playlist before or after the element selected when the Paste operation is initiated. This depends on the Insert Mode in Playlist parameter of the Playlist settings.
IPDirector - Version 6.00 - User Manual - Control Panel 1.3.2. Assigning a Player Channel or the Software Player Introduction There are several methods to assign a player channel to the Control Panel. Some of the methods will directly open an instance of the Control Panel. Others are used when the Control Panel is already open. • Assign a channel from the Channel Explorer. • Assign a channel from the Player field in the Control Panel.
EVS Broadcast Equipment S.A. - November 2012 Issue 6.00.B You can only open one instance of the Software Player at a time in IPDirector. If an instance of the Software Player is already open in a Control Panel, an error message prevents you from opening the Software Player. How to Control a Player with the ShuttlePRO If you select a player in the Control Panel and then take control of it with a ShuttlePRO, you will be able to perform actions on the Control Panel by using the ShuttlePRO commands.
IPDirector - Version 6.00 - User Manual - Control Panel How to Lock a Player Channel To lock a player channel, click the button in the Player field or press the + keyboard shortcut. When a channel is locked, the button displays a closed lock dimmed. and the whole window is If a ShuttlePRO is associated to the on-air channel, its functions will also be inactive. The OSD of the EVS server channel will also show a key representing that the playlist is locked.
EVS Broadcast Equipment S.A. - November 2012 Issue 6.00.B Limitations The On Air option is available when the Control Panel is linked to a player channel and if the user has the control right on this channel and if this channel is not locked. 1.3.5. Controlling the Player from a Secondary Controller Exclusive control of any channel by a third party protocol (switcher, editor controller or 3rd party device) can be achieved using the 2nd Controller feature of a Control Panel.
IPDirector - Version 6.00 - User Manual - Control Panel • Channel supporting "Mix on one channel": If the "Mix on one channel" functionality is not supported or enabled, two player channels must be used to be able to play the loaded item with transitions effects. These channels must be set to PGM/PRV mode.
EVS Broadcast Equipment S.A. - November 2012 Issue 6.00.B Playlists The PGM channel is necessary for playing transitions between playlist elements, when using channels which do not support the "Mix on one channel" functionality. The preview channel can be used to preview clips or trains, or playlist elements in order to trim them on a different channel than the one that the playlist is being played to air from.
IPDirector - Version 6.00 - User Manual - Control Panel To be able to load another element on one of these player channels, they must first be manually unganged from the Channel Explorer.
EVS Broadcast Equipment S.A. - November 2012 Issue 6.00.B How to Temporarily Ungang and Re-Gang Some Channels You can temporarily ungang some of the player channels from a group of ganged channels. To do so, proceed as follows: 1. In the Ganged Channels tab, select the player to ungang. 2.
IPDirector - Version 6.00 - User Manual - Control Panel To re-gang all the player channels that have been unganged from the Ganged Channels tab, use the Gang All command in one of the following ways: User Interface Button Keyboard Shortcut ShuttlePRO key + How to Definitely Remove a Channel from the Group To remove a channel from a group of ganged channels, proceed as follows: 1. In the Ganged Channels tab, right-click the player channel to ungang from the list. A contextual menu is displayed. 2.
EVS Broadcast Equipment S.A. - November 2012 Issue 6.00.B Transport Command Synchronization on Ganged Player Channels Trains When live or stopped record trains are loaded on ganged player channels, the NEXT and PREVIOUS commands executed on one PGM by means of the ShuttlePRO are only applied on this PGM: • If the train belongs to a group of ganged recorders, the application shifts to the next or previous record train of the group.
IPDirector - Version 6.00 - User Manual - Control Panel NEXT and PREVIOUS: In the same ways as for record trains, the NEXT and PREVIOUS commands executed with the ShuttlePRO on a linked clip loaded on one PGM are only applied on this PGM. In other words, the next or previous linked clip of the clip group will only be loaded on this player channel.
EVS Broadcast Equipment S.A. - November 2012 Issue 6.00.B Playlists When playlists are loaded on ganged player channels, the following commands are synchronized as explained below: • The Play, Go to IN, Go to OUT, Pause and Recue commands executed on one PGM are applied in a synchronized way to the other playlists of the ganged channels. • Double-clicking the 2nd element of the playlist on one PGM, for example, preloads the 2nd element of the playlists on the ganged channels, if it exists.
IPDirector - Version 6.00 - User Manual - Control Panel 1.4. Loading Media 1.4.1. Possible Loading Actions Various element types can be loaded on the Control Panel in different ways. These actions are the following: Action See section… Train Loading a train by selecting a recorder channel from the Channel Explorer. "How to Load a Train from the Channel Explorer" on page 53.
EVS Broadcast Equipment S.A. - November 2012 Issue 6.00.B Action See section… Loading a recording ingest by selecting it from the Control Panel. "How to Select a Train or a Recording Ingest from the Control Panel" on page 53 and "How to Load a Clip or a Recording Ingest from the Control Panel" on page 57. Loading the last loaded recording ingest (only in case it was loaded just before the media currently loaded) at its currently recording timecode (E/E).
IPDirector - Version 6.00 - User Manual - Control Panel 1.4.2. Loading a Train or a Recording Ingest How to Load a Train from the Channel Explorer To load a record train from the Channel Explorer, proceed as follows: 1. Open the Control Panel and assign a player channel or the Software Player. 2. Open the Channel Explorer from the main menu. 3. Select the requested record train (recorder channel). 4. Drag it to the Loaded Media field of the Control Panel.
EVS Broadcast Equipment S.A. - November 2012 Issue 6.00.B Selecting a recorder channel loads the corresponding train at its current recording position and plays it on the selected player. The E/E button turns blue only when a train is loaded and playing live. Selecting a recording ingest directly loads it at its currently recording position (OUT point) and plays it.
IPDirector - Version 6.00 - User Manual - Control Panel 3. By moving the jog dial you can move through the list to highlight the required train. 4. Press Select Train again to select it and exit the menu. The selected train is loaded on the player channel controlled by the ShuttlePRO.
EVS Broadcast Equipment S.A. - November 2012 Issue 6.00.B Clip Loaded: Source Media Recalled with Ret : User Interface Button Keyboard Shortcut ShuttlePRO key + How to Load the Train from the Previous or Next Recorder Channel When a train is loaded, it is possible to load a train from another recorder channel thanks to the ShuttlePRO keys. User Interface Button Keyboard Shortcut Previous Recorder - - Next Recorder - - Operation 56 ShuttlePRO key 1.
IPDirector - Version 6.00 - User Manual - Control Panel How to Snap back to the Last Loaded Train or Recording Ingest When a record train or a recording ingest is loaded on a player channel or on the Software Player and then another media is loaded on that channel, the Snap function allows you to go back to the previously loaded record train or recording ingest at the timecode where the E/E mode was exited, effectively "snapping" back to where the user left off in the record train or the recording ingest.
EVS Broadcast Equipment S.A. - November 2012 Issue 6.00.B How to Load a Clip from the Database Explorer To load a clip on a channel from the Database Explorer, proceed as follows: 1. Open the Control Panel and assign a player channel or the Software Player. 2. Open the Database Explorer from the main menu. 3. In the Clips view or Clip Elements view of the Database Explorer, select the requested clip in the Elements grid. 4.
IPDirector - Version 6.00 - User Manual - Control Panel • Use one of the ShuttlePRO keys: Operation ShuttlePRO key Previous Linked Clip Next Linked Clip How to Load a Clip Containing a Log Two types of clips contain a log timecode: protect media clips and clips automatically associated to a log. Both types are listed in the Logsheet grid of IPLogger and can be loaded on a player channel or a Software Player. To load such a clip, proceed as follows: 1.
EVS Broadcast Equipment S.A. - November 2012 1.4.4. Issue 6.00.B Loading a Playlist Introduction Off-line or on-line playlists can be loaded on a player controlled by the Control Panel and its content is therefore displayed in the Clip-List tab. When the Control Panel is associated to a player channel, off-line playlists will automatically become on-line and distant playlists will automatically be copied to the server of the controlled player channel.
IPDirector - Version 6.00 - User Manual - Control Panel 1.4.5. Loading a Timeline How to Load a Timeline from the Database Explorer To load the timeline, proceed as follows: 1. Open the Control Panel and assign a player channel or the Software Player. 2. Open the Database Explorer from the main menu. 3. In the Timelines view of the Database Explorer, select the requested timeline in the Elements grid. 4. Drag it onto the Loaded Media field of the Control Panel.
EVS Broadcast Equipment S.A. - November 2012 1.5. Moving through Media 1.5.1. Introduction Issue 6.00.B The Transport Functions pane provides a jog bar and more transport buttons to navigate in the loaded element. In addition, several options allow to directly jump to a given timecode within the media. 1.5.2. Transport Functions Jog Bar The position indicator can be moved with the mouse along the jog bar to browse the clip and to play it from any position if needed.
IPDirector - Version 6.00 - User Manual - Control Panel User Keyboard Operation Interface Shortcut Button ShuttlePRO key Play Description Starts to play the loaded media at 100% for normal clips, at 33% for "SLSM clips 3x" or at 50% for "SLSM clips 2x". ↔ The Speed field, above the Play button, indicates at which speed the media is played. Pause Stops the playout of the loaded media. See section "Pause Button Contextual Menu" on page 64.
EVS Broadcast Equipment S.A. - November 2012 User Keyboard Operation Interface Shortcut Button Issue 6.00.B ShuttlePRO key Define Custom Speed Description Allows to define a custom speed to play the loaded media. See sections "Custom Speed" on page 65 and "Playing Media at a Custom Speed" on page 67. Goto IN + Goto OUT + Moves the current position to the IN point of a clip. Moves the current position to the OUT point of a clip.
IPDirector - Version 6.00 - User Manual - Control Panel Fast Forward and Fast Rewind Speed A default rewind speed and a default forward speed are set in the Tools > Settings > Control Panel category. See section "Settings" on page 84 for more information on the speeds. The Fast Forward speed and the Fast Rewind speed can be adapted by means of contextual menus as described below. Then, the default speed is updated. The speed is displayed in the Speed field above the Play button.
EVS Broadcast Equipment S.A. - November 2012 Issue 6.00.B The Custom Speed window allows you to enter a value. The speed value is displayed in the Speed field above the Play button. This operation does not affect the default Fast Forward or Fast Rewind speed values.
IPDirector - Version 6.00 - User Manual - Control Panel 1.5.3. Jumping to a Given Timecode within the Loaded Media Possible Ways There are several ways to jump to a given timecode of a loaded media: • Click at one position on the jog bar • Click on the cursor and move it along the jog bar • Enter a new timecode value in the Current Timecode field and press ENTER. Note If the player channel is ganged with others, the same operation is performed on all the ganged channels.
EVS Broadcast Equipment S.A. - November 2012 Issue 6.00.B It can also be used if the channel is part of a • Gang group: the speed is applied to all the channels of the group at the same time. • Fill & Key association: the speed is applied to all the channels of the group at the same time. • PGM/PRV association: the speed is only applied to the PGM channel.
IPDirector - Version 6.00 - User Manual - Control Panel 1.5.5. Browsing in Video Material with the ShuttlePRO The Jog Wheel (JOG), in the centre of the ShuttlePRO allows the users to browse within the clip loaded in PAUSE mode: • field by field in standard use • second by second when the Fast Jog button is pressed: The Shuttle Ring (SHUTTLE) allows the user to perform Fast Forward and Rewind actions within the loaded clip. 1.6. Creating Media 1.6.1.
EVS Broadcast Equipment S.A. - November 2012 1.6.3. Issue 6.00.B Clip Creation Buttons and Shortcuts The following table gives the meaning of each clip creation operation. A button and/or a keyboard shortcut can be used to perform each action. The ShuttlePRO device has buttons dedicated to most of these functions as well.
IPDirector - Version 6.00 - User Manual - Control Panel User Operation Interface Button Keyboard Shortcut ShuttlePRO key Description Clear OUT Clears the OUT point which has just been set and not yet saved. + The OUT field is reset if an OUT point was marked on a record train. + The OUT field displays the Protect OUT field, before the guardband, if an OUT point was marked on a clip. Save Clip Saves the new clip after having marked an IN point and an OUT point.
EVS Broadcast Equipment S.A. - November 2012 Issue 6.00.B Note When the cursor is located in a text area, the key can be pressed together with a keyboard shortcut to perform one of the following actions: Mark IN, Mark OUT, Save Clip, and Update Clip. 1.6.4. How to Create a Clip To create a clip from a train or a recording ingest or to create a sub-clip from an existing clip, proceed as follows: 1.
IPDirector - Version 6.00 - User Manual - Control Panel A green message will appear on the main window to inform you that the clip has been created if the Green Information on VGA option has been selected from the View menu of the main IPDirector Menu bar. When a clip is successfully created, the status bar at the bottom of the IPDirector main window will show the successful operation: 1.6.5.
EVS Broadcast Equipment S.A. - November 2012 Issue 6.00.B When a XT high resolution clip is present in the clip, the Save Clip window will be displayed as follows: When a XT high resolution clip is not present in the clip, the Save Clip window will display a Restore to XT area instead of the Backup to Nearline area. In all cases, the Save Clip window is divided into two panes: 1. The left pane contains the Clip Information, i.e. clip data in general and in relation with IPDirector.
IPDirector - Version 6.00 - User Manual - Control Panel User Interface Element Name Description User-defined name for the clip. It can contain up to 24 alphanumeric characters. Only 12 characters of this name can be displayed by LSM systems. A prefix name can be defined in Tools > Settings > Autoname/Clip. VarID VarID is a 32-character ID with variable length and format. It is automatically assigned to new clip. It is mainly used to ensure redundancy on the system.
EVS Broadcast Equipment S.A. - November 2012 User Interface Element Restore to XT Issue 6.00.B Description Only displayed when no XT hi-res clip is present in the clip. Lists all the hi-res EVS servers and their pages. If you select the root of a server, the clip is restored to the default page. If you select a specific page, the clip is restored to that page. Publish To User groups to which the clip can be published, i.e. made available.
IPDirector - Version 6.00 - User Manual - Control Panel 5. Click the OK button or press the ENTER key. The playlist is created but it is empty. In case a player channel has been assigned to the control panel, the playlist is created on-line. If the Software Player has been selected, the playlist is created off-line. See section "Adding Elements to a Playlist" on page 79 for the various ways to add elements to a playlist. 1.7. Editing Media 1.7.1.
EVS Broadcast Equipment S.A. - November 2012 1.7.3. Issue 6.00.B Modifying Clip Metadata To modify clip metadata from the Control Panel, proceed as follows: 1. Load the clip on the player assigned to the Control Panel. 2. Edit the required metadata (keywords, interest level, and clip type). 3. Click the Update Clip button. 1.7.4. How to Trim a Playlist Element It is possible to modify the IN or OUT point of a playlist element. To do so, proceed as follows: 1.
IPDirector - Version 6.00 - User Manual - Control Panel Note When you move a group within another group, only the clips of the group are moved but the group is deleted. When you move a group after the last clip of another group or before the heading of another group, the group is moved with all its elements. 1.7.6. Adding Elements to a Playlist Possible Operations Several kinds of elements can be added to a playlist, which are: clips, trains, bins, playlists and growing clips.
EVS Broadcast Equipment S.A. - November 2012 Issue 6.00.B To do so, proceed as follows: 1. From the Clip-List tab, right-click the Playlist Name field. The Playlist contextual menu is displayed. 2. Select Set as Default playlist. 3. In the Control Panel, load the clip, growing clip or train you want to append to the playlist or create a new clip. 4. Click the APPEND CLIP button or press + . The element is inserted at the end of the default playlist.
IPDirector - Version 6.00 - User Manual - Control Panel • Defining audio and/or video transition effect • Defining still/start mode • Resetting transition to default A macro command can only be applied • to a selected element in a playlist panel or • to a playlist element loaded on a control panel. See the Playlist Panel user manual for more information on macro command management.
EVS Broadcast Equipment S.A. - November 2012 Issue 6.00.B 4. Select the user group(s) to which you want to publish the clip in the Available Groups area. Keep CTRL pressed for a multiple selection. 5. Click the button to move the selected user groups from the Available Groups area to the Selected Group area. 6. Click the Publish button. The check boxes corresponding to the selected user groups are now selected in the Clip Information tab.
IPDirector - Version 6.00 - User Manual - Control Panel 1. Load the clip in the Control Panel. 2. Right-click anywhere in the Control Panel (except in the Linked to Clips list and in the Clip-List tab). 3. Select the requested destination from the Send to contextual menu. The clip is sent to the requested destination. A new record is added in the Clip Sent To list where you can see the transfer status and access more information on the transfer via the contextual menu. 1.9.4.
EVS Broadcast Equipment S.A. - November 2012 Issue 6.00.B 7. Click the Save button. 8. If you have chosen the .xml format, the procedure ends here. In case you have selected the .csv format, the Choose csv Profile window opens. Follow steps 9 to 11. 9. Select a profile. The Choose Columns to Export window opens. 10. Select the columns to export from the left area to the right area. 11. Click OK. The playlist is exported to a file with the requested format to the requested folder.
IPDirector - Version 6.00 - User Manual - Control Panel Option Description Speeds The Speeds settings define the default speeds applied in Fast Forward, Fast Rewind or Play Var when • you click the Fast Forward button, Fast Rewind button in the Control Panel, • you use the shortcuts associated to each function: W (Fast Rewind), F (Fast Forward) or Ctrl+P (Play Var), • or you use the equivalent options or the Play Var on the remote.
EVS Broadcast Equipment S.A. - November 2012 86 Issue 6.00.B 1.
IPDirector - Version 6.00 - User Manual - Control Panel 1.
EVS Broadcast Equipment S.A. - November 2012 2. Software Player 2.1. Introduction 2.1.1. Context of Use Issue 6.00.B The Software Player acts as media viewer and allows the users to browse media through the GigE network. The Software Player can be chosen as a source for the Control Panel or the Playlist Panel, in the same way as a normal player channel. Browsed media can also be viewed in the Video Display. The Software Player can be used with the ShuttlePRO or with the BEPlay remote.
IPDirector - Version 6.00 - User Manual - Control Panel 2.1.3. Supported Codecs The following codecs are supported by the Software Player: 2.2. • SD: MJPEG SD, MJPEG Proxy, IMX 30, IMX 40, IMX 50, DVCPRO 25, DVCPRO 50, MPEG-1, MPEG-2, MPEG-2 (I-Field), DV25, H264.
EVS Broadcast Equipment S.A. - November 2012 3. Video Display 3.1. Introduction Issue 6.00.B There are two ways to view video on the IPDirector workstation: • through the Software Player • by connecting the SDI output of an EVS server into the IPDirector In both cases, the video associated to the channel can be displayed within the Control Panel or the Playlist Panel, or externally in the Video Display.
IPDirector - Version 6.00 - User Manual - Control Panel 3.2. Using a Player Channel on a Video Display 3.2.1. Preliminary Steps Before you can actually display a channel in the Video Display, you need to perform the following tasks: 1. Make a physical connection from the required video source to the input of the A/V board on the IPDirector workstation. See section "Connecting the Video Source" on page 91. 2. Assign a player channel to the Video Display in the Remote Installer application.
EVS Broadcast Equipment S.A. - November 2012 Issue 6.00.B 2. Select Edit Config. The IPDirector Configuration window opens: This window allows you to link a player channel of one specific EVS video server to one Video Display (Video Board). 3. Check the box in the Linked column corresponding to the player channel you want to link to the video display. 4. Select which video display device it must be linked to from the drop down list in the Video Display column.
IPDirector - Version 6.00 - User Manual - Control Panel To open the Video Display within a Control Panel or a Playlist Panel, you need to assign the player channel linked to the A/V board to the corresponding panel. Then, you can hide or unhide the Video Display by right-clicking the panel and selecting Show/Hide Video Display. 3.2.5.
EVS Broadcast Equipment S.A. - November 2012 Issue 6.00.B 3.4. Video Display Options 3.4.1. Video Display Linked to the Player Channel The table below describes the options available if you right-click the Video Display window when a media is loaded on the linked player channel. 94 Option Meaning EVS AVH Config Opens the Audio Output Channels window allowing the selection of audio channels to be listened to. See section "Audio Configuration and Monitoring" on page 95.
IPDirector - Version 6.00 - User Manual - Control Panel 3.4.2. Video Display Linked to the Software Player The table below describes the options available if you right-click the Video Display window when a media is loaded on the Software Player. Option Meaning OCX Audio Configuration Opens the Audio Output Channels window allowing the selection of audio channels to be listened to and the selection of the number of audio channels for the audiometers display.
EVS Broadcast Equipment S.A. - November 2012 Issue 6.00.B The Audio Output Channels window opens: 3. On the Left line, click the cell corresponding to the channel you want to associate to the left ear. 4. On the Right line, click the cell corresponding to the channel you want to associate to the right ear. 5. If required, adjust the input gain. 6. For an easy retrieval of the configuration, you can save it: enter a name in the Template Name field and click the Add button. 7. Click OK.
IPDirector - Version 6.00 - User Manual - Control Panel 3.5.2. Audio Level Monitoring The audio level can be monitored with audiometers on the sides of the Video Display window when you use the Software Player. To select the number of audio channels to be displayed, proceed as follows: 1. Right-click on the Video Display. 2. Select OCX Audio Configuration from the contextual menu. The Audio Output Channels window opens. 3. Click the radio button corresponding to the number of audio channels to display.
EVS Broadcast Equipment S.A. - November 2012 Issue 6.00.B Example for a selection of 16 channels: 98 3.
Corporate +32 4 361 7000 North & Latin America +1 973 575 7811 EVS Headquarters Liège Science Park 16, rue Bois St Jean B-4102 Seraing Belgium To learn more about EVS go to www.evs.com Asia & Pacific +852 2914 2501 Other regional offices www.evs.com/contact EVS Broadcast Equipment is continuously adapting and improving its products in accordance with the ever changing requirements of the Broadcast Industry. The data contained herein is therefore subject to change without prior notice.