
User's Manual Instruction Manual
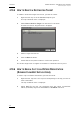
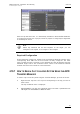
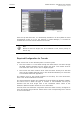
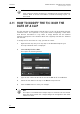
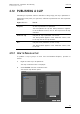
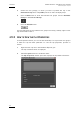
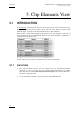

Table Of Contents
- Copyright
- Disclaimer
- Improvement Requests
- Regional Contacts
- User Manuals on EVS Website
- 1. Introduction
- 2. User Interface
- 2.1 OPENING OF DATABASE EXPLORER
- 2.2 OVERVIEW OF THE DATABASE EXPLORER
- 2.3 DATABASE EXPLORER TOOLBAR
- 2.4 TREE VIEW
- 2.5 ELEMENT GRID AND SEARCH OPTIONS
- 2.6 STATUS BAR
- Clips, Clip Elements and Nearline Files
- 4. Clips View
- 4.1 INTRODUCTION
- 4.2 UNDERSTANDING CLIP STRUCTURE ON AN EVS VIDEO SERVER
- 4.3 VIRTUAL LSM ID / REAL LSM ID
- 4.4 CLIP TREE STRUCTURE
- 4.5 CLIP DATA COLUMNS
- 4.6 CLIP CONTEXTUAL MENU
- 4.7 DELETING A CLIP
- 4.8 EDITING A CLIP
- 4.9 COPYING OR MOVING A CLIP
- 4.10 SENDING A CLIP TO A DESTINATION TARGET
- 4.10.1 Send To Menu
- 4.10.2 How to Send a Clip to the Default Archive
- 4.10.3 How to Send a Clip to a Destination Folder (Destination Target)
- 4.10.4 How to Add a Destination Target
- 4.10.5 How to Delete a Destination Target
- 4.10.6 How to Send a Clip to an XStore Workstation (Running CleanEdit Applications)
- 4.10.7 How to Send a Clip to an Avid System Using the AVID Transfer Manager
- 4.10.8 Transfer Monitoring
- 4.11 HOW TO MODIFY THE T/C IN OR THE DATE OF A CLIP
- 4.12 PUBLISHING A CLIP
- 4.13 LINKING CLIPS
- 5. Clip Elements View
- 6. Playlists View
- 7. Timelines View
- 8. Bins View
- 9. Logs View
- 9.1 INTRODUCTION
- 9.2 LOGS TREE STRUCTURE
- 9.3 HOW TO CREATE A LOGS DIRECTORY
- 9.4 HOW TO RENAME A LOGS DIRECTORY
- 9.5 HOW TO DELETE A LOGS DIRECTORY
- 9.6 HOW TO PUBLISH A LOG DIRECTORY OR A LOG SHEET
- 9.7 HOW TO VIEW THE LOG DIRECTORY OR LOG SHEET PROPERTIES
- 9.8 HOW TO DELETE A LOG DIRECTORY OR A LOG SHEET
- 9.9 HOW TO EXPORT A LOG SHEET FROM THE TREE
- 9.10 HOW TO EXPORT A LOGGING PROFILE FROM THE TREE
- 9.11 PRINTING A LOG SHEET
- 9.12 LOG EVENT COLUMNS
- 10. Media Files View
- 11. Searching the Database
- 12. Loading and Playing Media from the Database Explorer
- 13. Database Explorer Shortcuts
Issue 5.9.B IPDirector Version 5.9
–
User Manual
–
Part 3
–
Browsing
EVS Broadcast Equipment – January 2011
50
Once the clip has been sent, it is immediately available in an Avid (When an Asset
management system is in use, like Interplay or media Manager). It can then be
inserted into a bin and can be inserted into an edit.
Note
With Avid and FCP targets, the hi-res element is sent, with a priority on
the XT clip.
Required Configuration for Transfer
Clips can be sent via two different paths to an Avid system:
• The first method is to send them through the XNet network and then through
the GigE network between the Avid device and XFile. This method must be
used if the EVS video servers are not GigE equipped.
• The second and newer method would send the media directly from the EVS
video servers Gigabit Ethernet ports to the AVID TM initiated by an instruction
to an installed XTAccess application.
The network used for the transfer depends on the setup. For more information,
refer to the Technical Reference manual.
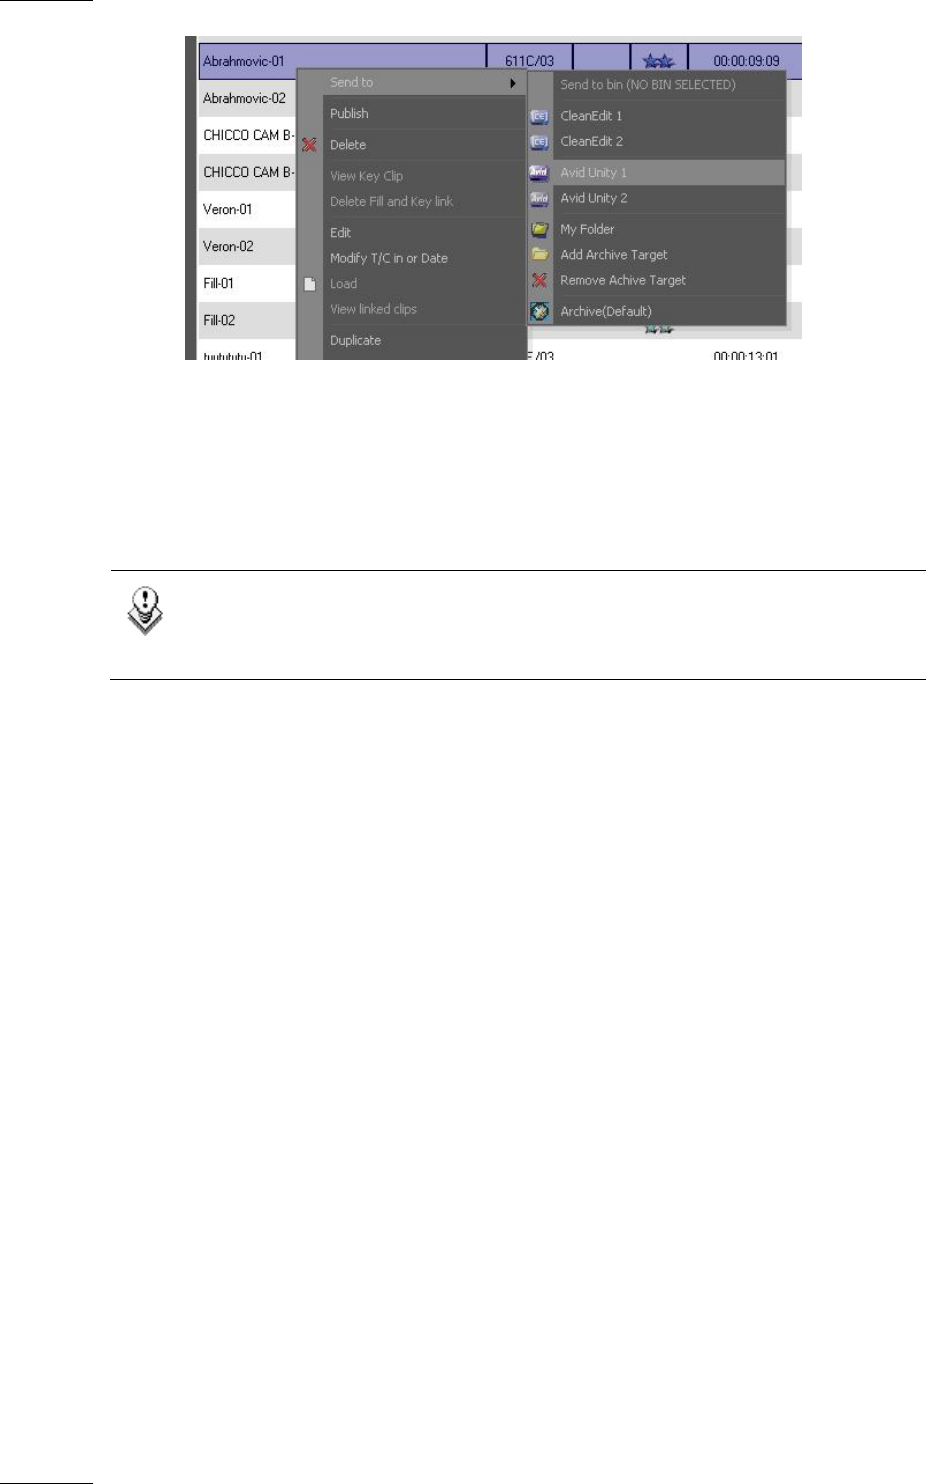
The Avid destination targets are predefined from the IPDirector Remote Installer.
The name used to define the type of transfer is user-definable and may be
different from the Avid target used in the screenshot above. Refer to the
IPDirector Remote Installer manual for more information.
Avid TM, XFile and XTAccess components must have been correctly configured in
order to automate this procedure. Please refer to the corresponding user’s manual
for more information.