
User's Manual Instruction Manual
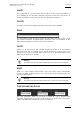
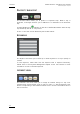
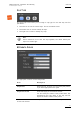
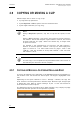
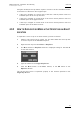
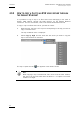
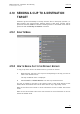

Table Of Contents
- Copyright
- Disclaimer
- Improvement Requests
- Regional Contacts
- User Manuals on EVS Website
- 1. Introduction
- 2. User Interface
- 2.1 OPENING OF DATABASE EXPLORER
- 2.2 OVERVIEW OF THE DATABASE EXPLORER
- 2.3 DATABASE EXPLORER TOOLBAR
- 2.4 TREE VIEW
- 2.5 ELEMENT GRID AND SEARCH OPTIONS
- 2.6 STATUS BAR
- Clips, Clip Elements and Nearline Files
- 4. Clips View
- 4.1 INTRODUCTION
- 4.2 UNDERSTANDING CLIP STRUCTURE ON AN EVS VIDEO SERVER
- 4.3 VIRTUAL LSM ID / REAL LSM ID
- 4.4 CLIP TREE STRUCTURE
- 4.5 CLIP DATA COLUMNS
- 4.6 CLIP CONTEXTUAL MENU
- 4.7 DELETING A CLIP
- 4.8 EDITING A CLIP
- 4.9 COPYING OR MOVING A CLIP
- 4.10 SENDING A CLIP TO A DESTINATION TARGET
- 4.10.1 Send To Menu
- 4.10.2 How to Send a Clip to the Default Archive
- 4.10.3 How to Send a Clip to a Destination Folder (Destination Target)
- 4.10.4 How to Add a Destination Target
- 4.10.5 How to Delete a Destination Target
- 4.10.6 How to Send a Clip to an XStore Workstation (Running CleanEdit Applications)
- 4.10.7 How to Send a Clip to an Avid System Using the AVID Transfer Manager
- 4.10.8 Transfer Monitoring
- 4.11 HOW TO MODIFY THE T/C IN OR THE DATE OF A CLIP
- 4.12 PUBLISHING A CLIP
- 4.13 LINKING CLIPS
- 5. Clip Elements View
- 6. Playlists View
- 7. Timelines View
- 8. Bins View
- 9. Logs View
- 9.1 INTRODUCTION
- 9.2 LOGS TREE STRUCTURE
- 9.3 HOW TO CREATE A LOGS DIRECTORY
- 9.4 HOW TO RENAME A LOGS DIRECTORY
- 9.5 HOW TO DELETE A LOGS DIRECTORY
- 9.6 HOW TO PUBLISH A LOG DIRECTORY OR A LOG SHEET
- 9.7 HOW TO VIEW THE LOG DIRECTORY OR LOG SHEET PROPERTIES
- 9.8 HOW TO DELETE A LOG DIRECTORY OR A LOG SHEET
- 9.9 HOW TO EXPORT A LOG SHEET FROM THE TREE
- 9.10 HOW TO EXPORT A LOGGING PROFILE FROM THE TREE
- 9.11 PRINTING A LOG SHEET
- 9.12 LOG EVENT COLUMNS
- 10. Media Files View
- 11. Searching the Database
- 12. Loading and Playing Media from the Database Explorer
- 13. Database Explorer Shortcuts

Issue 5.9.B IPDirector Version 5.9
–
User Manual
–
Part 3
–
Browsing
EVS Broadcast Equipment – January 2011
42
4.9 COPYING OR MOVING A CLIP
Different ways exist to move or copy a clip:
• by drag-and-drop operations
• by the Duplicate or Move options from the contextual menu
• by the GigE connection (for copy only)
Note 1
During a Duplicate operation, only the XT clip will be copied, not the
file.
During a Move operation, only the XT clip will be moved and receive a
new LSM ID. The file will keep the original LSM ID. However, the file will
be listed under the XT / page / bank of the moved clip, no longer under
its previous location.
For example, a clip containing an XT clip and a file with ‘LSM ID =
621A/01’ is moved to position ‘113A/01’. The clip is no more displayed in
page 6 of server 01. It is listed under server 01, page 1, bank 1 with
‘LSM ID = 113A’ and contains an XT clip with ‘LSM ID = 113A’ and a file
with LSM ID = ‘621A’.
Note 2
As some copy or move operations may be between EVS video servers on
the XNet they will take some time to complete.
4.9.1 COPYING OR MOVING A CLIP USING DRAG-AND-DROP
A clip can be selected in the right pane of the Database Explorer and dragged to a
new location in the tree structure in the left pane. The target is highlighted in the
tree.
Depending on the option selected in Tools > Settings > General, the copy and
move functions could be performed in different ways: Windows style, Google style
or Dialog Box style. Refer to section ‘Settings’ in part 1 of the user manual for
more information on these options.
The Dialog Box Style is the default value. When dragging a clip, displays a popup
window and asks the operator for the operation to perform.